
Table of content
Code Capsules connects to GitHub repositories to deploy applications. To follow this guide, you’ll need a Code Capsules account and a GitHub account.
To demonstrate how to deploy an HTML5 template to Code Capsules, we’ll be using a template from HTML5 UP. Head over to the HTML5 UP site and download the zip file for any template you find there. Unzip this template file in your preferred working directory on your local machine.
Sign in to GitHub and create a repository for the template site you downloaded.
We’ll need to push the unzipped template files to your newly created repository for Code Capsules to deploy the template site from your GitHub account. To achieve this, initialize a git repository in the project’s root folder on your machine by running the command
git init
from a terminal window while in the root folder.
Before you can push to GitHub, you need to add the untracked files to your local repository. Run
git add -A
in a terminal window from the project’s root folder to do so. After adding the files, commit your changes by running
git commit -m "Initial app commit"
.
Run the command below to set the remote repository for your local repo. Be sure to replace
<YOUR-REMOTE-GITHUB-URL>
with the actual URL for your remote repository.
git remote add origin <YOUR-REMOTE-GITHUB-URL>
Push the unzipped files to your remote repository by running
git push origin main
.
Log in to your Code Capsules account and navigate to the “Spaces” tab. Once there, click the yellow
+
icon on the top right of the screen to add a new Space.
Follow the prompts, choosing your region and giving your Space a name, then click “Create Space”.
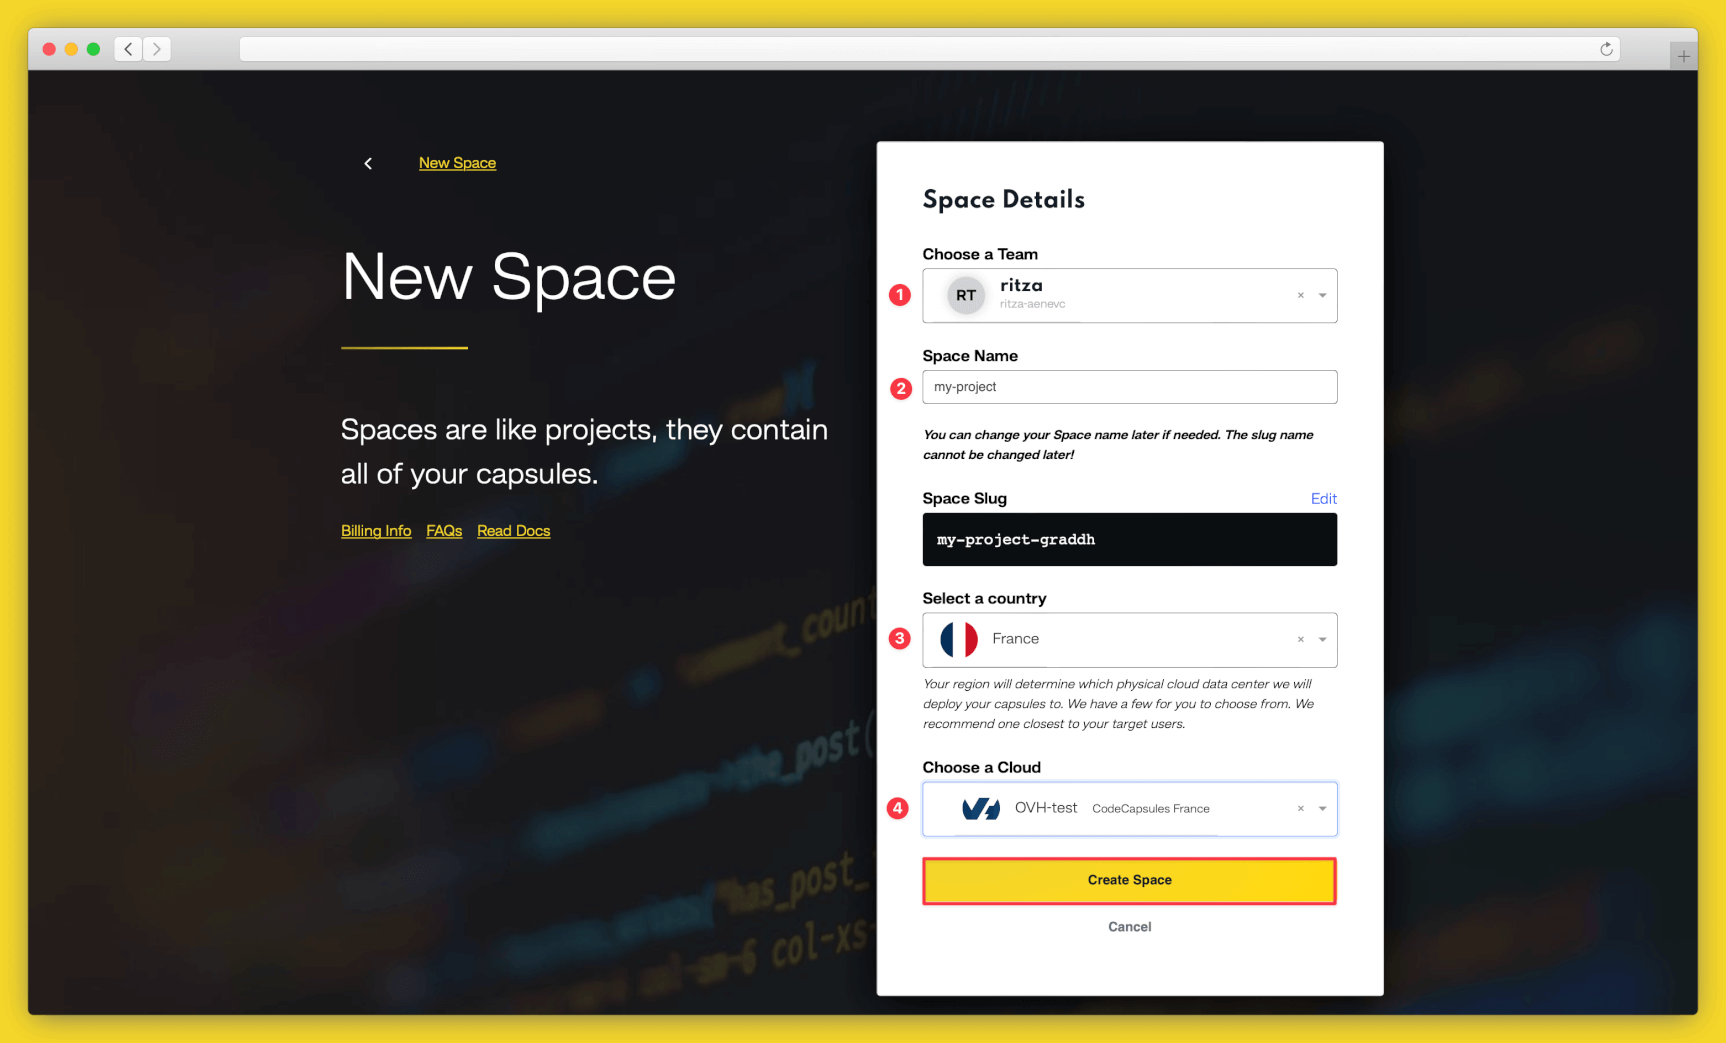
Example instructions to go with numbered annotations, 1. Choose a team — you can use a default “personal” team if you’re the only person working on this project, or a named team if you’re collaborating with others 2. This should remind you of the project, for example “customer-api” or “notetaking-app” 3. Choose a country close to where most of your users will be 4. If you’re already using a specific cloud, you can choose that here, otherwise pick anyone.
A Capsule provides the server for hosting an application on Code Capsules.
To create a new Capsule for your space, follow the instructions below:
Code Capsules will automatically build your application when you’ve finished creating the Capsule.
Once your application is live, you can view the build log by selecting the “Deploy” tab and clicking the “View build log” link in the “Builds” section.
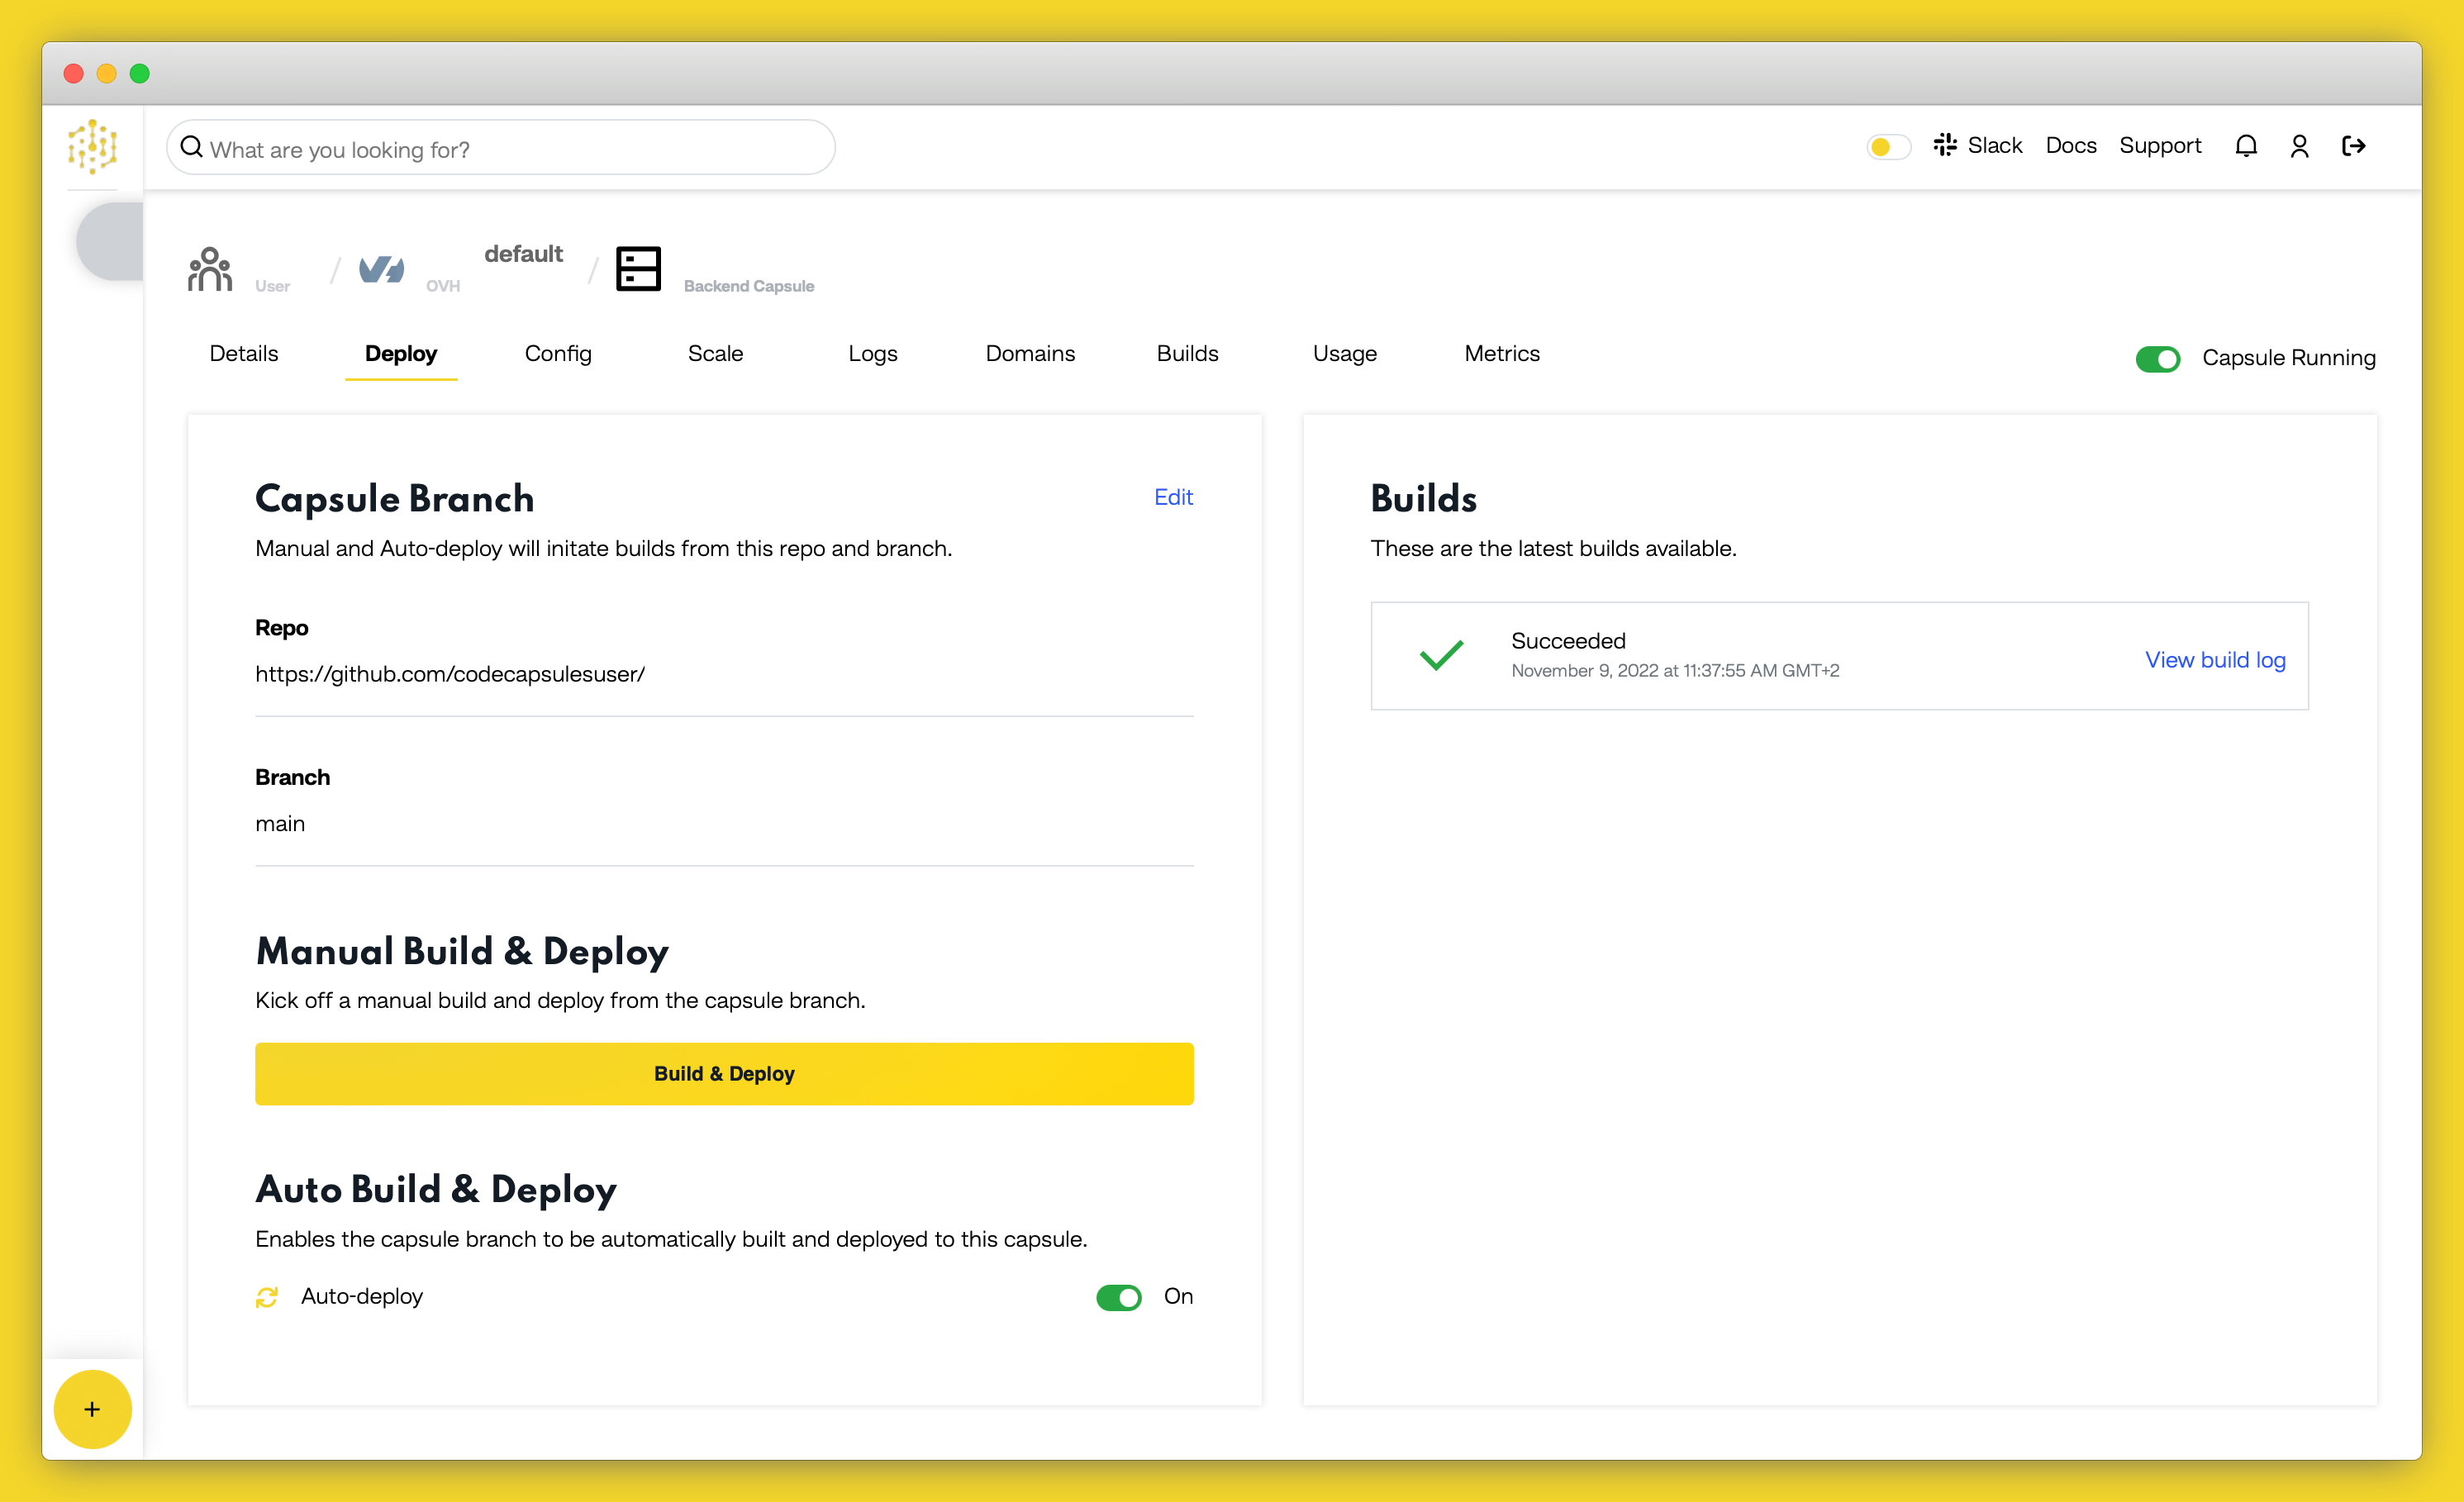
Once the build is complete, a URL link will appear in the URL section in the “Details” tab. Click the link and you should see your deployed application.
Table of content