
Table of content
Code Capsules connects to GitHub repositories to deploy applications. To follow this guide, you’ll need a Code Capsules account and a GitHub account.
To demonstrate how to deploy a Node.js Slack Bot with Code Capsules, we’ve provided an example bot, which you can find on the Code Capsules GitHub repository.
Sign in to GitHub, and fork the example bot repository by clicking “Fork” at the top-right of your screen and selecting your GitHub account as the destination.
Log in to your Code Capsules account and navigate to the “Spaces” tab. Once there, click the yellow
+
icon on the top right of the screen to add a new Space.
Follow the prompts, choosing your region and giving your Space a name, then click “Create Space”.
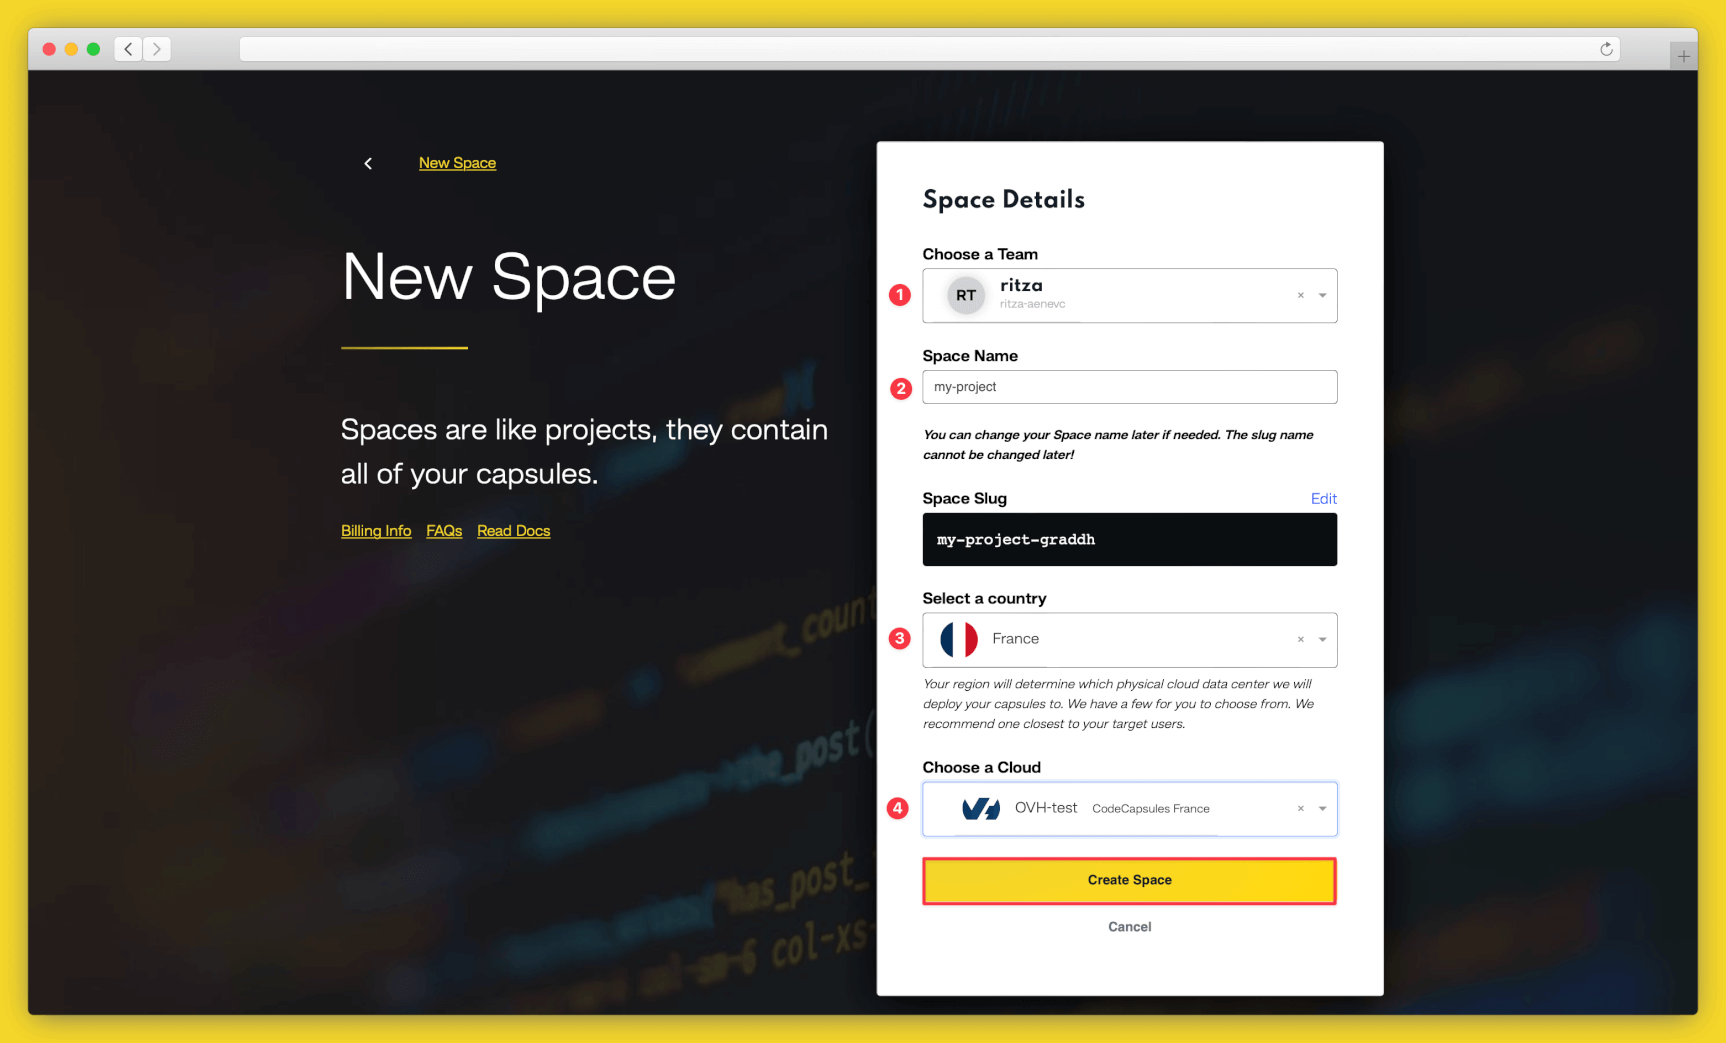
Example instructions to go with numbered annotations, 1. Choose a team — you can use a default “personal” team if you’re the only person working on this project, or a named team if you’re collaborating with others 2. This should remind you of the project, for example “customer-api” or “notetaking-app” 3. Choose a country close to where most of your users will be 4. If you’re already using a specific cloud, you can choose that here, otherwise pick anyone.
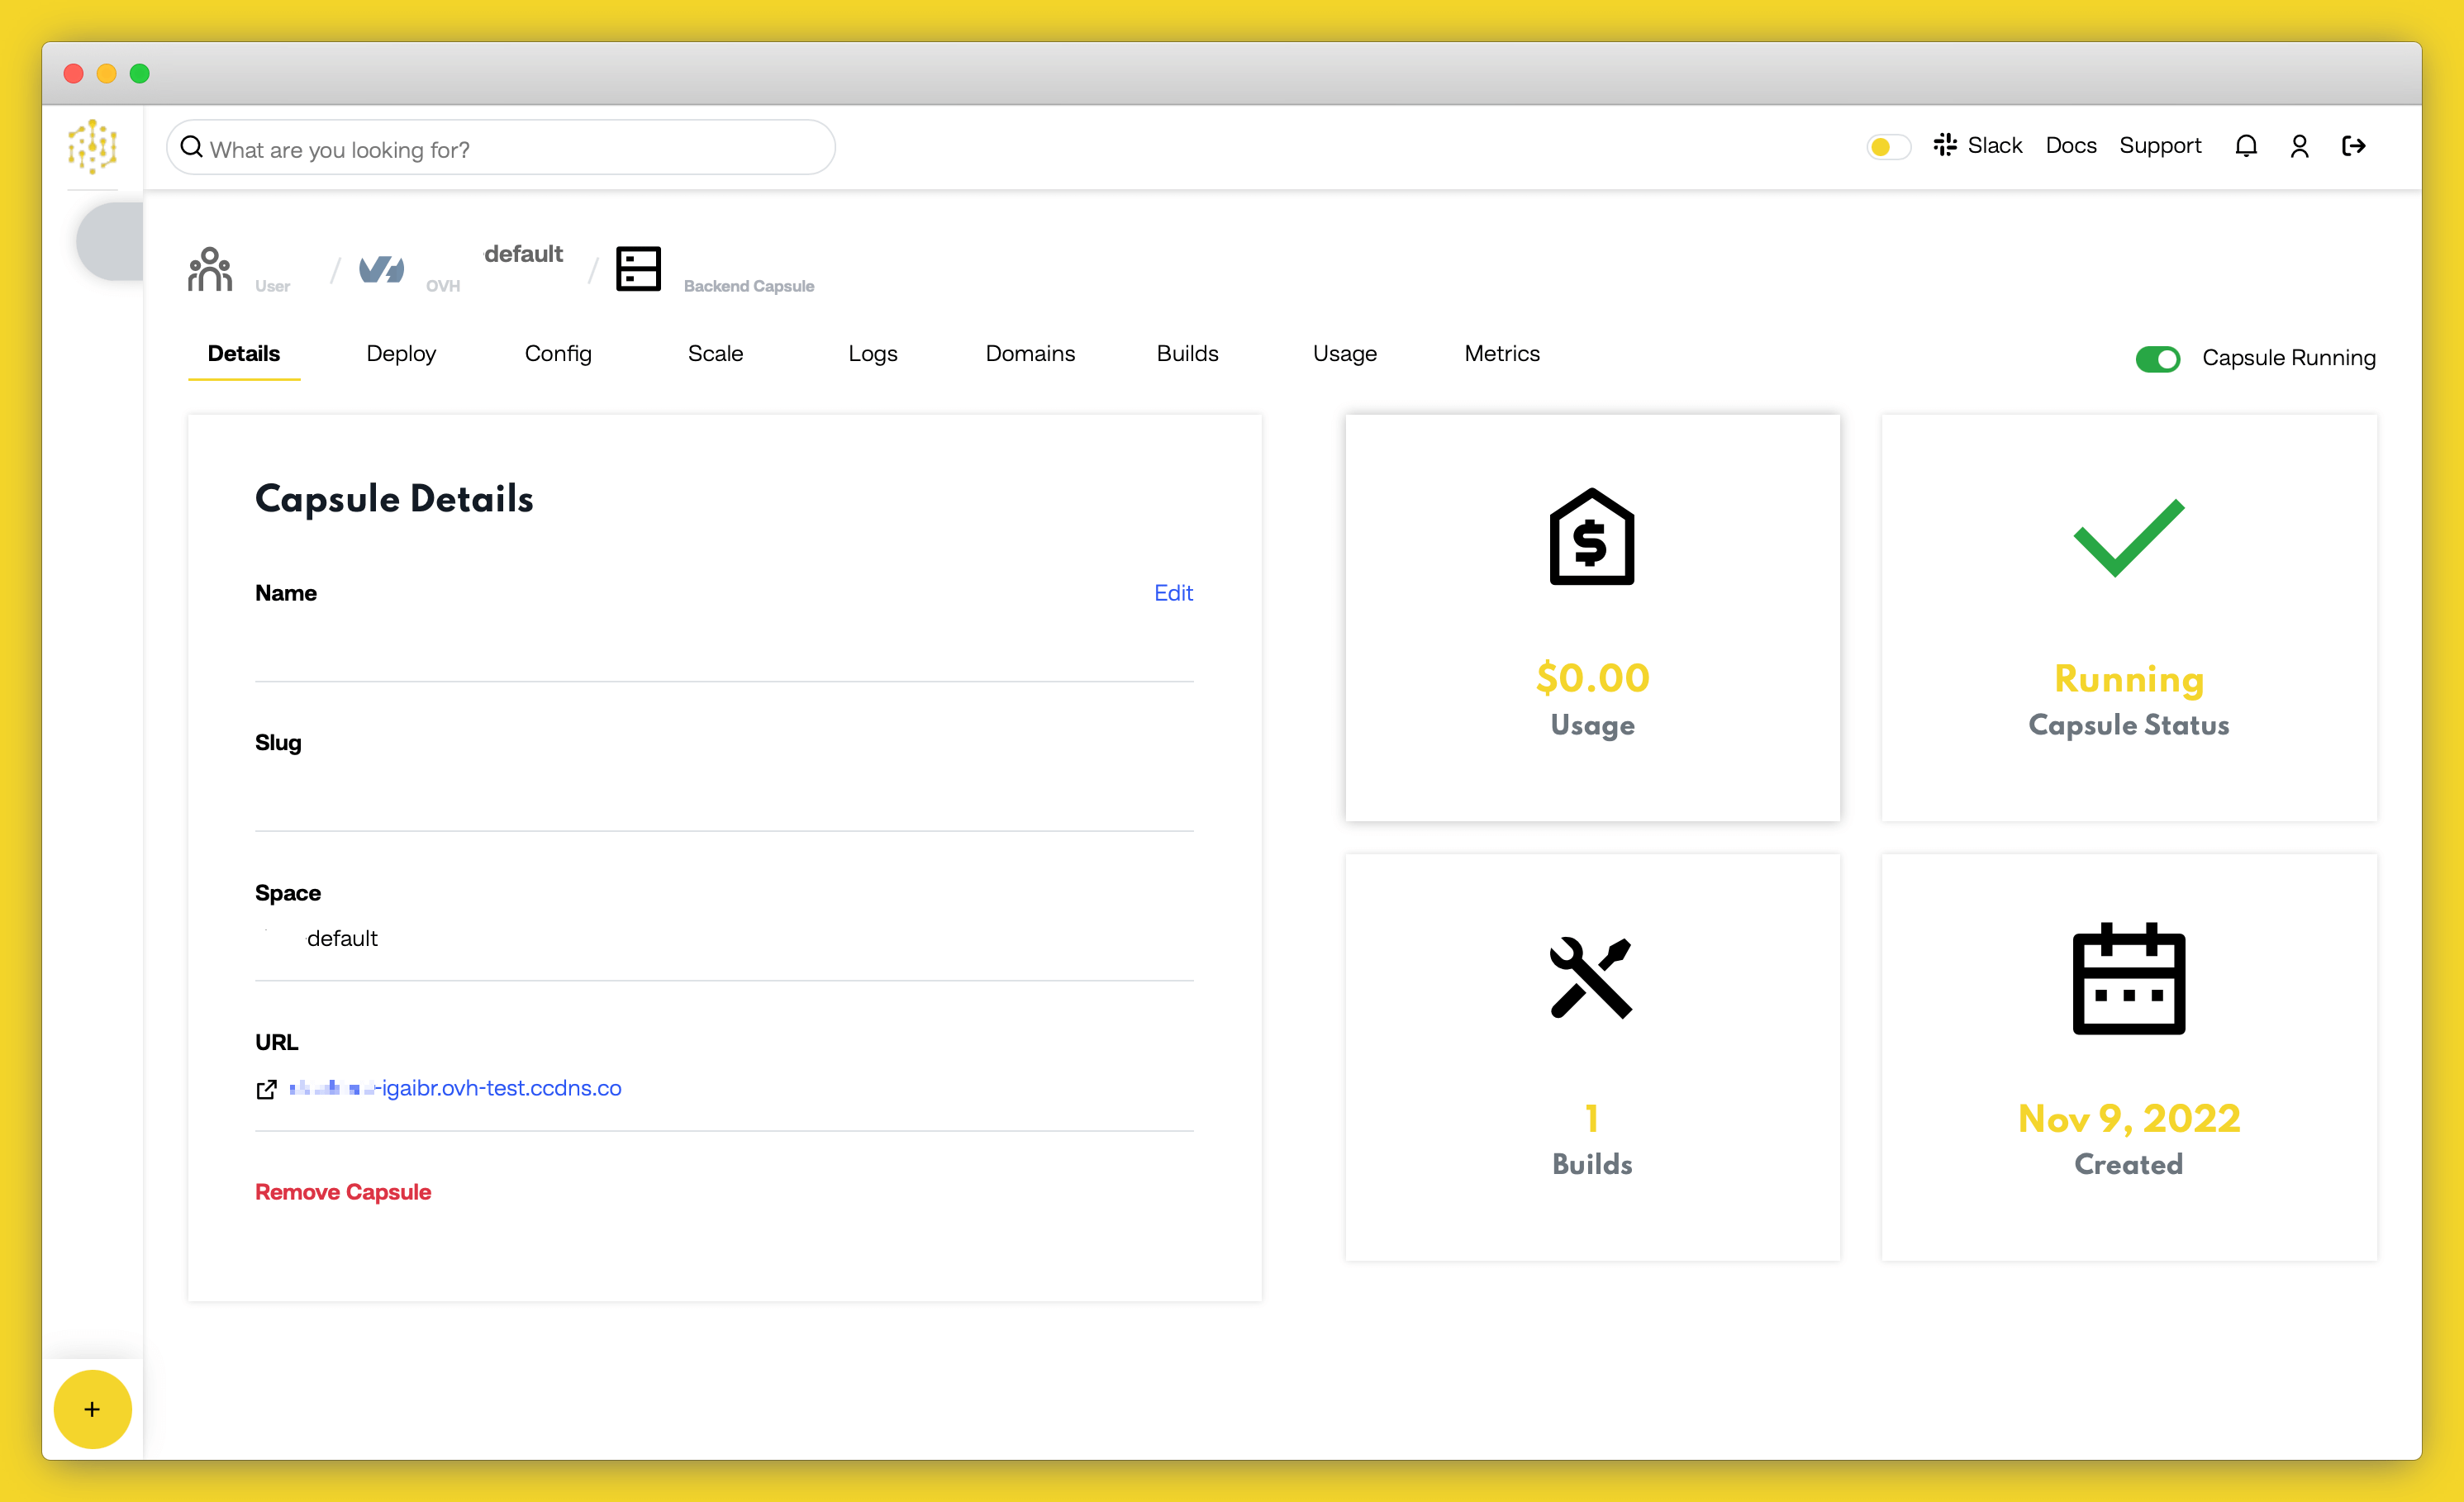
A Capsule provides the server for hosting an application on Code Capsules.
To create a new Capsule for your space, follow the instructions below:
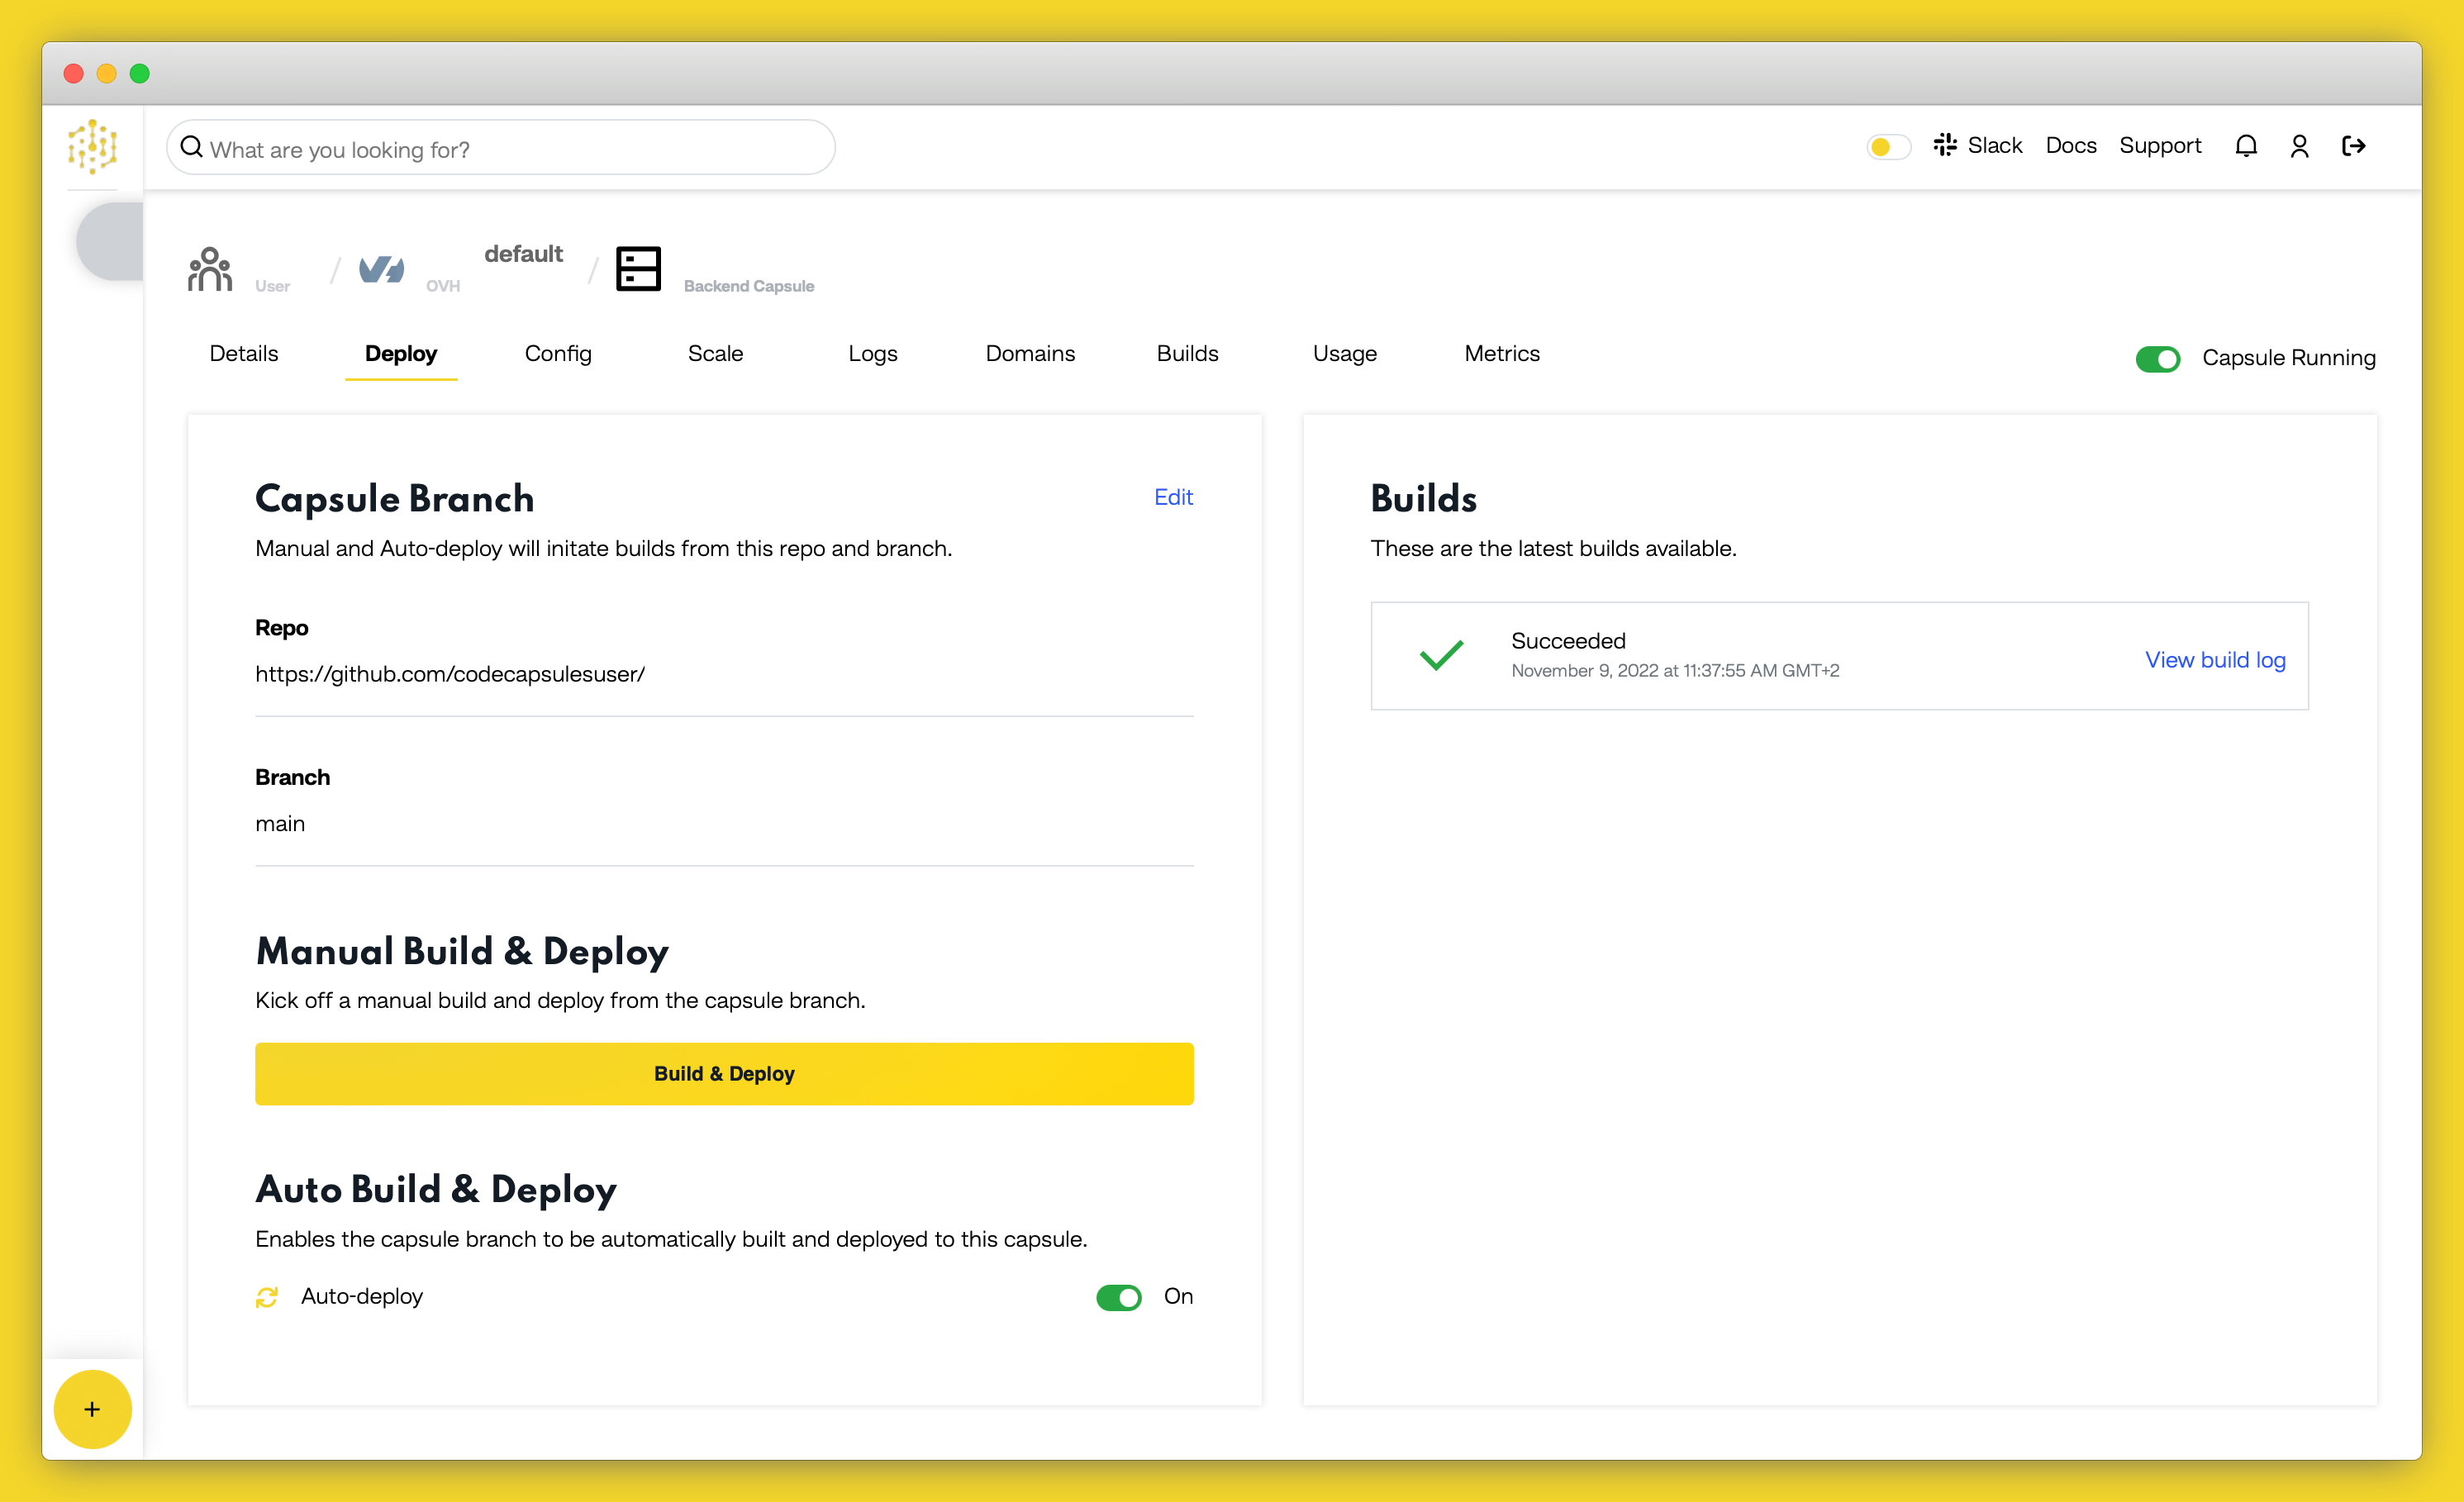
Code Capsules will automatically build your application when you’ve finished creating the Capsule.
Once your application is live, you can view the build log by selecting the “Deploy” tab and clicking the “View build log” link in the “Builds” section.
You’ll need a Slack user account and to log into a workspace before you can create a Slack bot. After you have logged into a workspace, head over to the Slack API page and click on “Create an app”.
/stats
.
/slack/command/stats
to the end of it.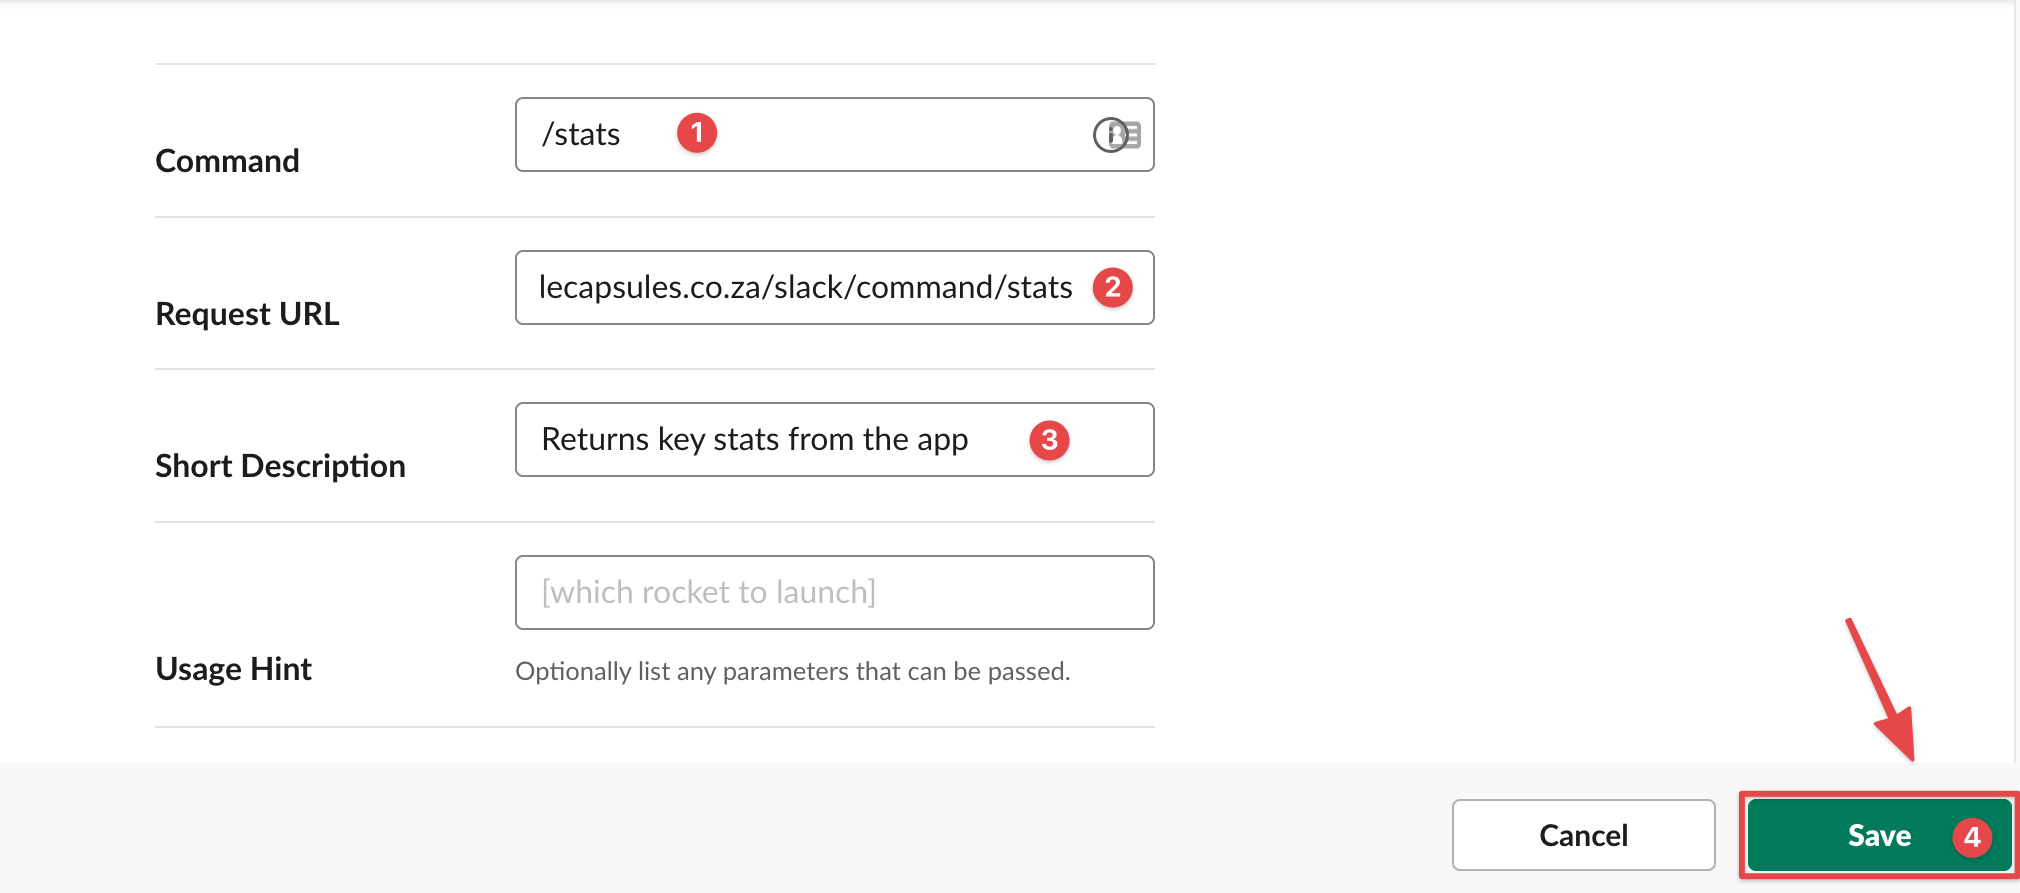
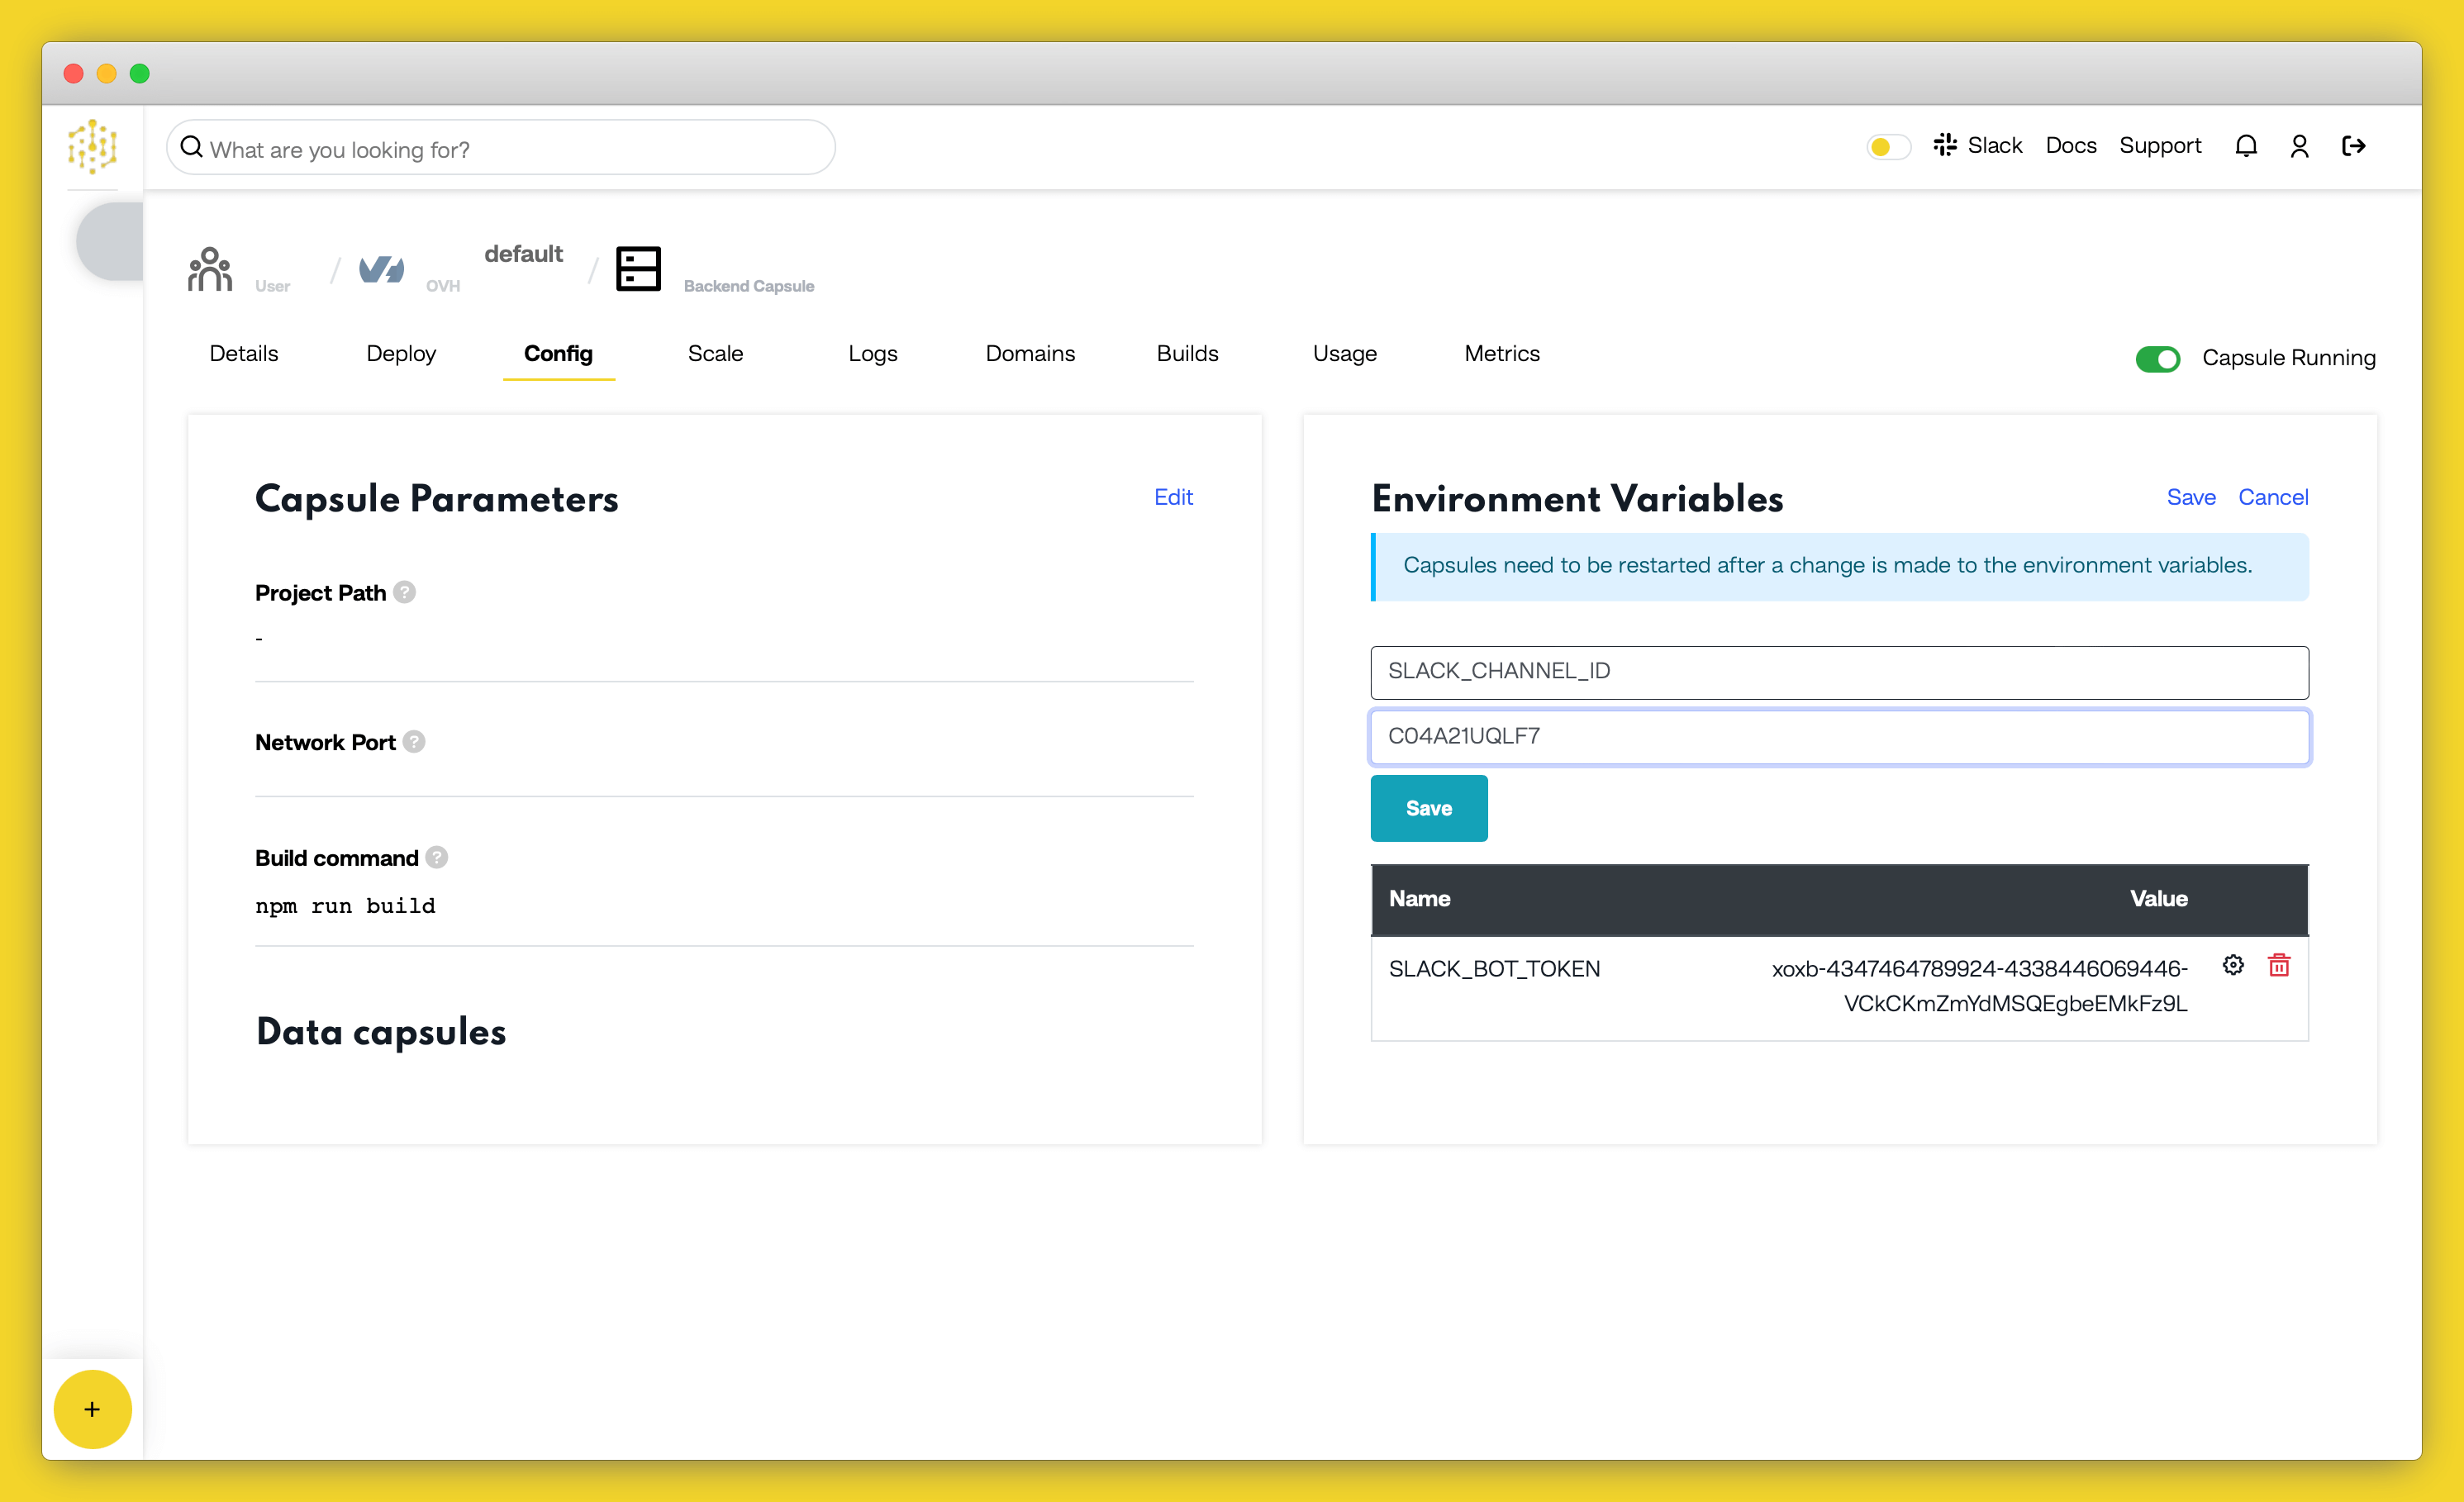
Our bot’s logic makes use of environment variables to function securely. You’ll need to add the variables to your capsule’s “Configure” tab before the bot can send/receive messages from your workspace.
For the first environment variable,
SLACK_BOT_TOKEN
:
SLACK_BOT_TOKEN
and set its value to the token you copied in the previous step.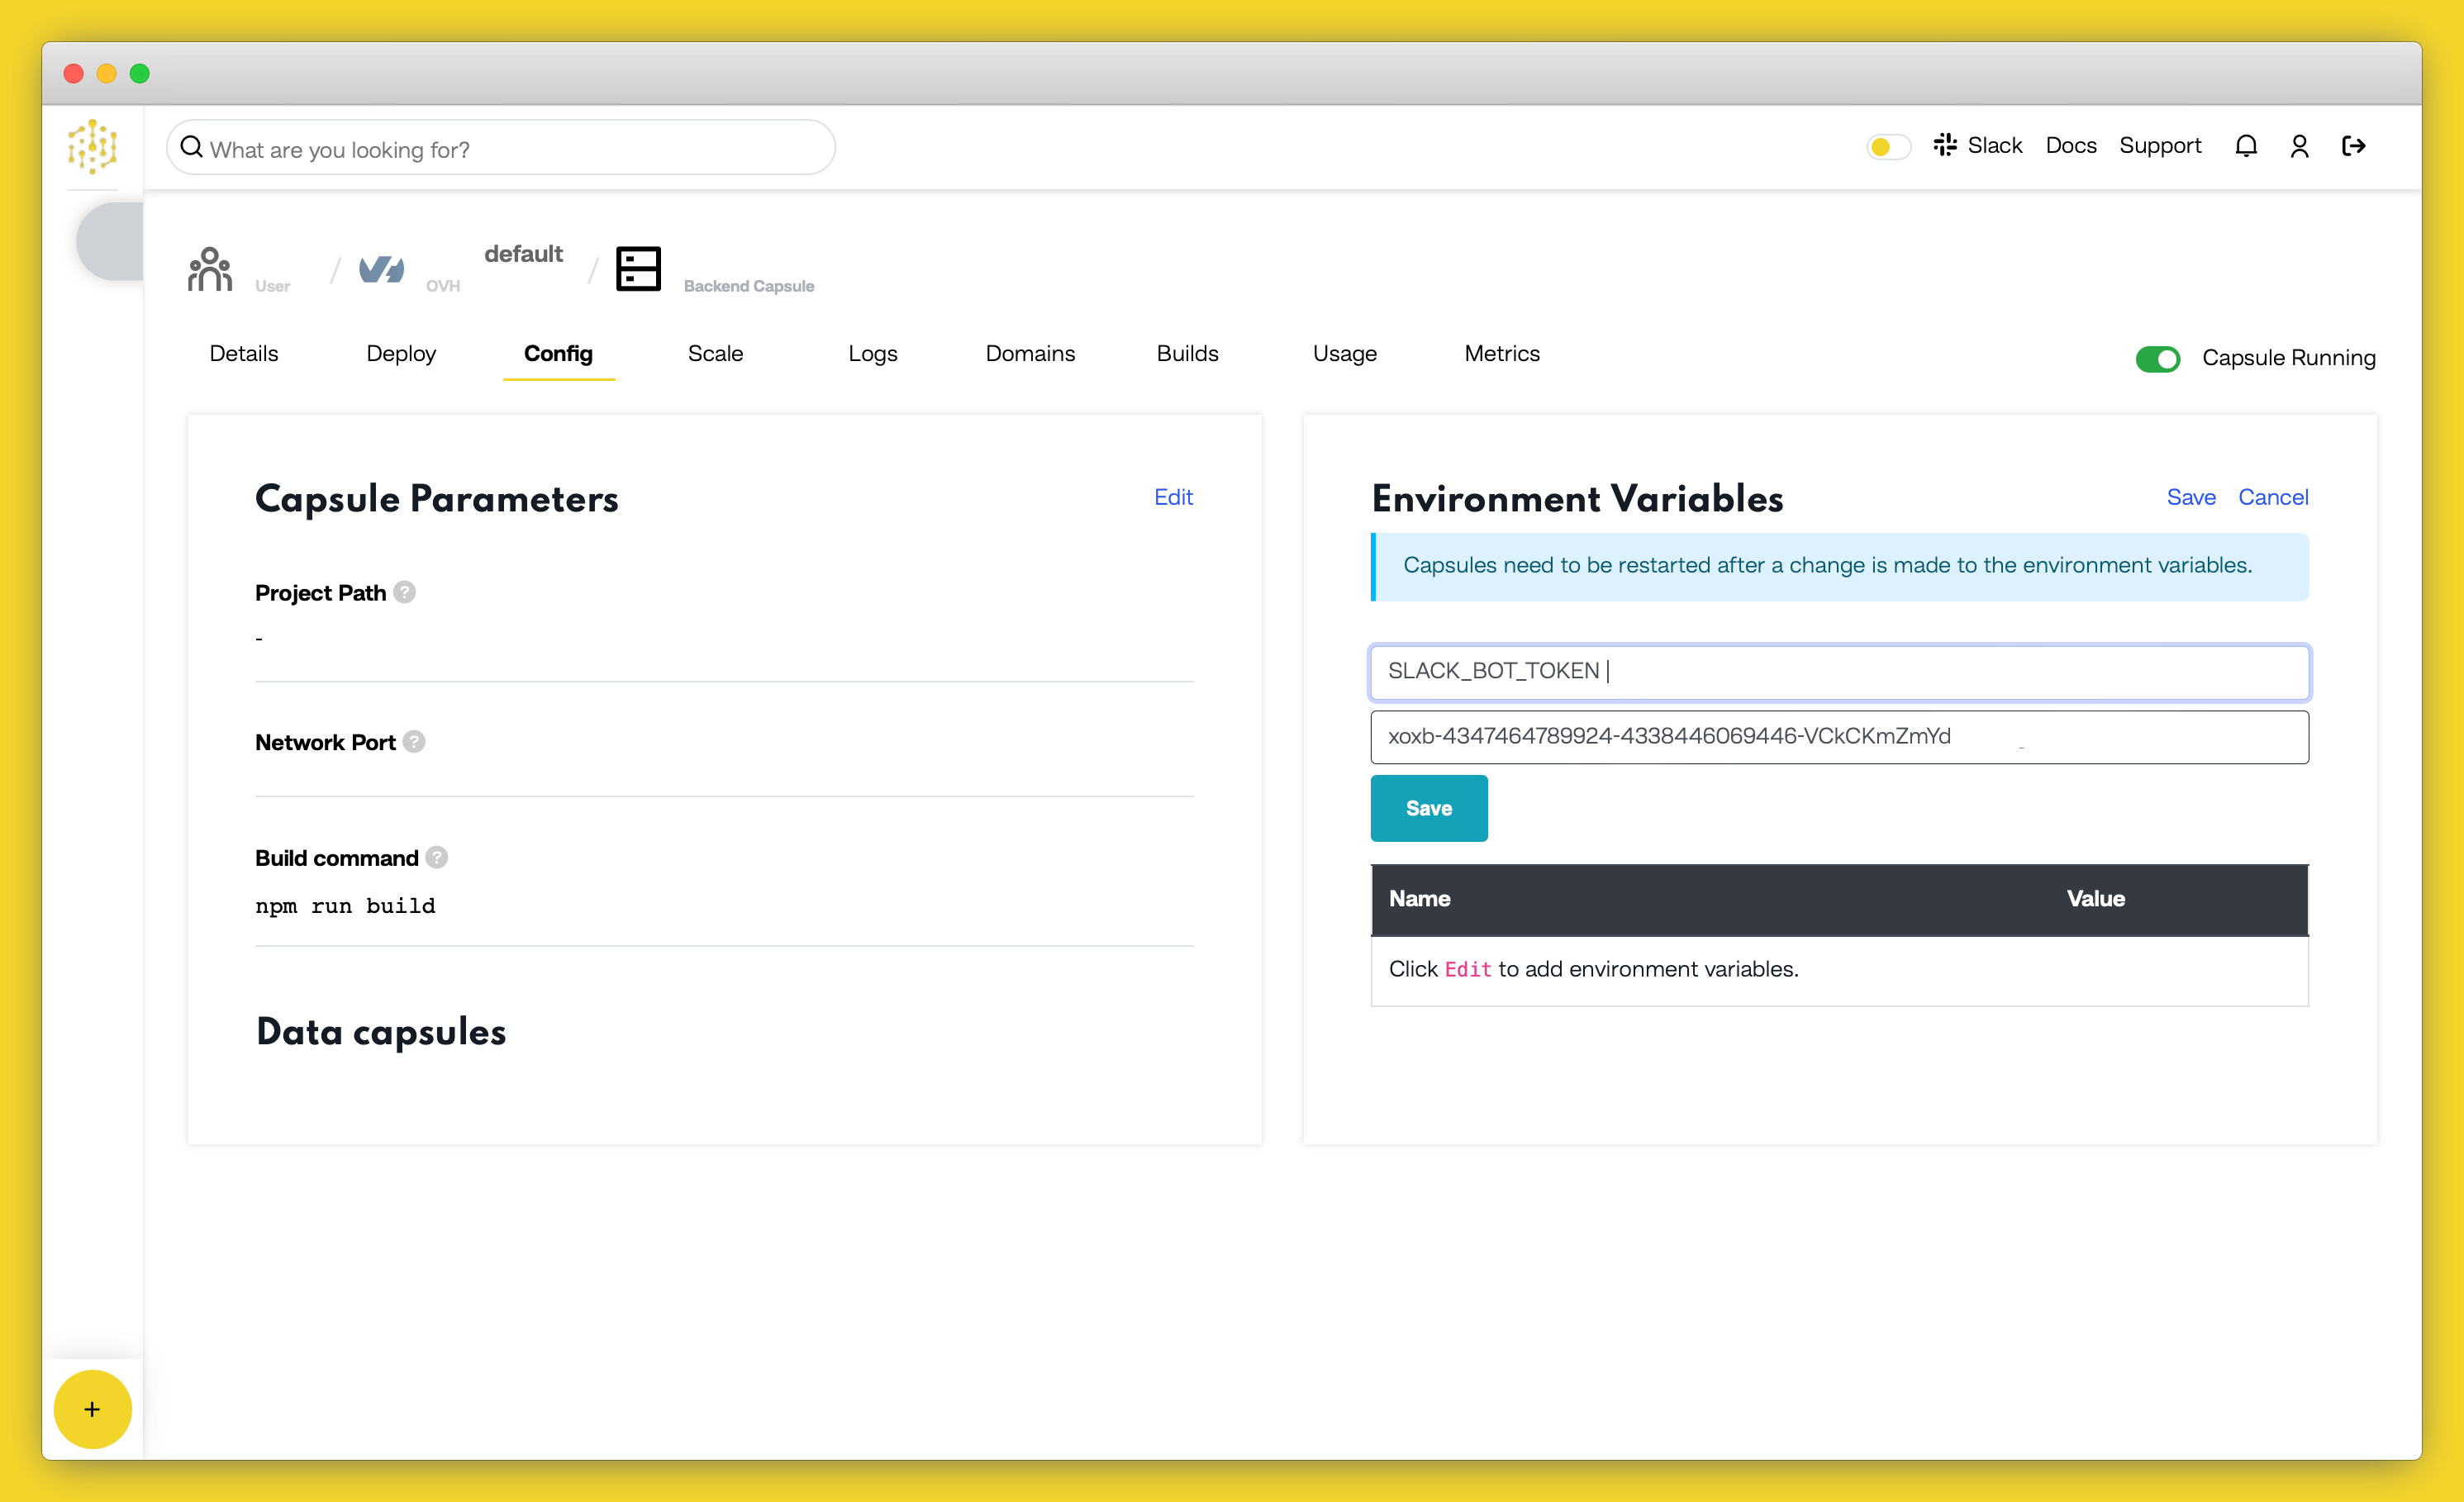
For the second environment variable,
SLACK_CHANNEL_ID
:
https://<workspace-name>.slack.com/archives/C01SZ6Z3TCY
. The last part of that URL is the channel ID; in this example case,
C01SZ6Z3TCY
.SLACK_CHANNEL_ID
.
For the third environment variable,
SLACK_SIGNING_SECRET
:
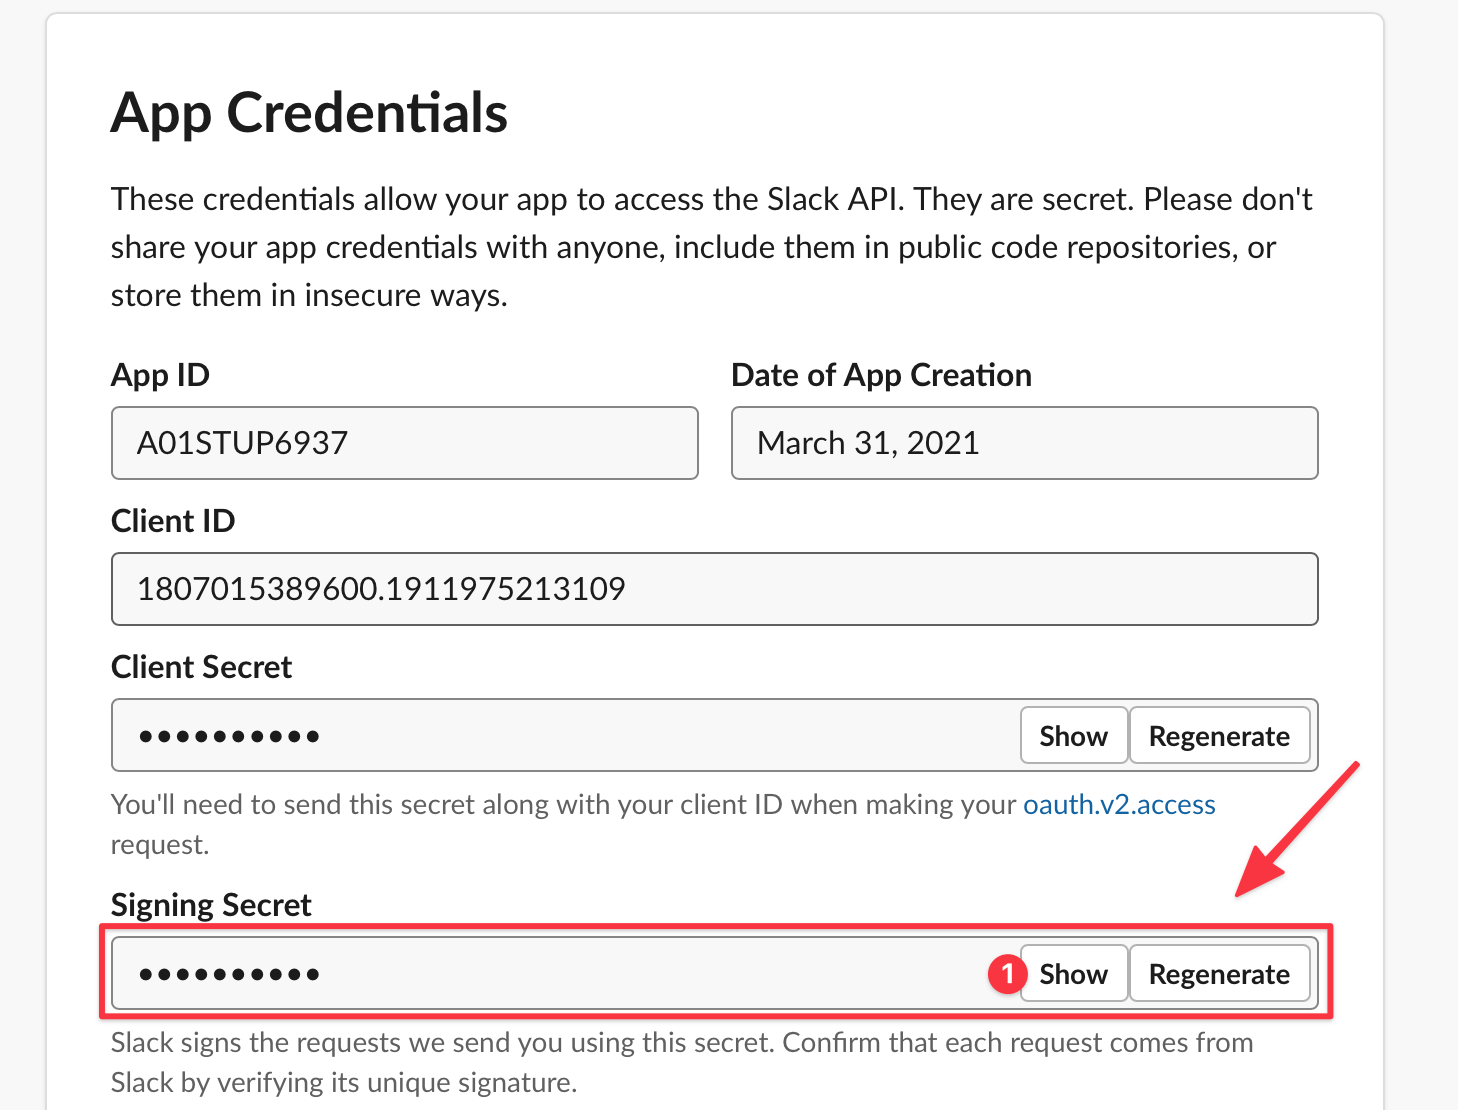
SLACK_SIGNING_SECRET
on your capsule’s “Configure” tab, and set its value to the secret you copied in the previous step.
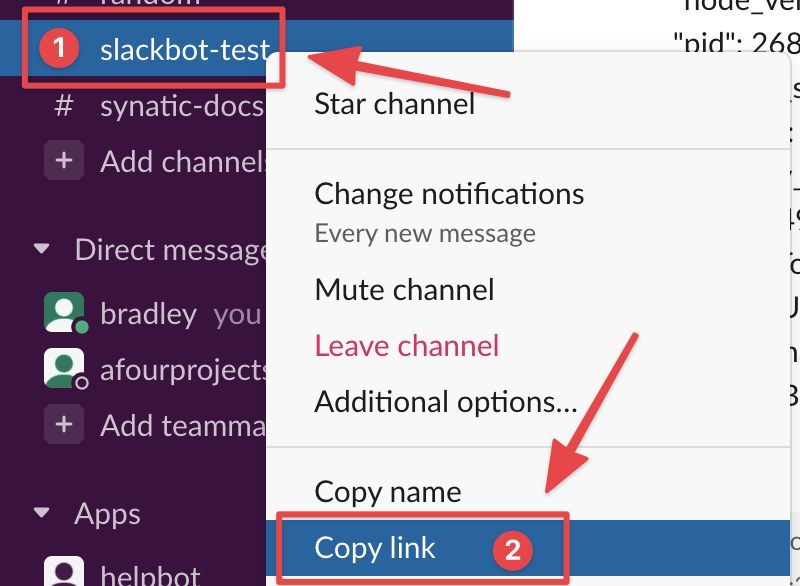
You need to invite the bot to the chosen channel so that it’ll be able to post there. To achieve this, send a message mentioning
@<bot-name>
the bot in the channel you added it to. Click “Invite Them” when Slack prompts you.

The bot can now send messages to the channel every time it starts. You can restart the capsule to see this functionality in action or alternatively send a
/stats
message in the channel to get a report about the bot’s status on Code Capsules.
If you’d like to deploy another application in a different language or framework, take a look at our other deployment guides.
Table of content