Table of content
MongoDB provides reliable NoSQL persistent storage for your applications. In this tutorial, we look at how to create a MongoDB instance you can use with your backend applications that are running on Code Capsules and elsewhere.
Log in to your Code Capsules account and navigate to the Space your MongoDB data capsule will be contained in. Click the yellow
+
button and select the “Data Capsule” option from the Create New Capsule dialog that slides in from the right.

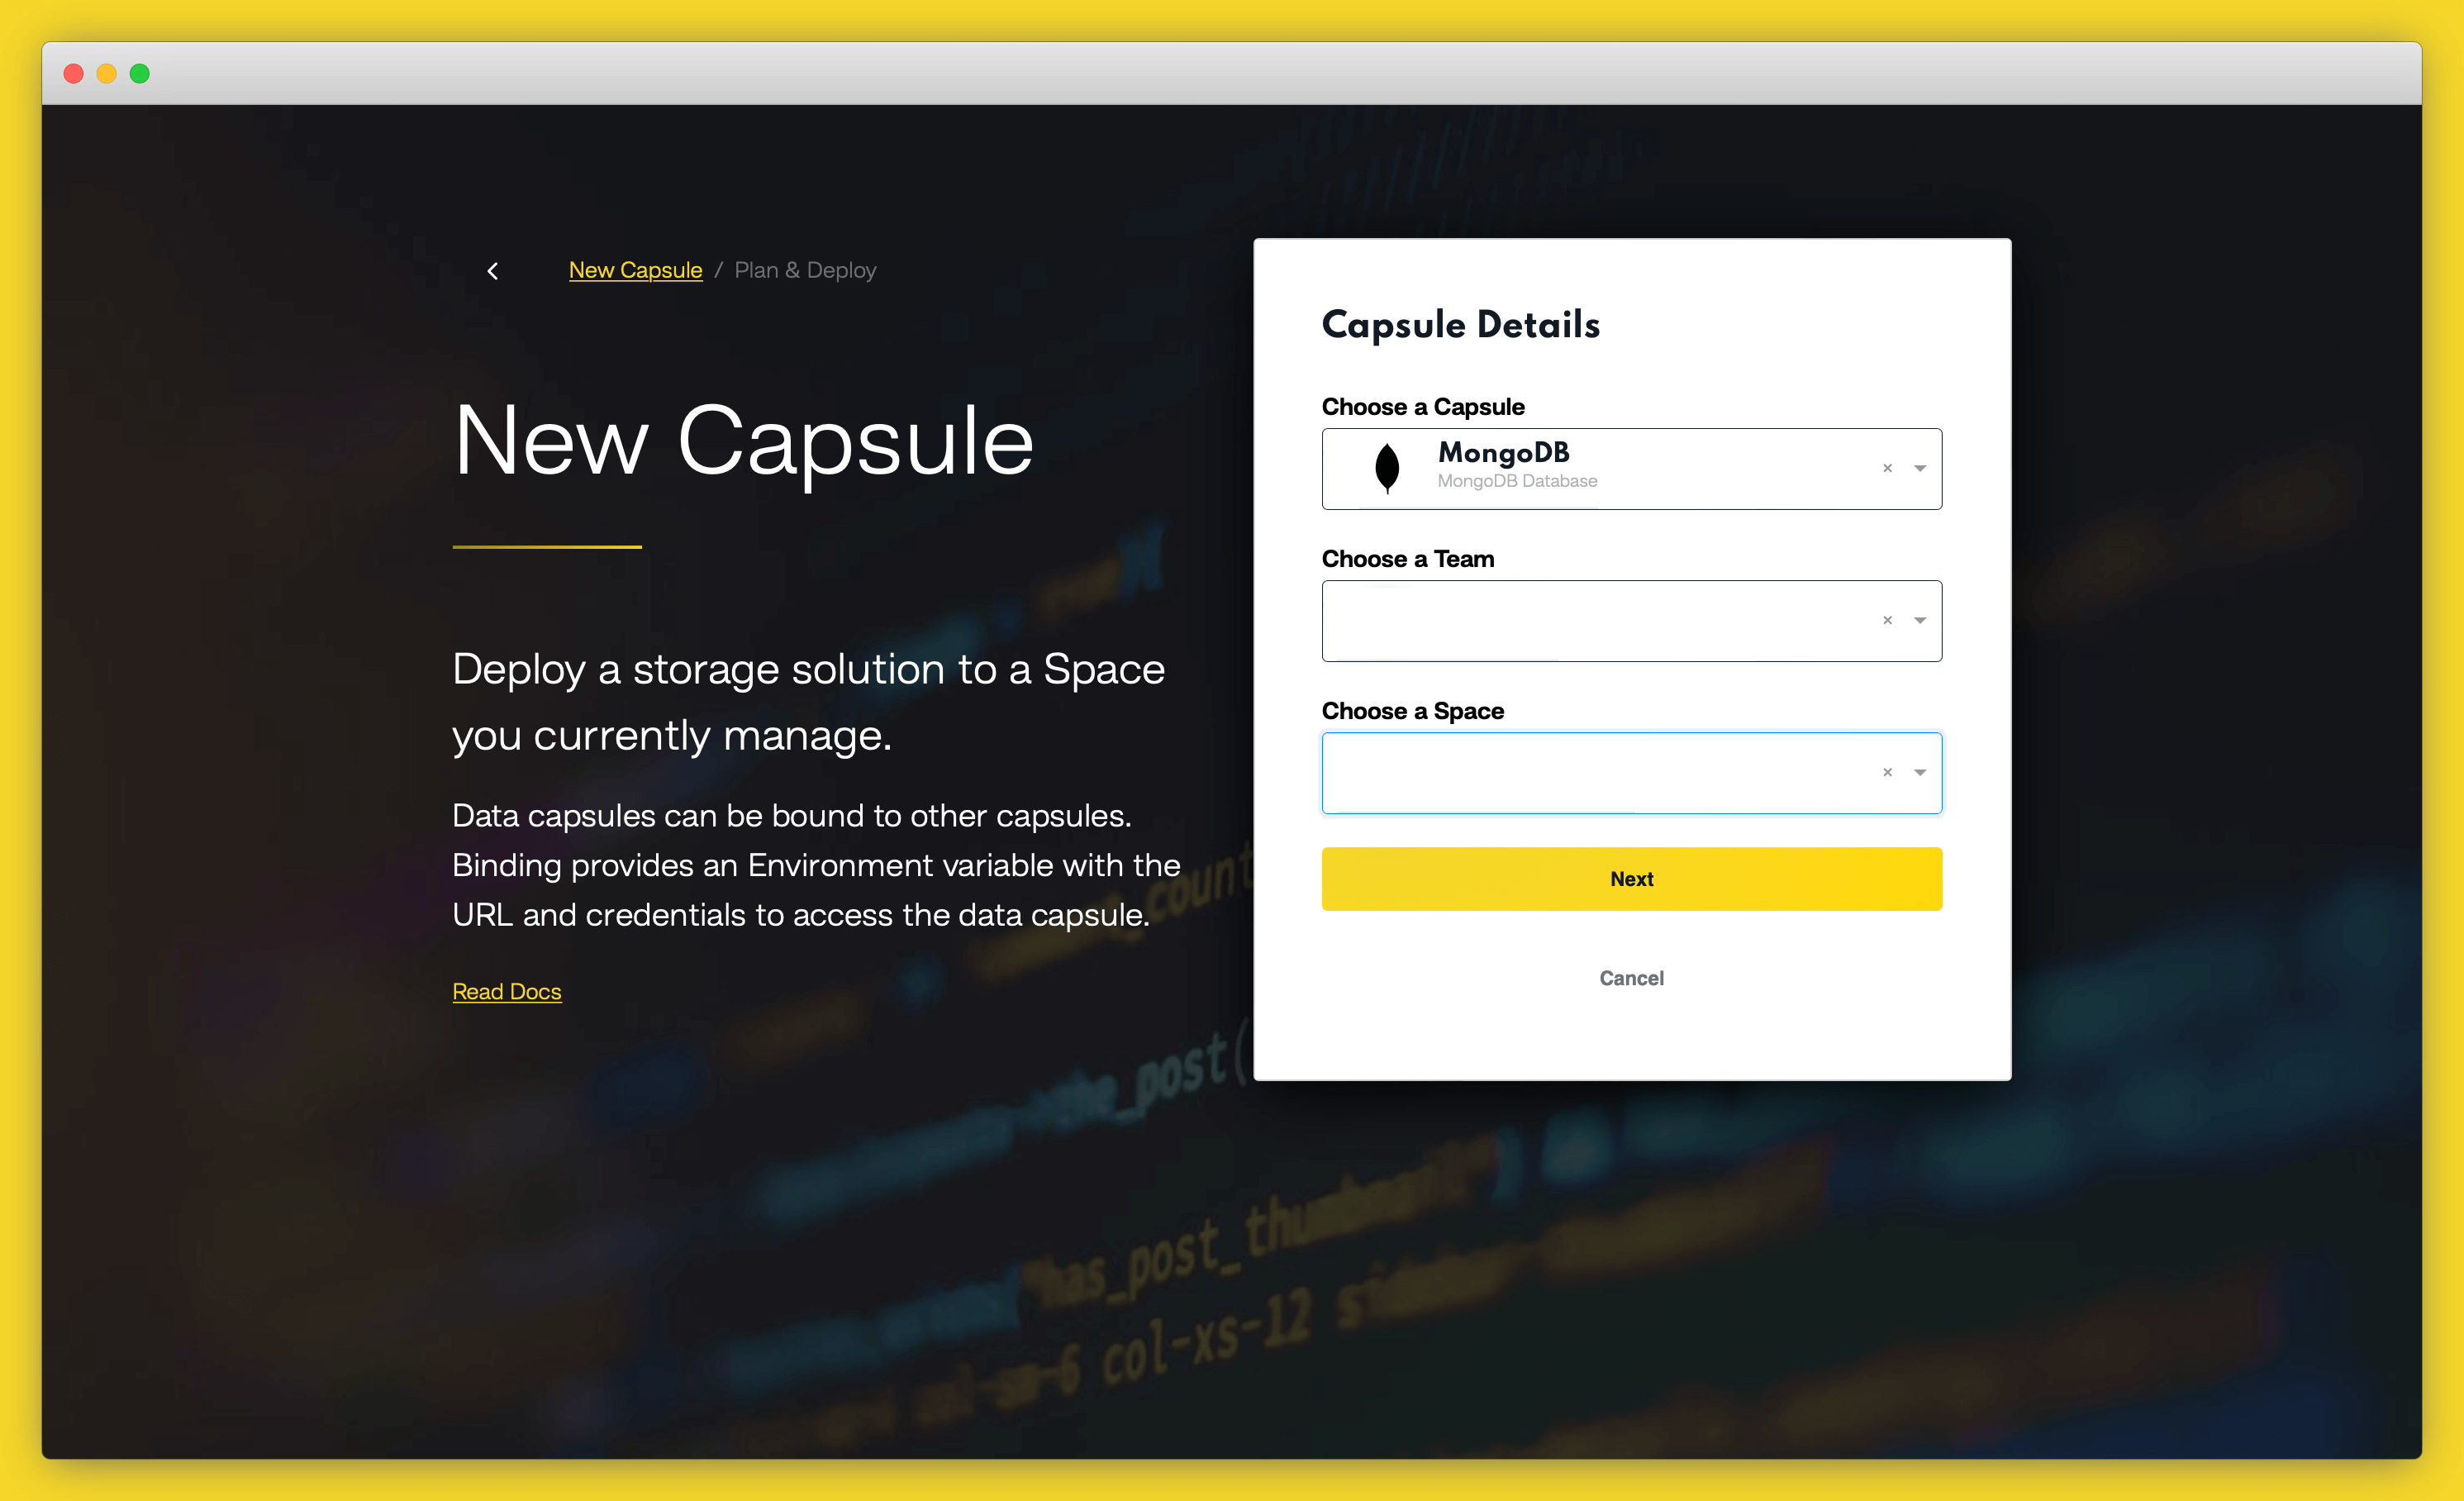
In the New Data Capsule dialog, choose “MongoDB Database Cluster” as your data type, then click the “Create Capsule” button.
To connect a data capsule to a backend capsule hosted on Code Capsules, you need to bind the two together before you can connect to and use your data capsule. If you’re not hosting your backend application on Code Capsules, you can jump to this section, as the binding step is not applicable in that use case.
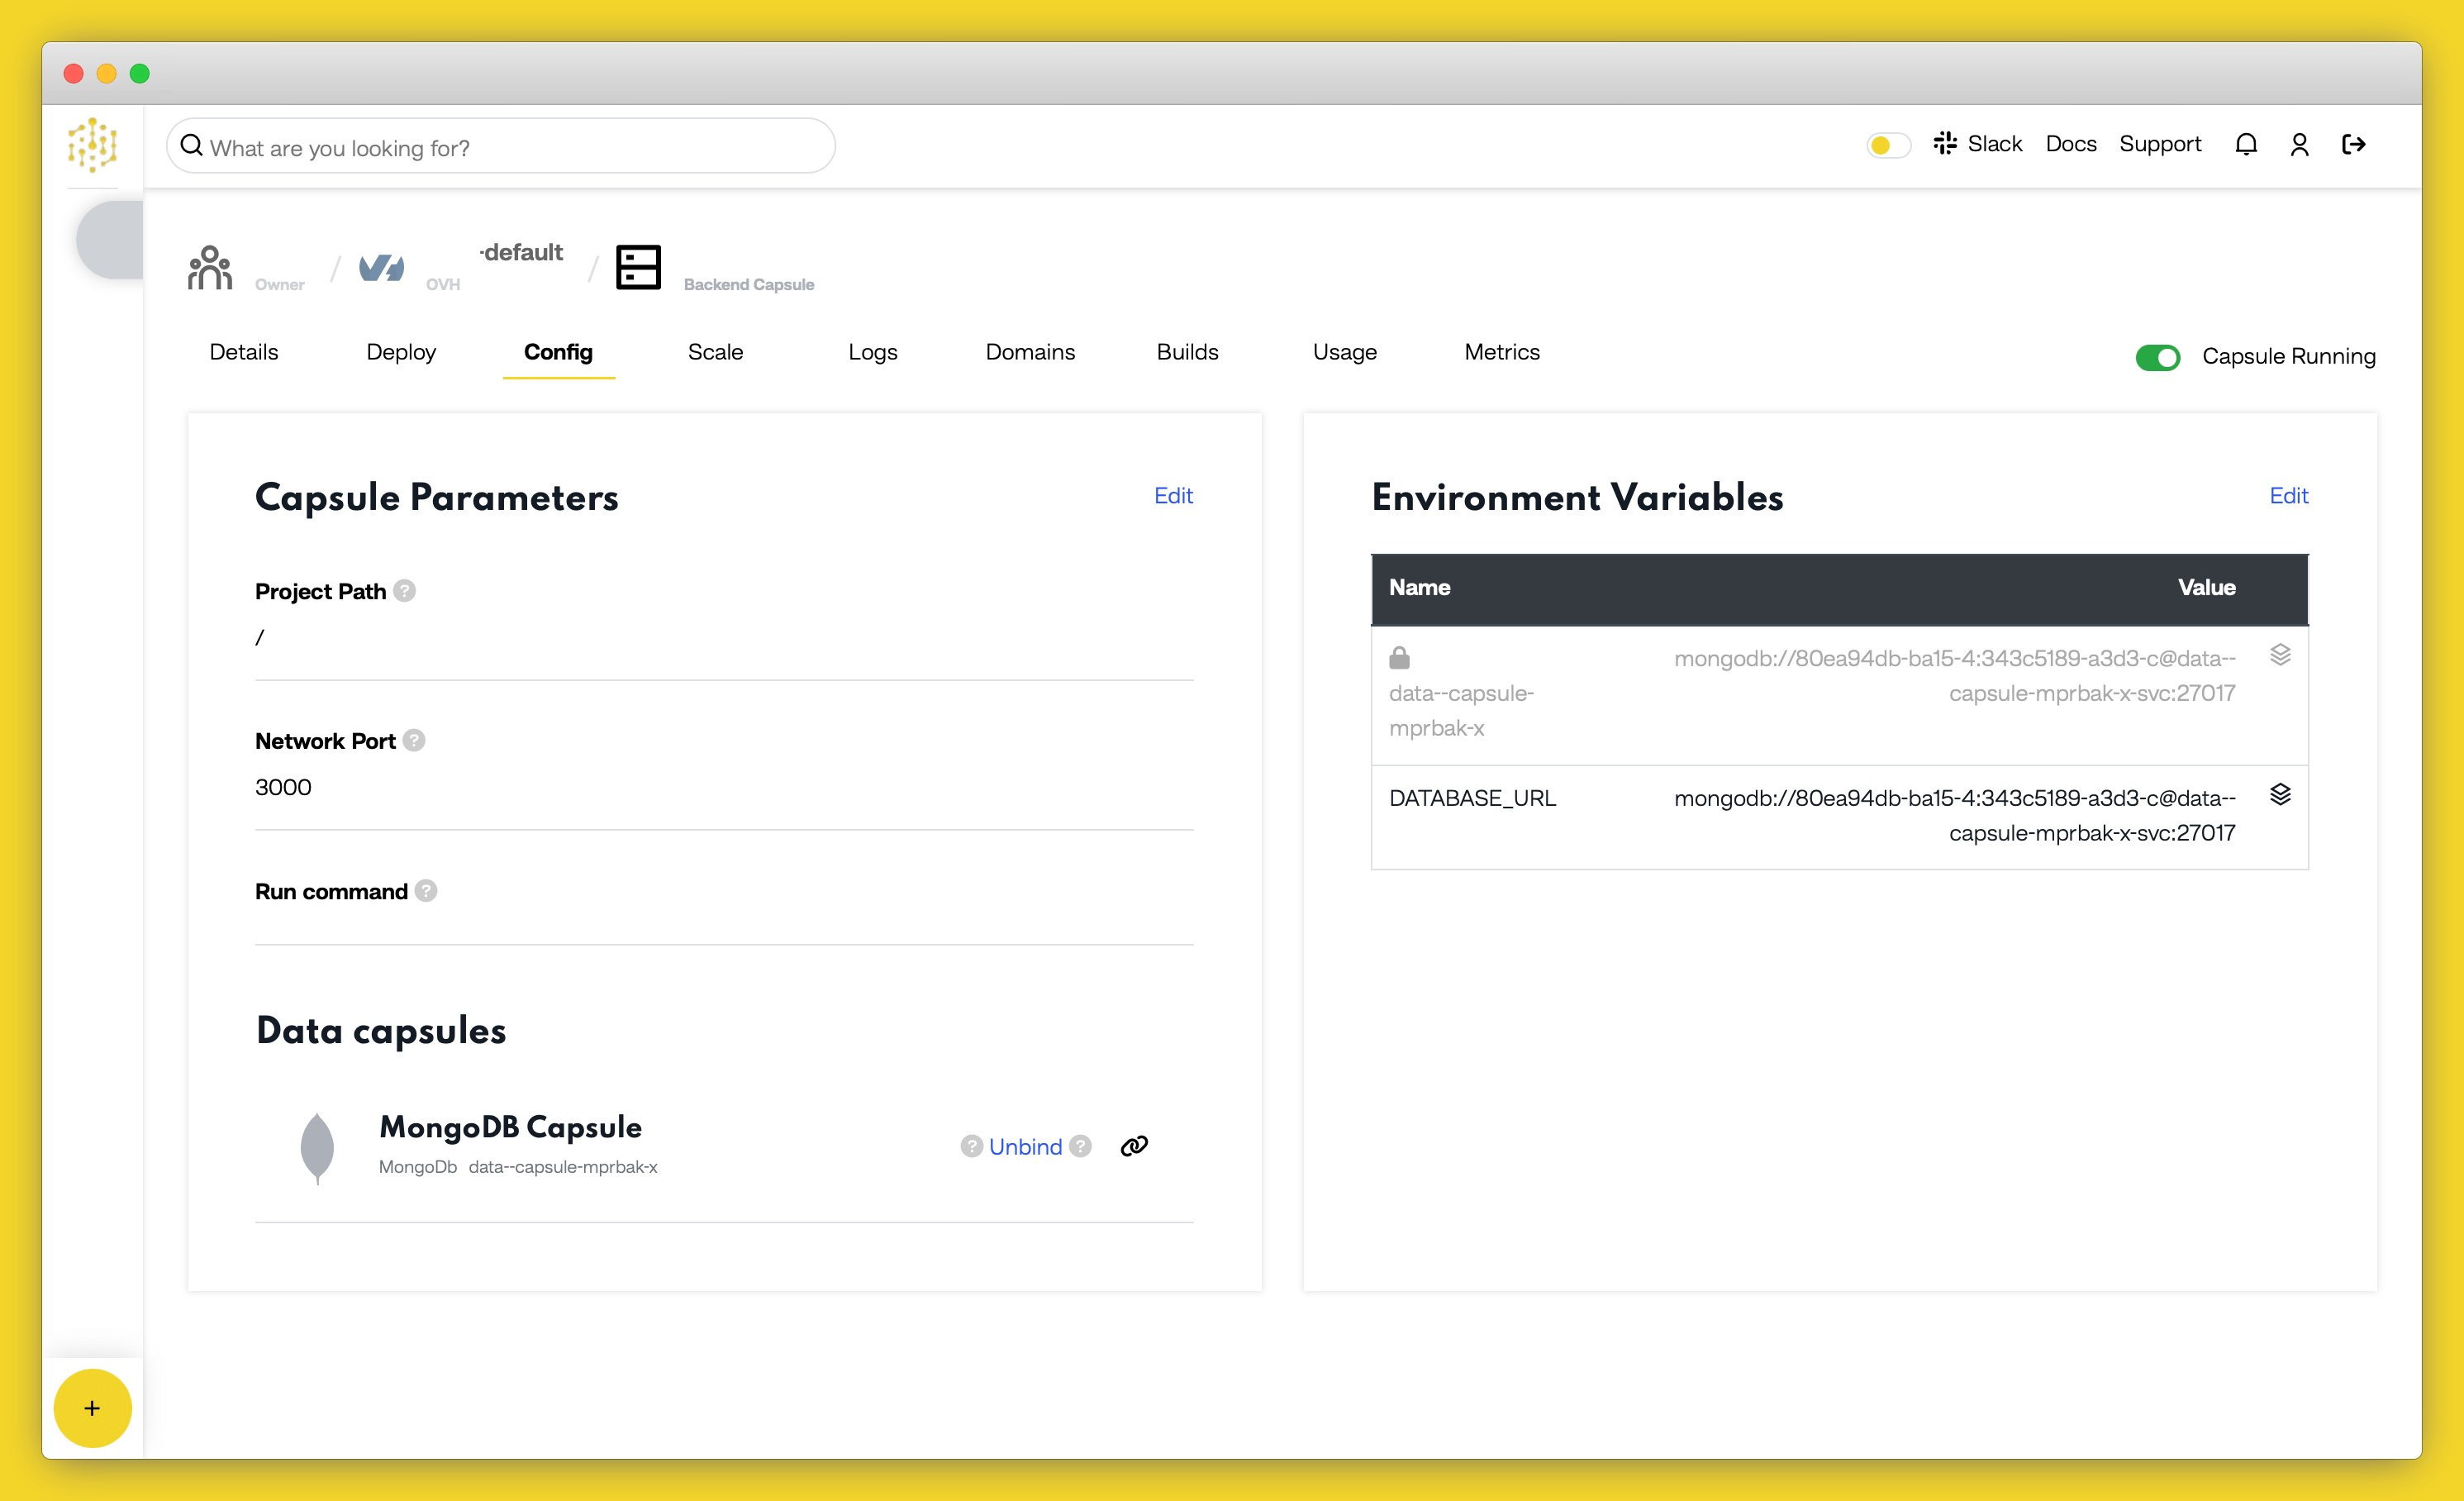
Navigate to the backend capsule and click “Config” to open the capsule’s config tab. Scroll down to the “Bind Data capsule” section, where your recently created data capsule will show.

Click “Bind” to bind your data and backend capsules. During the bind process, Code Capsules creates a
DATABASE_URL
environmental variable to let your backend capsule know how to access services and features of your data capsule. Once the two capsules have been bound, you can scroll to the top of the Config tab to find the value of this variable.
We can use this database variable in code to read and write to our data capsule. Copy the value of the
DATABASE_URL
variable and append
/your_db_name?authSource=admin
to it as a query parameter. Make sure to replace
your_db_name
with the actual name of your database. This tells the data capsule to read and write to the specified database. If a database named
your_db_name
doesn’t exist, the data capsule will create it. This allows you to have multiple databases in one data capsule.
If your backend capsule is a Python application, use the following code to connect to your MongoDB Data Capsule:
import os
import pymongo
data_capsule_url = os.getenv('DATABASE_URL')
database_one_url = data_capsule_url + "/database_one?authSource=admin"
production_database_url = data_capsule_url + "/production_database?authSource=admin"
client = pymongo.MongoClient(database_one_url)
db = client.database_one
### Do something with the db variable here
If your backend capsule is a Node.js application, use the following code to connect to your MongoDB Data Capsule:
data_capsule_url = process.env.DATABASE_URL
database_one_url = data_capsule_url + "/database_one?authSource=admin"
production_database_url = data_capsule_url + "/production_database?authSource=admin"
var MongoClient = require('mongodb').MongoClient;
MongoClient.connect(database_one_url, function(err, db) {
// Do something with the db variable here
});
If you’re not hosting your backend application on Code Capsules, you can still connect your data capsule to it. The first step is to allow public access to your data capsule. Make sure this option is turned on in the “Overview” tab of your data capsule’s details screen.

If public access to your data capsule is enabled, a connection string is visible below the “Public Access” switch, as shown in the above picture. Copy this connection string and append
&authSource=admin
to it so that its format is similar to
mongodb://92d79d9b-64f2-0:240e1937-a9fe-4@data-capsule-kykgmd.codecapsules.co.za:27017/app?ssl=true&authSource=admin
.
The string slice preceding
/app?ssl=true&authSource=admin
will be different in your case, since you’re using a different data capsule from the one used for writing this reference guide. The last
/app?ssl=true&authSource=admin
part doesn’t need to be replaced, though. Paste the appended connection string into your backend application’s code to access your data capsule’s services.
If your backend application is written in Python, use the following code to connect to your MongoDB Data Capsule:
import pymongo
database_url = "mongodb://92d79d9b-64f2-0:240e1937-a9fe-4@data-capsule-kykgmd.codecapsules.co.za:27017/app?ssl=true&authSource=admin"
client = pymongo.MongoClient(database_url)
db = client.database_one
### Do something with the db variable here
If you copied the code snippet above, remember to replace the
mongodb://92d79d9b-64f2-0:240e1937-a9fe-4@data-capsule-kykgmd.codecapsules.co.za:27017
string slice in the
database_url
variable with the corresponding value for your connection string.
If your backend application is written in Node.js, use the following code to connect to your MongoDB Data Capsule:
database_url = "mongodb://92d79d9b-64f2-0:240e1937-a9fe-4@data-capsule-kykgmd.codecapsules.co.za:27017/app?ssl=true&authSource=admin"
var MongoClient = require('mongodb').MongoClient;
MongoClient.connect(database_url, function(err, db) {
// Do something with the db variable here
});
If you copied the code snippet above, remember to replace the
mongodb://92d79d9b-64f2-0:240e1937-a9fe-4@data-capsule-kykgmd.codecapsules.co.za:27017
string slice in the
database_url
variable with the corresponding value for your connection string.
Table of content