
Table of content
Docker provides containers to run applications isolated. Among other benefits of this architecture, one is allowing applications on the same server to run independently, reducing the likelihood of having a single point of failure in your project.
In this tutorial, we’ll build a hex color identifier API with PHP using the Laravel framework, containerize the application using Docker, then ship it to production on Code Capsules.
Here’s an example of a response we might get after querying the API.

You will need the following to complete the tutorial and host your application on Code Capsules:
To begin, we need to create a project folder to house all our files.
In a terminal, navigate to the directory you’ll be keeping the application files in. Run the commands below to create the project folder and navigate into it.
mkdir color-identifier
cd color-identifier
From the project folder terminal, run the commands below to create a Laravel starter project called “ColorApi” and change directories into it.
composer create-project --prefer-dist laravel/laravel ColorApi
cd ColorApi
From now on, the
ColorApi
folder will be referred to as the project root folder.
From the project’s root folder, enter the command
git init
to initialize a git repository. This will allow you to track changes to your app as you build it.
Head over to GitHub and create a new repository. Then, in your project’s root folder, run the command below from the terminal, replacing “username” and “repository_name” with your own values from GitHub.
git remote add origin git@github.com:username/repository_name.git
This will link your local repository to the one on GitHub.
Next, we’ll install the dependencies we need to build our application. Open the
composer.json
file in the root folder and add the following entries to the
"require"
dictionary:
"require": {
...
"ourcodeworld/name-that-color": "dev-master",
"symfony/console": "6.0.*",
"symfony/error-handler": "6.0.*",
"symfony/finder": "6.0.*",
"symfony/http-foundation": "6.0.*",
"symfony/http-kernel": "6.0.*",
"symfony/mailer": "6.0.*",
"symfony/mime": "6.0.*",
"symfony/process": "6.0.*",
"symfony/routing": "6.0.*",
"symfony/var-dumper": "6.0.*",
"symfony/event-dispatcher": "6.0.*",
"symfony/string": "6.0.*",
"symfony/translation": "6.0.*",
"symfony/translation-contracts": "3.0.*",
"symfony/service-contracts": "3.0.*",
"symfony/event-dispatcher-contracts": "3.0.*",
"symfony/deprecation-contracts": "3.0.*"
....
}
Now run the command
composer update
from the terminal to install the packages.
While in the
ColorApi
terminal, run the command below to create a controller for your API:
php artisan make:controller ColorController
This command will create a controller at
app/Http/Controllers/ColorController.php
. In big projects, controllers are meant to group similar request-handling logic in different methods, but the hex color API we’re building is relatively small and will only have one controller method.
Update the contents of
ColorController.php
so it looks like this:
<?php
namespace App\Http\Controllers;
require base_path('vendor/autoload.php');
use Illuminate\Http\Request;
use ourcodeworld\NameThatColor\ColorInterpreter;
class ColorController extends Controller
{
public function convert($hexcode)
{
$instance = new ColorInterpreter();
$result = $instance->name($hexcode);
// 1. Print the human name e.g "Deep Sea"
echo $result["name"] . "\n";
// 2. Print the hex code of the closest color with a name e.g "#01826B"
echo $result["hex"] . "\n";
return response()->json($result["name"]);
}
}
We require the
autoload.php
module on line 5 to automatically load the dependency we installed earlier, and can now reference it on line 8.
The
convert()
method is responsible for converting a hex code to a human-readable name by leveraging the
ColorInterpreter
package we loaded on line 8. It takes in the hex code as an argument and returns the color name.
With the controller in place, we’re left with linking it to a route that other applications or users can hit. Let’s create and link to this route by editing the
routes/api.php
file like this:
<?php
use Illuminate\Http\Request;
use Illuminate\Support\Facades\Route;
use App\Http\Controllers\ColorController;
Route::middleware('auth:sanctum')->get('/user', function (Request $request) {
return $request->user();
});
Route::get('/color/{hexcode}',[ColorController::class, 'convert']);
On the last line, we add a route that accepts GET requests with a hex code parameter on the
api/color
URL. We then link that route to the
ColorController
class
convert()
method. Your application should be able to accept requests on the
api/color/{hexcode}
route now.
Our Laravel application can now run locally, but we need to install it in a Docker container for it to run on Code Capsules. To achieve this, add a
Dockerfile
to the
/ColorApi
folder. A
Dockerfile
is a set of instructions on how to build an image of your application and run it inside a docker container. Populate the
Dockerfile
with the code below:
FROM composer:2.0 as build
COPY . /app/
RUN composer install --prefer-dist --no-dev --optimize-autoloader --no-interaction --ignore-platform-reqs
FROM php:8.1-apache-buster as production
RUN echo "ServerName 127.0.0.1" >> /etc/apache2/apache2.conf
ENV APP_ENV=production
ENV APP_DEBUG=false
RUN docker-php-ext-configure opcache --enable-opcache && \
docker-php-ext-install pdo pdo_mysql
COPY --from=build /app /var/www/html
RUN php artisan config:cache && \
php artisan route:cache && \
chmod 777 -R /var/www/html/storage/ && \
chown -R www-data:www-data /var/www/
CMD ["php", "artisan", "serve", "--host=0.0.0.0"]
Dockerfile
The name
Dockerfile
should start with a capital letter ‘D’ and have no extension; otherwise it won’t work.
Dockerfile
Let’s take a look at how the image is built and run in the
Dockerfile
.
In the first three lines, we require
composer
as the build stage and copy the project to the
/app
folder of the container. After copying all the
src
code for our app into the container, we run
composer install
with some optional parameters that create an efficient production build.
After installing the dependencies, we require PHP 8.1 as the production stage and set the
"ServerName"
variable to avoid getting a warning from the Apache server. We then copy the app from the build stage into the production stage, specifically into the
/var/www/html
directory.
The last command tells Docker how to run your application after it has been built.
Our application is now ready for deployment. Let’s add and commit all the files we created to our local repository and then push them to the remote one. Do this by running the commands listed below in a terminal while in the project’s root folder:
git add -A
git commit -m "Added hex color identifier app files"
git branch -M main
git push -u origin main
Your remote repository will now be up-to-date with your local one.
The final step is to deploy our app. Log into your Code Capsules account and link your remote GitHub repository to Code Capsules. Create a Docker Capsule and deploy the app there. You can reference this deployment guide to see how to do so in greater detail.
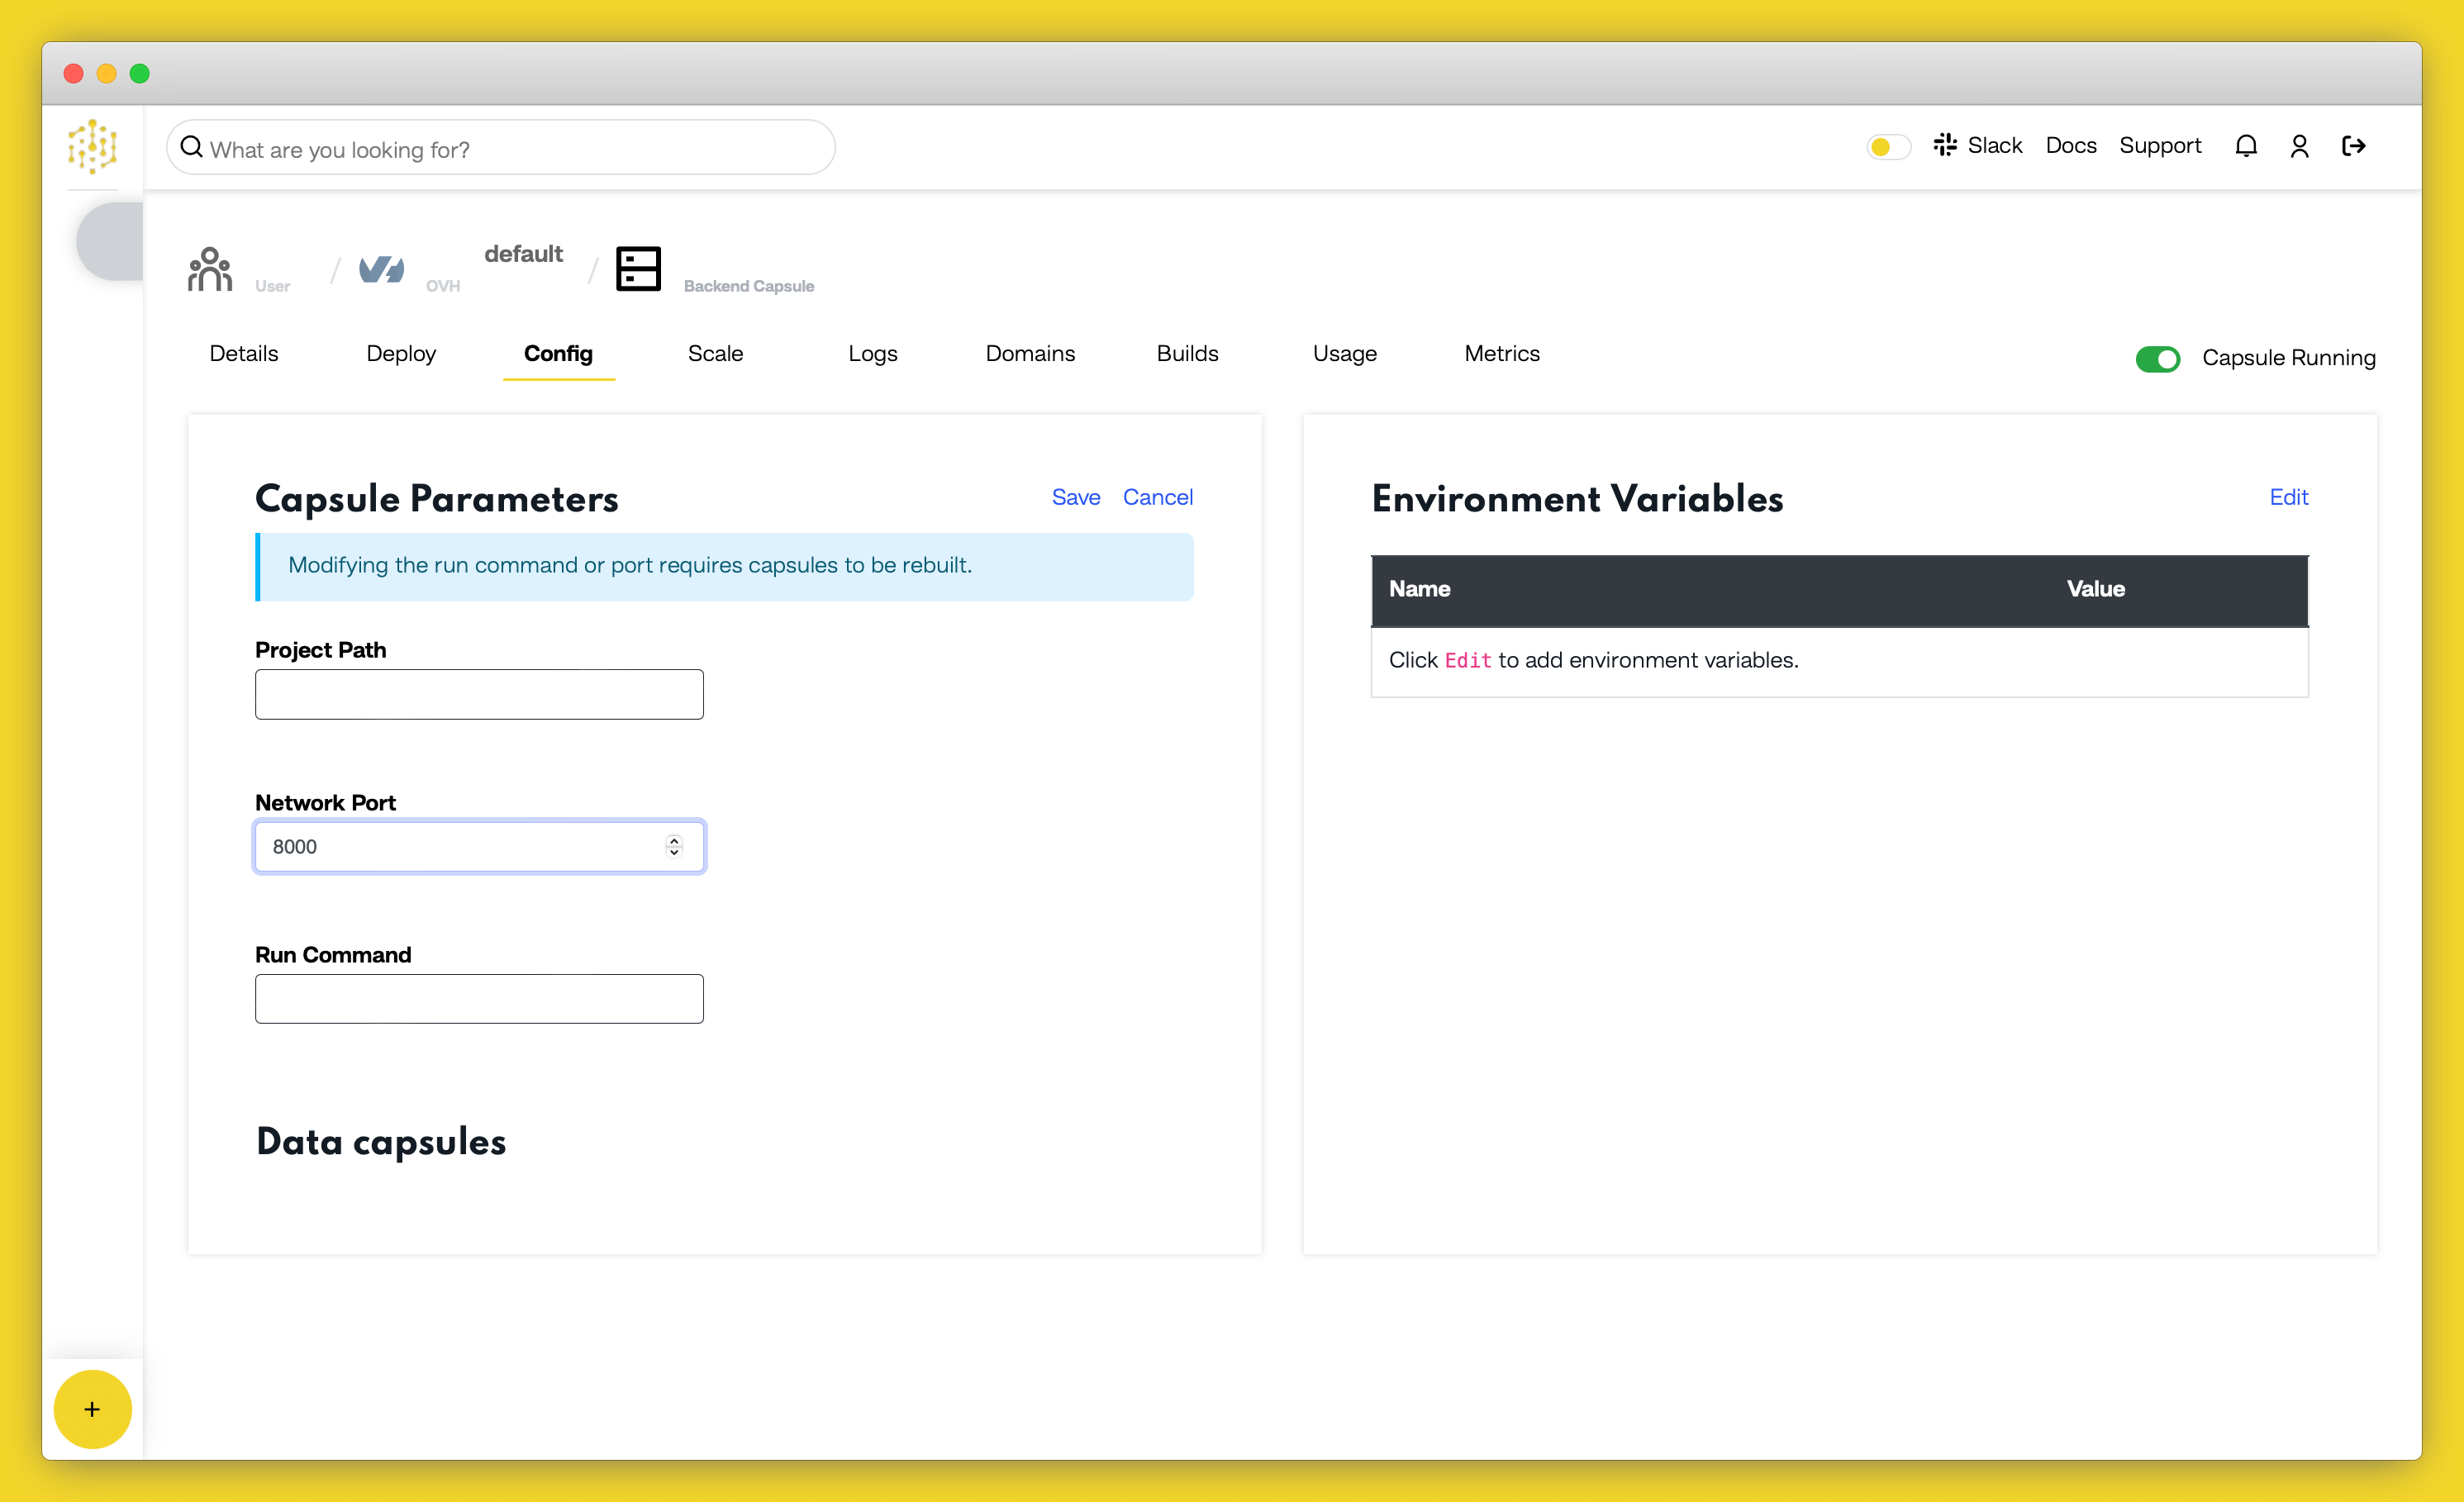
Once the build is complete, navigate to the “Configure” tab and scroll down to the “Network Port” section. Enter “8000” as the port number and click on “Update Capsule”.
That’s it! Your “Hex Color Identifier” app should be live and fully functional now. You should now be able to query the
/api/color
route.

Table of content