Table of content
Python’s Pillow package provides support for image manipulation that we can leverage to create random graphic images.
In this tutorial, we’ll show you how to build a web application that creates images with rectangle graphics of different colors and sizes, and makes them available for download when requested by a user.
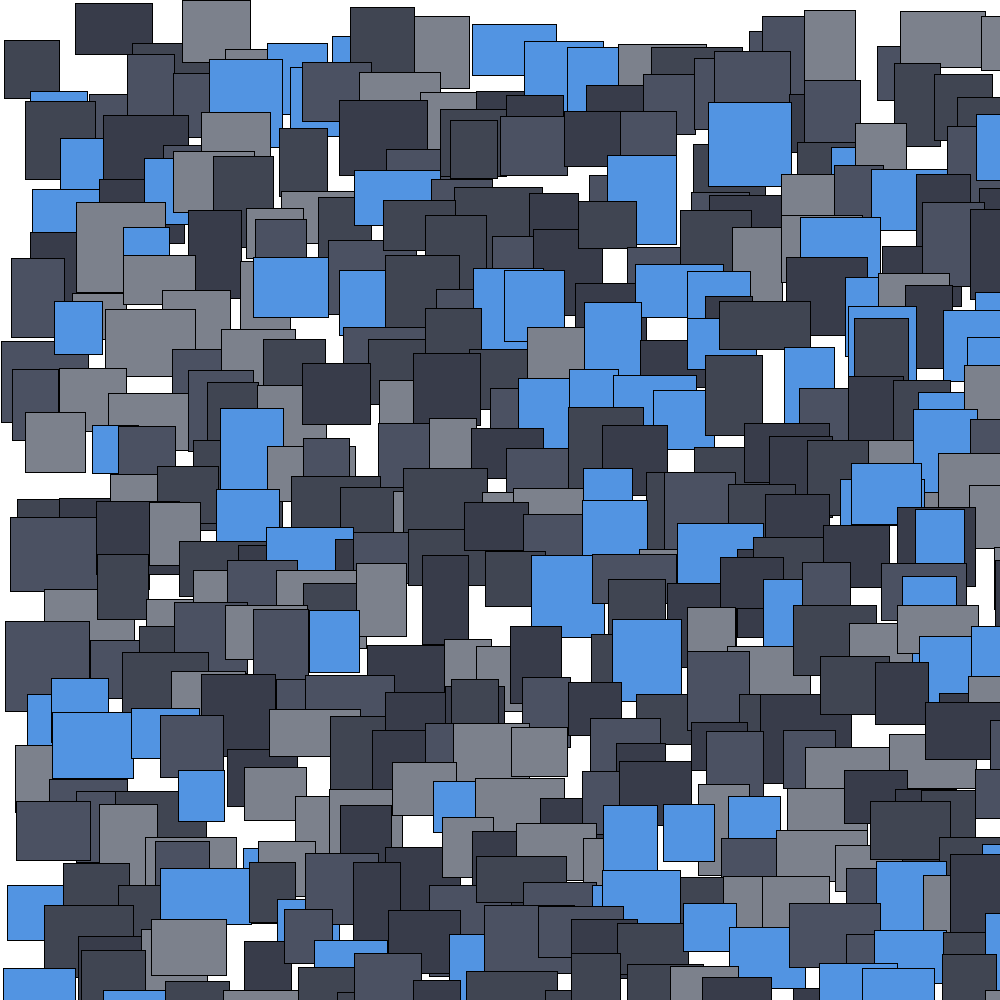
Here’s an example of a graphic image that can be created by the app we’ll build:
You can also add text to the generated images to create image covers and different marketing posts.
You will need the following to complete the tutorial and host your application on Code Capsules:
To begin, we need to create a project folder to house all our files.
In a terminal, navigate to the directory you’ll be keeping the application files in. Run the commands below to create the project folder and navigate into it.
mkdir generate-graphics
cd generate-graphics
Next, we’ll create a virtual environment, which will allow us to isolate the packages we need to run our application from the computer system. Run the command below from a terminal in the project root folder to create a virtual environment called
env
:
python -m venv env
To activate the virtual environment, run one of the following commands, depending on your OS:
MacOS
source env/bin/activate
Windows
.\env\Scripts\activate
When you’ve activated the virtual environment, the name
env
will appear on the far left of your current line. This confirms that the activation was successful.

Now we can install dependencies our app needs to the environment. Run the command below from a terminal in the project root folder to install the packages we’ll need:
pip install flask pillow gunicorn
Let’s initialize a Git repository so that we can make use of version control throughout the course of this tutorial and keep track of our changes. Run the command
git init
to create a new empty repository in the project root folder.
The final set-up step is to link to GitHub. We’ll link our newly created local
git
repository to a remote one that we can deploy to Code Capsules from. The remote repository can be thought of as a mirror image of the local one, and we’ll update the remote repository when new code works as expected locally.
Head over to GitHub and create a new repository. You’ll be presented with instructions for linking your new remote repository to a local one. Go back to your terminal in the project root folder and run the command below, taking care to replace the
username
and
repository_name
with your own values.
git remote add origin git@github.com:username/repository_name.git
We can now start building our generative art app, and we’ll start with the frontend using Flask templates. Create an
app/templates
folder inside the project root folder and add a file named
home.html
to it. This file will contain the code for the landing page of our app. Populate it with the code below:
<!DOCTYPE html>
<html lang="en">
<head>
<meta content="width=device-width, initial-scale=1" name="viewport" />
<title>Generate Art without NFTs</title>
<link href="https://cdn.jsdelivr.net/npm/bootstrap@5.0.0-beta1/dist/css/bootstrap.min.css" rel="stylesheet"
integrity="sha384-giJF6kkoqNQ00vy+HMDP7azOuL0xtbfIcaT9wjKHr8RbDVddVHyTfAAsrekwKmP1" crossorigin="anonymous">
<!-- HTMX -->
<script src="https://unpkg.com/htmx.org@1.5.0"></script>
<style>
@media (min-width: 1000px) {
.button-row{
width: 50%
}
.image-frame {
width: 50%;
height: 50%;
}
p {
font-size: 20px;
padding: 0 180px;
}
}
@media (max-width: 1000px) {
.button-row{
width: 80%
}
.image-frame {
width: 100%;
height: 100%;
}
p {
font-size: 20px;
padding: 0 12px;
}
button{
width: 115px;
height: 87px;
margin: 0 10px;
}
}
body{
padding: 20px;
text-align: center;
}
img{
width: 75%;
height: 75%;
}
.image-frame{
border: 10px solid #213e49;
border-radius: 5px;
margin: auto;
margin-top: 20px;
}
.button-row{
display: flex;
flex-direction: row;
justify-content: space-around;
margin: auto;
margin-top: 25px;
}
</style>
</head>
<!-- Insert body code here -->
</html>
The
<link>
tag in the
<head>
section links to Bootstrap to simplify styling for common HTML elements like forms and buttons, while the
<style>
tag adds any extra unique styling and responsiveness we might need.
The
<meta>
tag in the
<head>
section provides the relevant metadata required to allow our
@media
queries to give our app responsiveness, making it readable on both large and smaller screens.
We’ll be using HTMx to send requests to generate a new graphic image, and we include it in the project by adding the
<script>
tag below the
<link>
tag. HTMx makes it possible to add interactivity to traditional multipage HTML sites without any of the extra complexity that’s introduced by popular single page frameworks.
Next, we’ll add the code for the body of the home page. Copy and paste the snippet below underneath the closing
</head>
tag in
home.html
:
<body>
<h1>Generate Art</h1>
<p>The art below is unique. It will never be seen again if you press "I hate this art, make me another". If you like it, you can download it and keep it. No need to get blockchain or NFTs or Open Sea involved: just a few lines of Python. Read our tutorial <a href="https://codecapsules.io/docs/tutorials/generative-art/">Build a Generative Art Application with Pillow, Flask and HTMx</a> to build your own.</p>
<div id="image-update-div">
<div class="image-frame">
<img id="new-image" alt="Image could not be found." src="data:image/png;base64,{{image}}" />
</div>
<div class="button-row">
<a download="art.png" href="data:image/png;base64,{{image}}">
<button class="btn btn-primary">Download</button></a>
<button class="btn btn-primary" hx-target="#image-update-div" hx-get="/generate-another" hx-swap="outerHTML">
I hate this art, make me another
</button>
</div>
</div>
</body>
Our app has two main features: it allows a user to generate new graphic images and to download them. The “I hate this art, make me another” button sends a request to the
/generate-another
route, which handles the creation of a new graphic image. When the app generates an image a user likes, the user can download that image by pressing the “Download” button. This download button has access to the newly created graphic image.
The
<img>
tag below the page header takes in a Base64 string as input and renders the corresponding graphic image to the screen. The download button also accesses this Base64 string to allow for the download of the image. We’ve assigned an
id
value of
"image-update-div"
to the div that contains both this image and the download button to allow us to use HTMx to update the image when a user clicks the “I hate this art, make me another” button. You’ll notice three HTMx attributes in the button’s
src
code, which is located at the bottom of the page. Let’s go over them and see what each one is responsible for:
hx-target
: This attribute accepts an
id
value prefixed by a
#
. It lets HTMx know which element to swap on a successful request.hx-get
: The
hx-get
attribute sends a
GET
request to the specified URL. If we wanted to send a
POST
request, we would have used the
hx-post
attribute instead.hx-swap
: This attribute tells HTMx how to swap out the old with the new elements after a successful request. In our case, we’ve used the value of
"outerHTML"
to specify that the entire
<div>
element be replaced by the response. Other accepted values include but are not limited to
innerHTML
,
beforeend
, and
afterend
.You can view other HTMx attributes and their functionalities in this HTMx reference guide.
The backend contains the interesting bits of our app’s logic. Here, we will see the logic for the two routes that are called in the frontend.
Create a file named
run.py
in the project root folder and populate it with the code below:
from app import app
if __name__ == "__main__":
app.run()
The code above is responsible for starting our application by calling Flask’s
run
method.
app
ModuleLet’s go ahead and initialize the
app
module we imported in the previous code snippet. Create an
__init__.py
file inside the
/app
folder and populate it with the code below:
from flask import Flask
app = Flask(__name__)
from app import views
In the code above, we create a Flask
app
object and import the app views we’ll add later on.
The next step is to add logic for the graphic image generation. Create a file named
palettes.json
in the project root folder and populate it with the code in this file. This is a list of 2D arrays containing random numbers that represent different color palettes. We sourced these color palettes from Color-Hex. Our app will pick randomly from these each time a user chooses to generate a new image.
Next, let’s create the file that will make use of the palettes we defined. In the
/app
folder, add a file named
make_squares.py
and populate it with the code below:
import base64
import json
import random
import io
from PIL import Image, ImageDraw
BLACK = (0, 0, 0, 255)
palettes = []
with open("palettes.json") as f:
ps = json.load(f)
for p in ps:
palette = [tuple(x) for x in p]
palettes.append(palette)
def create(save_path):
img = Image.new("RGBA", (1000, 1000), (255, 255, 255, 255))
d = ImageDraw.Draw(img)
num_recs = random.randrange(20, 40)
min_size = random.randrange(20, 50)
max_size = min_size + random.randrange(20, 100)
colors = random.choice(palettes)
stroke_width = random.randrange(1, 5)
xoffset = 0
yoffset = 0
for row in range(num_recs):
for rec in range(num_recs):
topleftx = random.randrange(0, 50) + xoffset
toplefty = random.randrange(0, 50) + yoffset
bottomrightx = topleftx + random.randrange(min_size, max_size)
bottomrighty = toplefty + random.randrange(min_size, max_size)
color = random.choice(colors)
xoffset += 50
r = d.rectangle(
[topleftx, toplefty, bottomrightx, bottomrighty],
fill=color,
outline=BLACK,
width=stroke_width,
)
yoffset += 50
xoffset = 0
img.save(save_path)
image = io.BytesIO()
img.save(image, "PNG")
image.seek(0)
img_b64 = base64.b64encode(image.getvalue()).decode()
return img_b64
The module defined in the code snippet above leverages the Pillow package to create new random images using the palettes we defined in the
palettes.json
file. In lines 10-15, we open the
palettes.json
file and add its contents to a local array named
palettes
that we’ll use in the
create()
method.
The
create()
method is responsible for generating Base64 image strings for new random images. It does so by first creating a blank canvas and adding a random number of rectangles of different sizes and colors. When the image has been created, it’s returned as a Base64 image string, which is more efficient to transfer between our app modules.
The last step in building our backend is to add the application views. To achieve this, create a file named
views.py
inside the
/app
folder and populate it with the code below:
from app import app
from flask import render_template, send_file, request
from app.make_squares import create
import io, base64
from PIL import Image
import os
tmp_file_path = "/tmp/imgnew.png"
@app.route("/", methods=["GET"])
def index():
graphic_image = create(tmp_file_path)
return render_template("home.html", image=graphic_image)
@app.route("/generate-another", methods=["GET"])
def generate_another():
graphic_image = create(tmp_file_path)
response = f"""
    <div id="image-update-div">
      <div class="image-frame">
      <img id="new-image" src="data:image/png;base64,{graphic_image}" />
      </div>
      <div class="button-row">
        <a download="art.png" href="data:image/png;base64,{graphic_image}">
          <button class="btn btn-primary">Download</button></a>
        <button class="btn btn-primary" hx-target="#image-update-div" hx-get="/generate-another" hx-swap="outerHTML">
          I hate this art, make me another
        </button>
      </div>
    </div>
    """
return response
At the top of the file, we import the
create
method from the
make_squares
module, since our views need to return the Base64 image string when responding.
The
index
route is called when the app is started, and it calls the
create()
method to generate a Base64 image string and returns it in the
home.html
template. The
/generate-another
route is called when a user clicks on the “I hate this art, make me another” button. It saves the new graphic image to the
/tmp
folder before returning it as part of an HTML response, since the request is triggered by HTMx. This allows our app to only refresh the image element, and download reference, and not the whole page, like in the case of rendering templates.
Our generate art app is now complete, and we are only left with adding the files necessary for deployment before we can publish it.
requirements.txt
We’ll start by creating a Procfile, which tells Code Capsules how to run our app. Create a file named
Procfile
in the project root folder and add the following code to it:
web: gunicorn run:app
We use the
gunicorn
server to run our app in production, since the built-in Flask server is less secure and only suitable to be used in a development environment.
Next, we need to generate a
requirements.txt
file to tell Code Capsules which packages need to be installed first before our app can start. Run the command below from a terminal while in the project’s root folder to create a
requirements.txt
file.
pip freeze –local > requirements.txt
.gitignore
Before we push our local changes to the remote repository, we must stop tracking our virtual environment folder. Create a file named
.gitignore
in the project root folder and add the code below to it:
/env
Let’s add and commit all the files we created to our local repository and then push them to the remote one. Do this by running the commands listed below in a terminal while in the project’s root folder:
git add -A
git commit -m "Added generative graphics files"
git push -u origin main
Your remote repository will now be up-to-date with your local one.
The final step is to deploy our app. Log into your Code Capsules account and link your remote GitHub repository to Code Capsules. Create a Backend Capsule and deploy the app there. You can follow this deployment guide to see how to do this in greater detail.
That’s it! Your “Generate Art” app should be live and fully functional now.
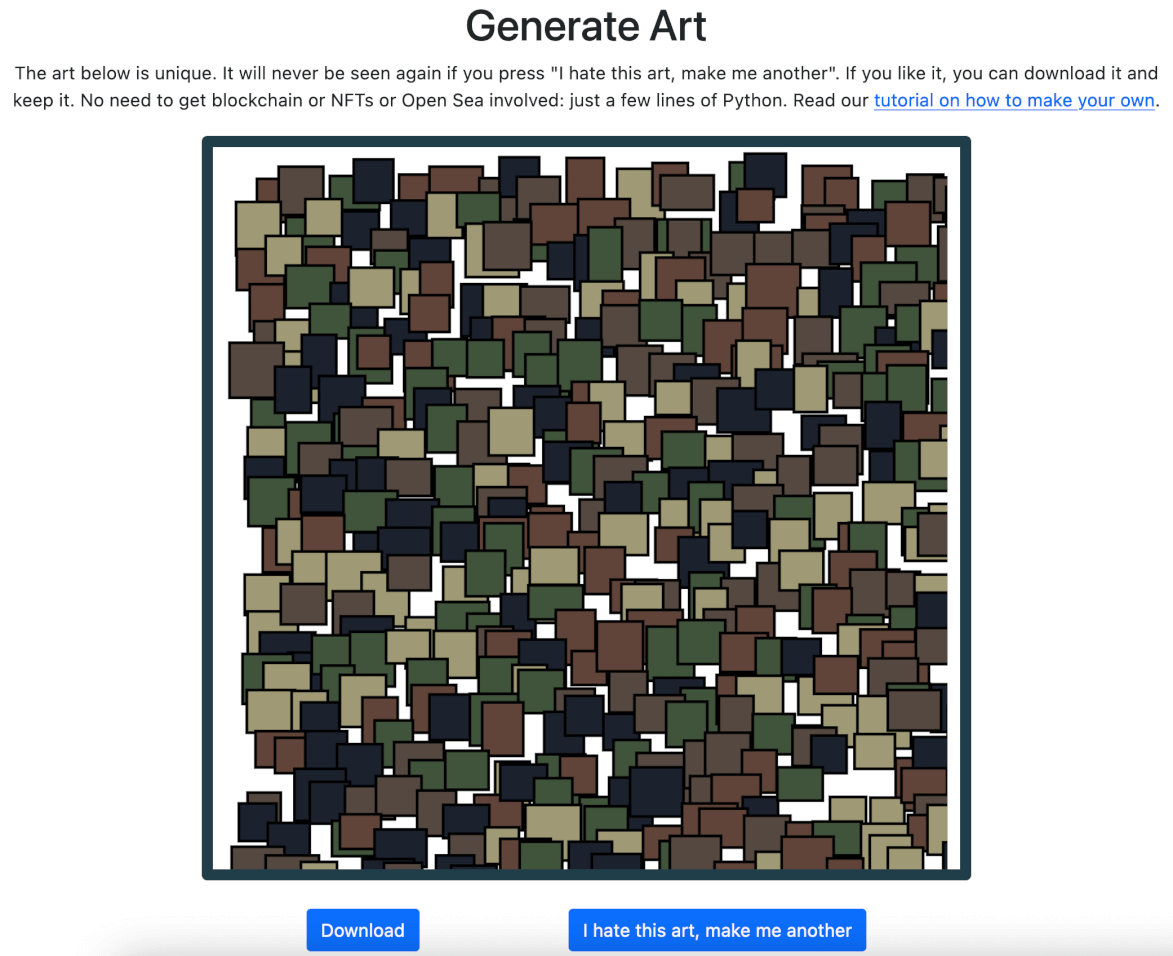
Table of content