
Table of content
Static websites allow you to deliver simple content to people over the web. Setting up a static page that demonstrates your business, product, or skills doesn’t have to be complex. Skip the learning curve surrounding server management and focus on getting out quality content with Code Capsules.
In this tutorial, we’ll create a front-end, which is content that visitors see when they load your website. Code Capsules is a service that hosts front-end (and back-end) code online, so we can use it to host a simple portfolio website.
With Code Capsules you can:
git push
.First, we’ll take a look at choosing a portfolio template and personalizing it. After, we’ll push the portfolio to a GitHub repository and connect Code Capsules to GitHub to make the portfolio visible to the world.
Hosting a portfolio on Code Capsules requires no previous knowledge about servers or front-end development. To personalize a portfolio template and deploy it to Code Capsules, we’ll need:
HTML5 UP provides HTML site templates for free. We’ll use the Massively template – an easy to modify and elegant HTML template.
To get started:
This last step is necessary for hosting a web-page on Code Capsules. The file structure should look something like this:
myPortfolio
portFolder
+ assets
+ images
+ generic.html
+ elements.html
+ index.html
+ LICENSE.txt
+ README.txt
The
index.html
file contains all the HTML code for our portfolio – any changes to this code will result in a change to the portfolio. To view changes, you make as we begin to modify the template, double-click the
index.html
file to open the portfolio in a web-browser.
This tutorial will follow the creation of a portfolio for a front-end developer. We’ll take a closer look at some things you wouldn’t want in a portfolio. The next few sections will cover how to modify the following elements of the portfolio template:
Let’s start with the title and subheading of the portfolio. Open the index.html file in your text editor. You’ll see the following block of HTML near the top of the file:
<head>
<title>Massively by HTML5 UP</title>
<meta charset="utf-8" />
<meta name="viewport" content="width=device-width, initial-scale=1, user-scalable=no" />
<link rel="stylesheet" href="assets/css/main.css" />
<noscript><link rel="stylesheet" href="assets/css/noscript.css" /></noscript>
</head>
Change the text within the
<title>
tags to whatever you’d like, such as: “My Portfolio”. This is what will appear in search engines and browser tabs.
Now we’ll change the text that displays at the top of the portfolio. Scroll down in your text editor, until you see the following code:
<!-- Intro -->
<div id="intro">
<h1>This is<br />
Massively</h1>
<p>A free, fully responsive HTML5 + CSS3 site template designed by <a href="https://twitter.com/ajlkn">@ajlkn</a> for <a href="https://html5up.net">HTML5 UP</a><br />
and released for free under the <a href="https://html5up.net/license">Creative Commons license</a>.</p>
<ul class="actions">
<li><a href="#header" class="button icon solid solo fa-arrow-down scrolly">Continue</a></li>
</ul>
</div>
<!-- Header -->
<header id="header">
<a href="index.html" class="logo">Massively</a>
</header>
<h1>...</h1>
tags – this is the large text that displays at the top of the portfolio.<p>...</p>
tags to edit the subheading of the portfolio – the
<br />
tags and the
<a>...</a>
tags are safe to delete.<!-- Header -->
section. You can also delete this button by deleting the three lines wrapped in
<header>...</header>
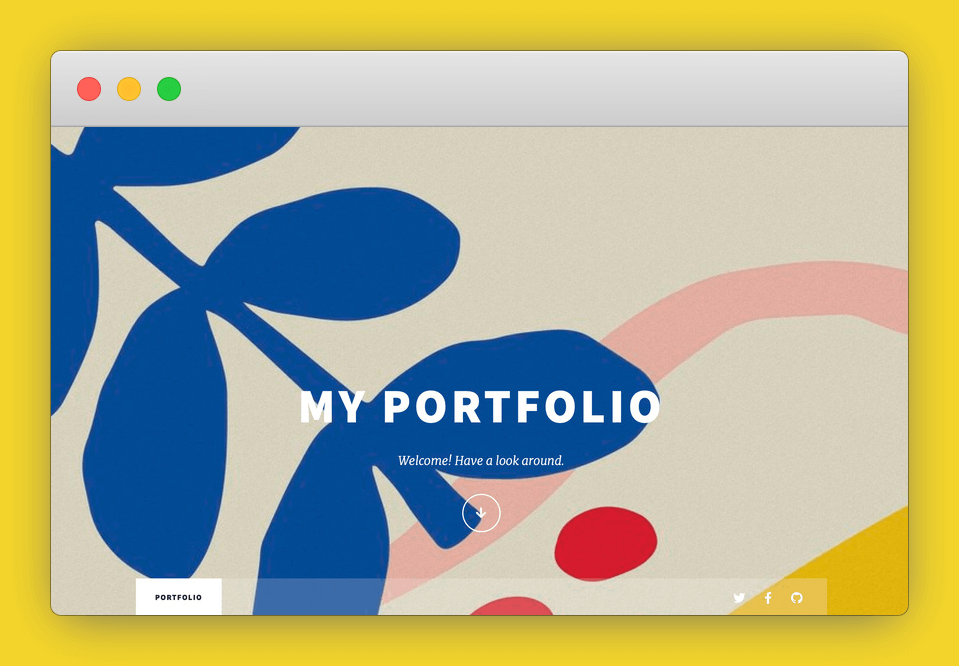
tags.Save the file and open it in a web browser. Our portfolio should now look something like this:
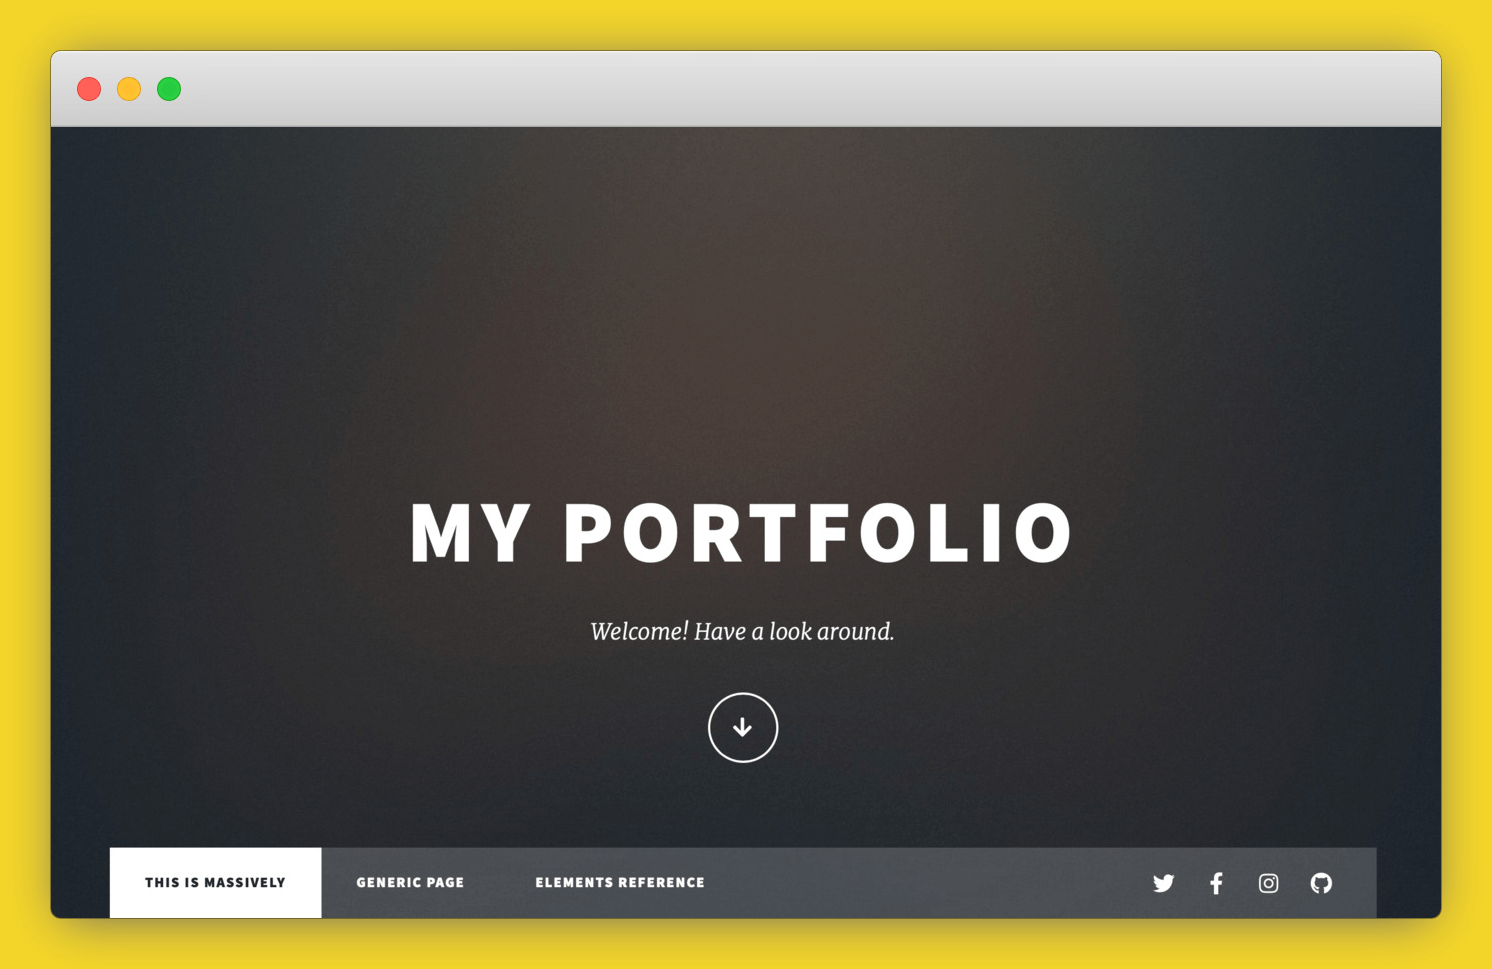
Next, we’ll take a look at deleting the date entries above each portfolio piece, removing the “Generic Page” and “Elements Reference” tabs, and modifying the social media links.
The default layout for Massively is designed for a blog or news website containing articles. You may not need dates on a portfolio page. To delete the dates above each article entry, locate and delete all lines beginning with
<span class="date"...>
.
To make this a single-page portfolio, we can delete the “Generic Page” and “Elements Reference” tabs by finding and deleting these lines:
<li><a href="generic.html">Generic Page</a></li>
<li><a href="elements.html">Elements Reference</a></li>
While we’re at it, alter the title of the main tab by changing the “This is Massively” text found just above those lines:
<li class="active"><a href="index.html">This is Massively</a></li>
The code for social media accounts is located at the top and bottom of the index.html file. Starting at the top, find this block of code:
<ul class="icons">
<li><a href="#" class="icon brands fa-twitter"><span class="label">Twitter</span></a></li>
<li><a href="#" class="icon brands fa-facebook-f"><span class="label">Facebook</span></a></li>
<li><a href="#" class="icon brands fa-instagram"><span class="label">Instagram</span></a></li>
<li><a href="#" class="icon brands fa-github"><span class="label">GitHub</span></a></li>
</ul>
Delete any social media account you don’t need. Say you don’t have an Instagram account, you would delete the following line to remove the Instagram link:
<li><a href="#" class="icon brands fa-instagram"><span class="label">Instagram</span></a></li>
If you’d like to link your social media accounts, enter the account link in place of the
#
in
href="#"
. For example, to link a Twitter account, you’d edit the Twitter line like so:
<li><a href="https://twitter.com/your_username" class="icon brands fa-twitter"><span class="label">Twitter</span></a></li>
The social media code at the bottom of the
index.html
is nearly identical – follow this same process to edit the code at the bottom.
In this section, we’ll:
1. Remove the contact form found at the bottom of the portfolio by deleting the following code:
<section>
<form method="post" action="#">
<div class="fields">
<div class="field">
<label for="name">Name</label>
<input type="text" name="name" id="name" />
</div>
<div class="field">
<label for="email">Email</label>
<input type="text" name="email" id="email" />
</div>
<div class="field">
<label for="message">Message</label>
<textarea name="message" id="message" rows="3"></textarea>
</div>
</div>
<ul class="actions">
<li><input type="submit" value="Send Message" /></li>
</ul>
</form>
</section>
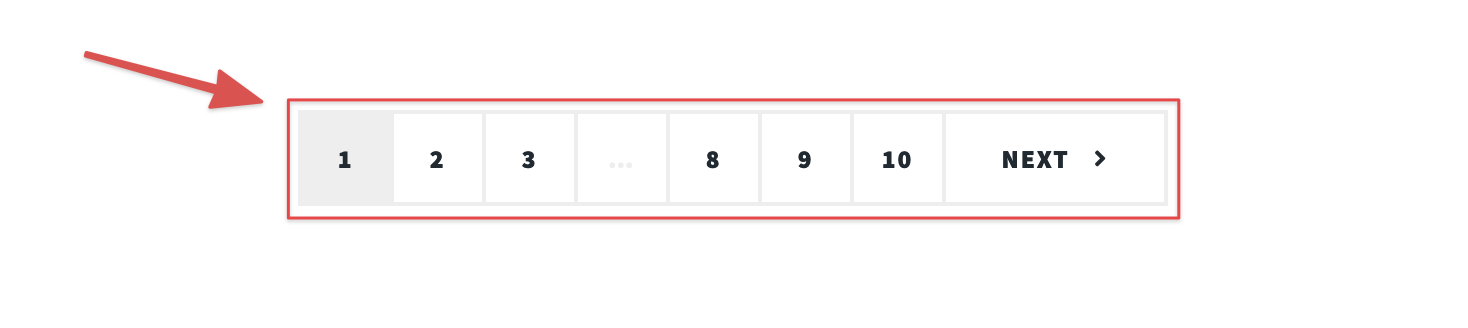
2. Remove pagination by deleting:
<footer>
<div class="pagination">
<!--<a href="#" class="previous">Prev</a>-->
<a href="#" class="page active">1</a>
<a href="#" class="page">2</a>
<a href="#" class="page">3</a>
<span class="extra">…</span>
<a href="#" class="page">8</a>
<a href="#" class="page">9</a>
<a href="#" class="page">10</a>
<a href="#" class="next">Next</a>
</div>
</footer>
3. To delete specific contact information sections (the address section is shown below), delete the
<section>
tag, all the information within that tag, and the corresponding
</section>
tag.
<section class="alt">
<h3>Address</h3>
<p>1234 Somewhere Road #87257<br />
Nashville, TN 00000-0000</p>
</section>
If you’d like to personalize your contact information instead, edit the text within the
<h3>...</h3>
tags and the
<p>...</p>
tags.
Our portfolio is almost complete – we just need to personalize the actual portfolio pieces – customizing the images, button links, and other text. Let’s start with the images.
Gather any images you’d like to replace with the default images. Then, place your images in the
images
directory, located in the same directory as the
index.html
file.
You can swap images by finding lines wrapped in
<img.../>
tags, like the below line.
<img src="images/pic01.jpg" alt="" />
images
is the name of the directory where you placed your image. To change the image, replace the text “pic01.jpg” with the name and file extension of your desired image.
Replace the
bg.png
image in the
images
folder to replace the background image for the website.
Once we’ve replaced the images, we should change the text for each portfolio entry. Find code blocks wrapped in
<article>...</article>
tags, such as:
<article>
<header>
<h2><a href="#">Sed magna<br />
ipsum faucibus</a></h2>
</header>
<a href="#" class="image fit"><img src="images/pic02.jpg" alt="" /></a>
<p>Donec eget ex magna. Interdum et malesuada fames ac ante ipsum primis in faucibus. Pellentesque venenatis dolor imperdiet dolor mattis sagittis magna etiam.</p>
<ul class="actions special">
<li><a href="#" class="button">Full Story</a></li>
</ul>
</article>
You can:
<h2>...</h2>
tags.<p>...</p>
tags.<li><a href="#" class="button">Full Story</a></li>
lines and replacing the “#” with a link to your portfolio piece. These buttons can link to more detail about your portfolio piece, say on a YouTube or Twitter account, by replacing the
"#"
with a link to the details.<li><a href="#" class="button">Full Story</a></li>
line.If you would like to remove a portfolio piece, delete the
<article>...</article>
tags and all the text wrapped in the tags.
Once finished with the portfolio, we need to push it to GitHub. After, the portfolio can be deployed to Code Capsules, making the portfolio publicly viewable.
If you already know how to push code from a local repository to a remote repository on GitHub, push the subdirectory containing the portfolio to GitHub and skip to the next section.
Otherwise, we’ll push (or send) our portfolio code to a GitHub remote repository (a place where your code stores on GitHub). Once complete, Code Capsules can connect to the repository and automatically “deploy” the portfolio online. Let’s create the remote repository now.
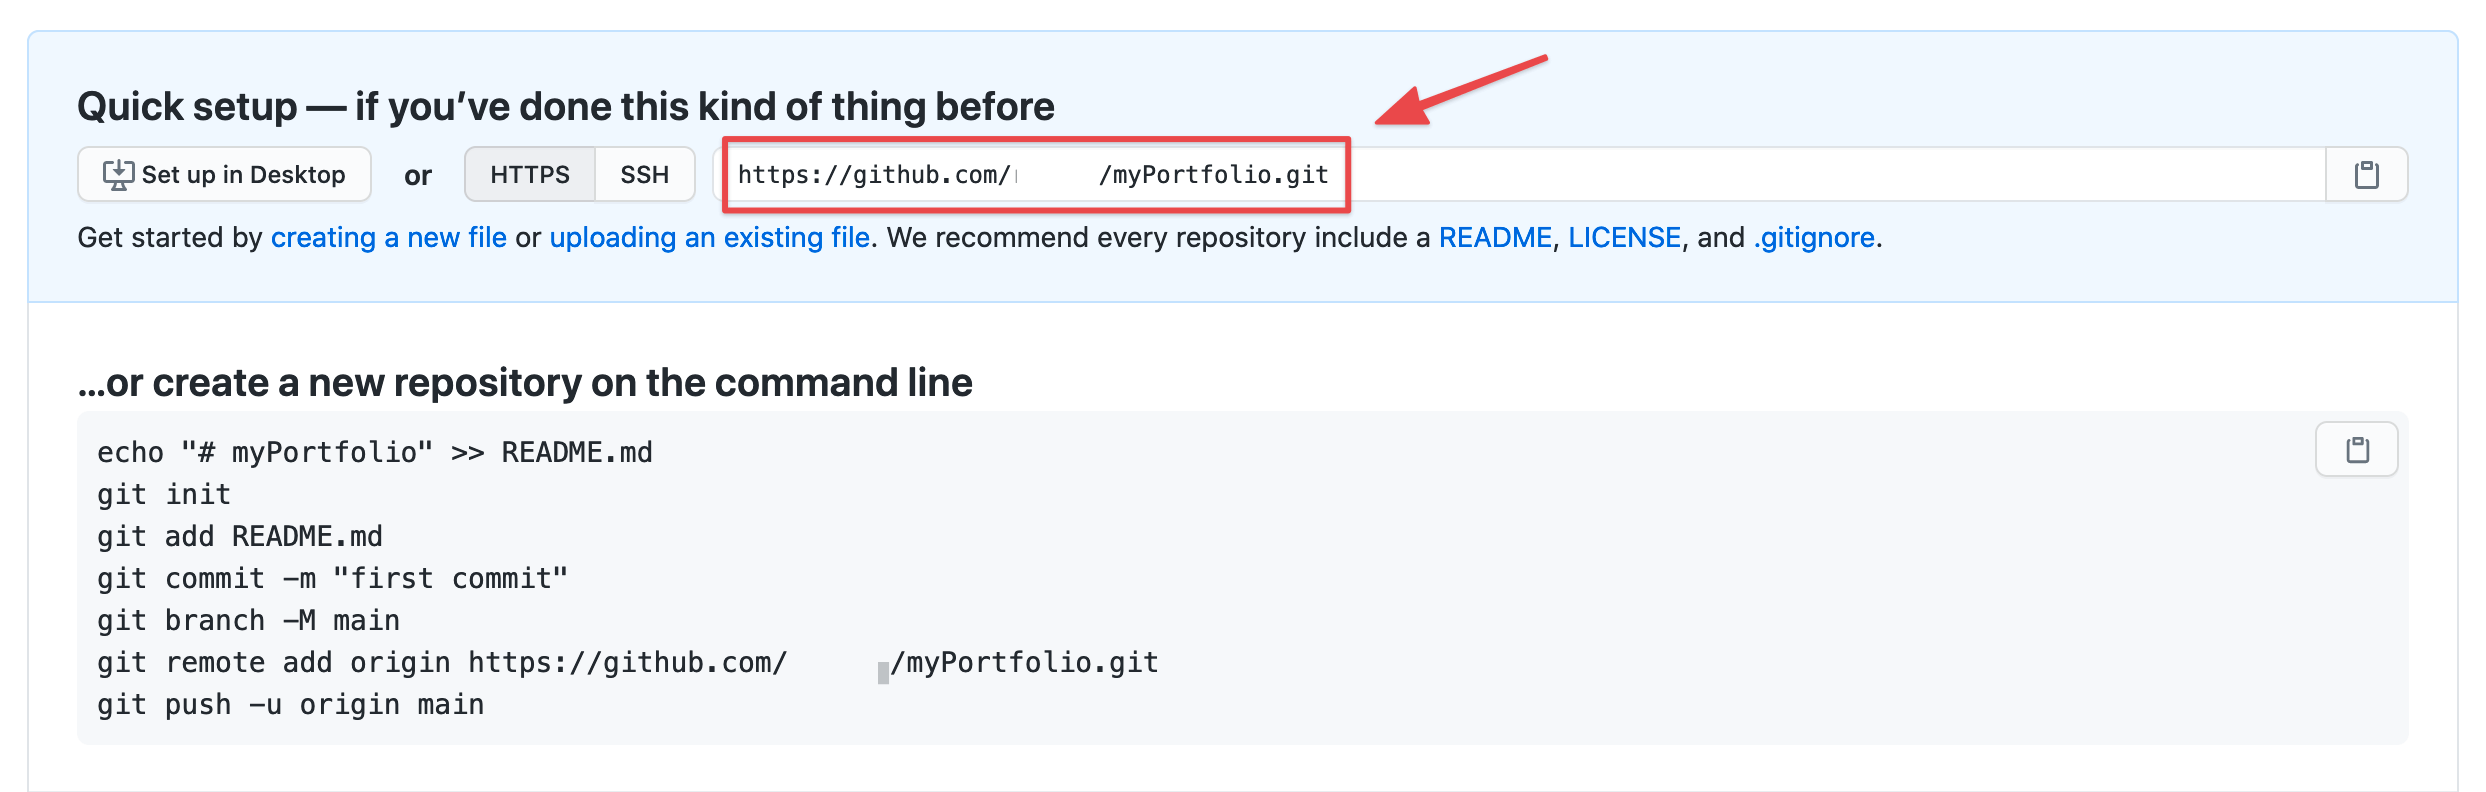
Follow the steps below to create a remote repository on GitHub:
We’ve created the remote repository – now we need to push the portfolio to GitHub.
Open a terminal and navigate to the top-level directory containing the portfolio. This directory should contain the subdirectory that has all the portfolio files.
If your file structure looked like:
myPortfolio
portFolder
+ assets
+ images
+ generic.html
+ elements.html
+ index.html
+ LICENSE.txt
+ README.txt
You would open the terminal in the
myPortfolio
directory. Not the
portFolder
directory.
Enter each command in order:
git init
git add .
git commit -m "First commit!"
git branch -M main
git remote add origin https://github.com/yourusername/yourrepositoryname.git
git push -u origin main
Replace the URL above with the URL to your remote repository (copied in the previous section).
Now you can see the portfolio code in your GitHub repository. Your repository should look similar to the below, where all of your portfolio code is contained in a subdirectory (in this image, the subdirectory is “portFolder”):

Now Code Capsules can host the portfolio.
A Capsule provides the server for hosting an application on Code Capsules.
Click the yellow
+
button, and follow the instructions below to create a Frontend Capsule:
To create a new Capsule for your space, follow the instructions below:
Code Capsules will automatically build your application when you’ve finished creating the Capsule.
Once your application is live, you can view the build log by selecting the “Deploy” tab and clicking the “View build log” link in the “Builds” section.
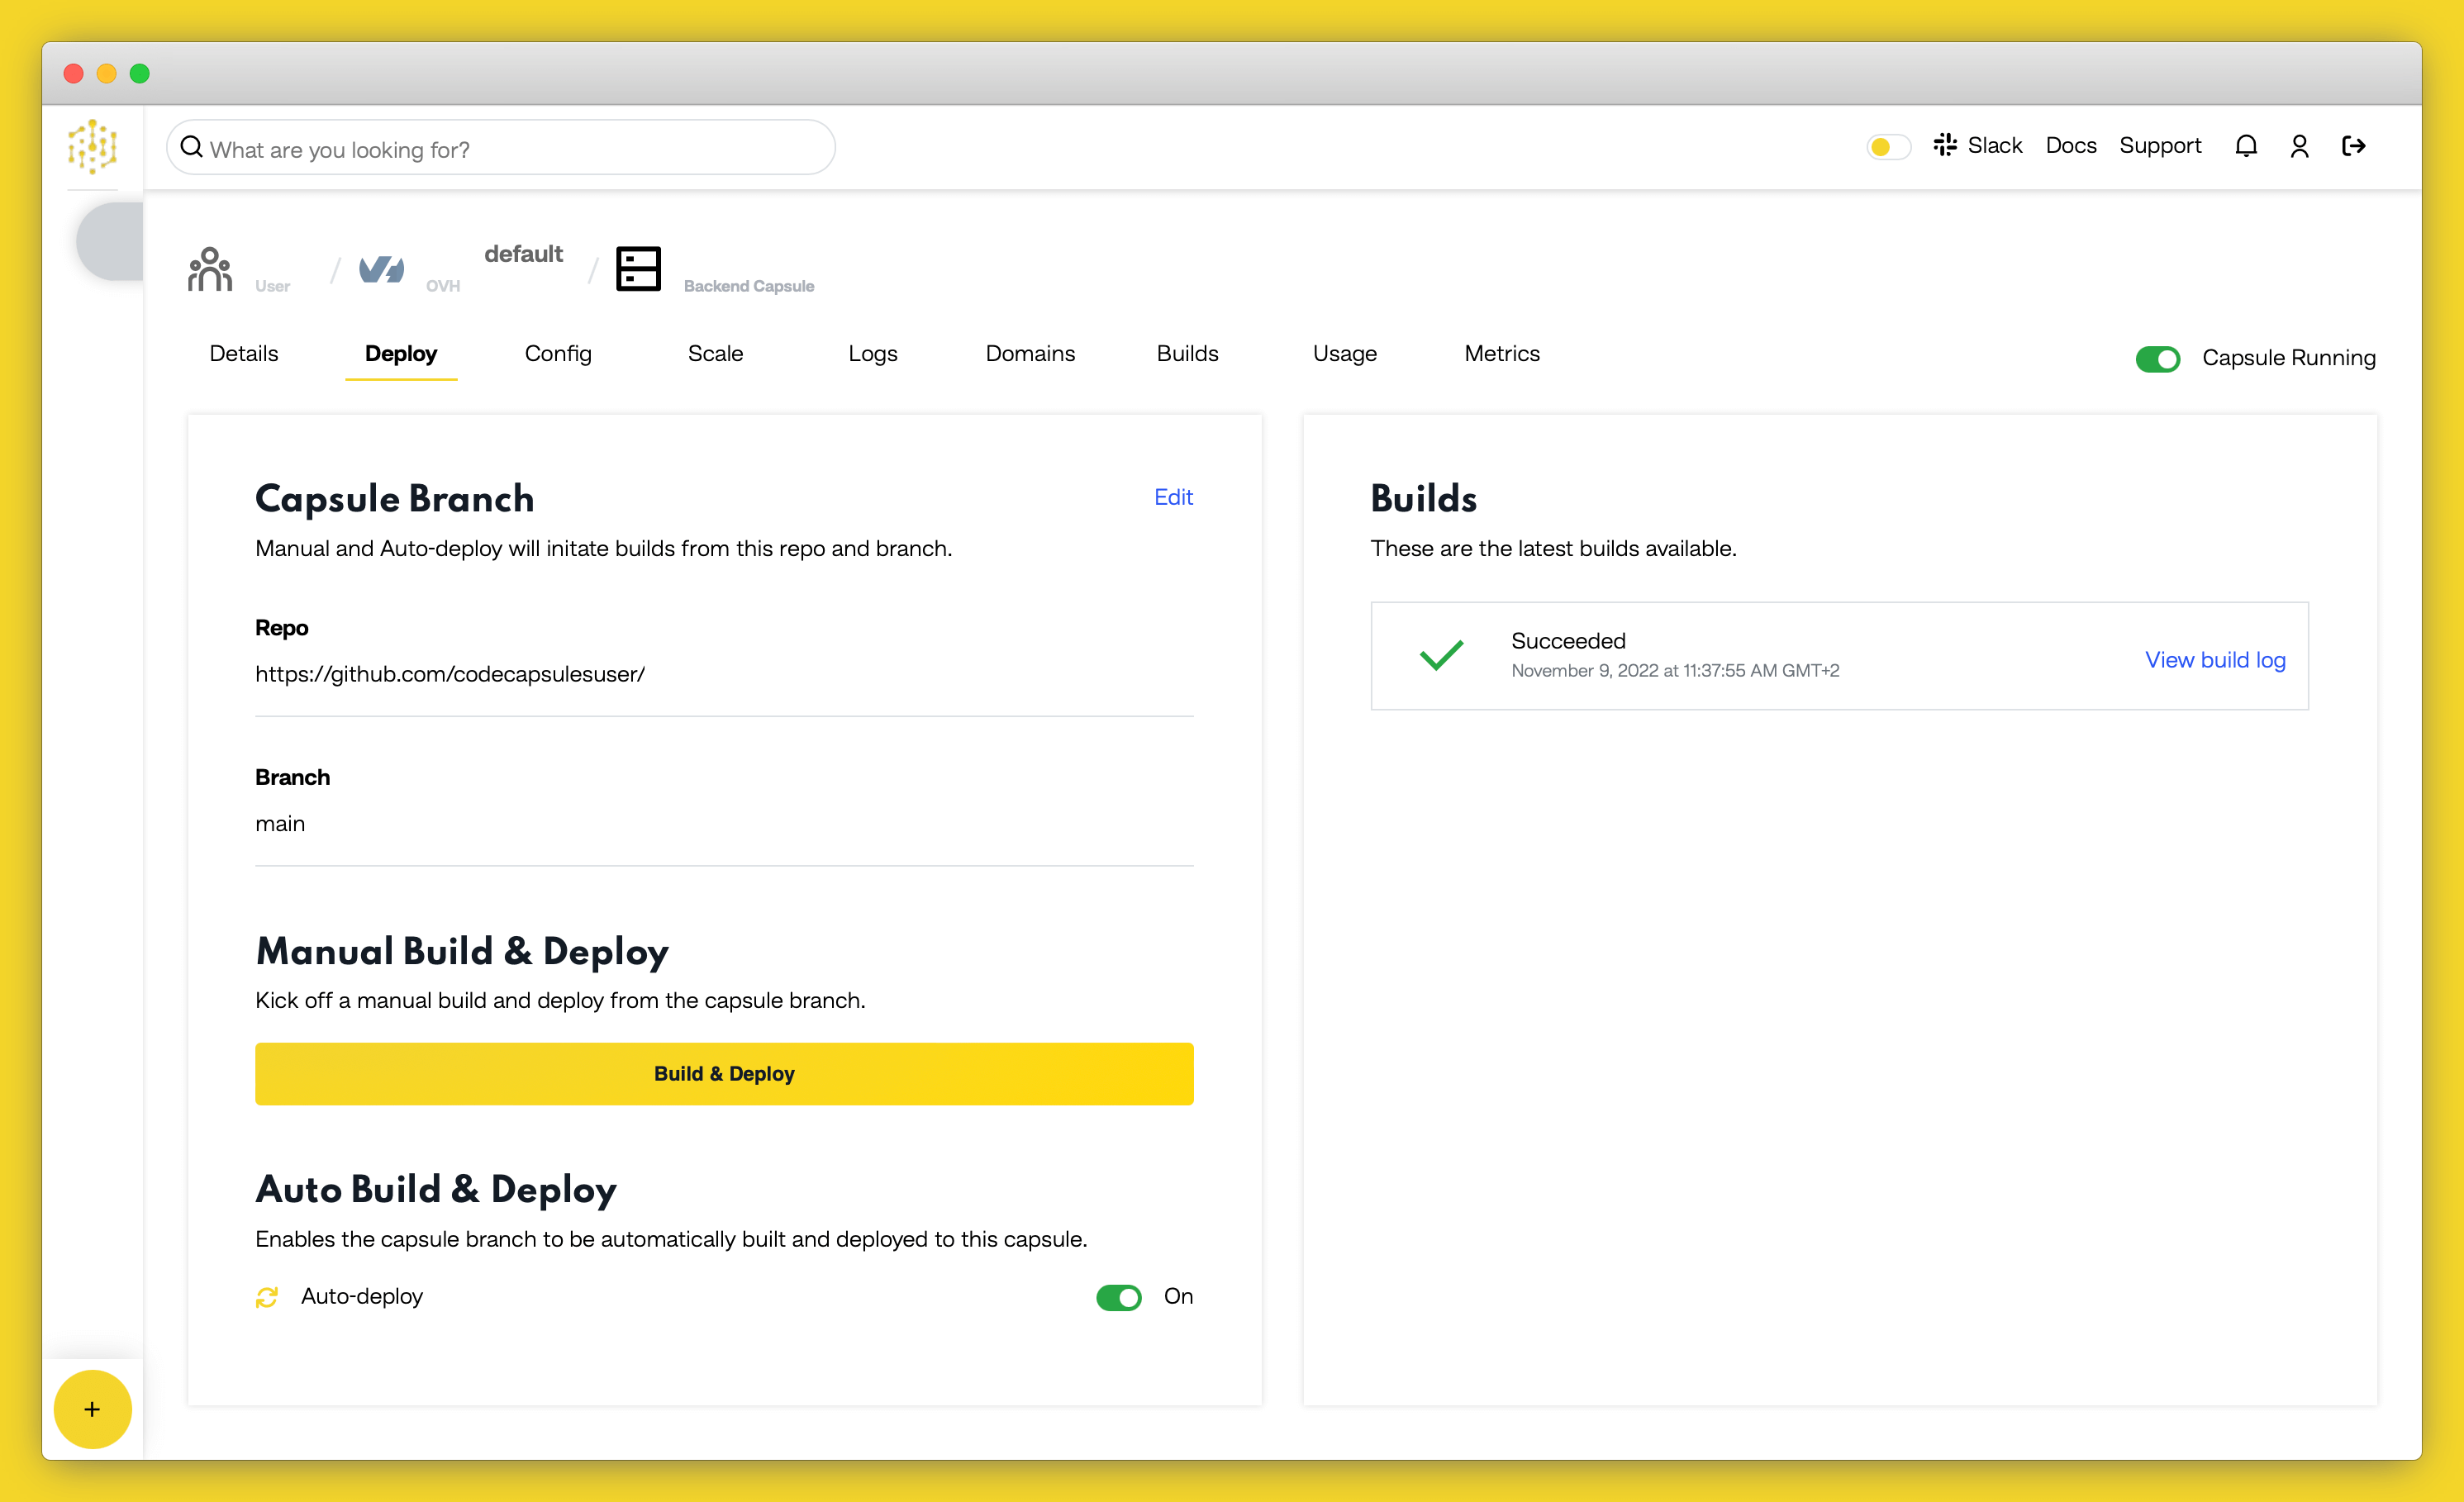
Once the build is complete, a URL link will appear in the URL section in the “Details” tab. Click the link and you should see your deployed application.
We’ve created a portfolio, pushed it to GitHub, and made the portfolio visible to the world. In the future, we’ll take a look at “Backend” capsules. These “Backend” capsules will enable us to host back-end code and provide additional functionality – like implementing the contact form we removed at the beginning of the tutorial.
We’ll also take a look at customizing your domain, so people can view your portfolio by typing something like
https://www.myportfolio.co.za
If any of the HTML code was confusing, or you’d like to learn more for further customization, check out this tutorial written by Mozilla.
For any help with GitHub, take a look at their documentation.
Table of content