
Table of content
A white-label app is a prebuilt program that offers customers the freedom to customize the application without the hassle of developing the core functionality.
These kinds of apps were developed to meet the need for shorter waiting times and lower costs in app development. Generic app bases like this only need to be created once and can then be sold to multiple customers. App developers can earn better returns on a single piece of software, while companies can implement branded white-label apps quickly without incurring high development costs.
Do the benefits of a white-label app seem appealing to you? (Who wouldn’t want to save money and time!) Then let’s take a look at the two options available.
Once you’ve decided to create a white-label app, you need to consider the level of customization your clients will need. There are two types of white-label applications: single tenant and multitenant. While one allows for greater customization, the other offers a more cost-effective and speedy solution. Let’s take a look at what each type has to offer.
A single-tenant application has its own independent database and server, dedicated solely to a single customer’s version of the application. This means that changes made to the app will not affect any other versions, allowing customers to have complete control over any updates made to the app, whether stylistic or architectural.
A single-tenant white-label app provides the customer with a template that speeds up the lengthy development process, along with the freedom to tailor the application to suit their needs. This template is the perfect foundation for customers who want to save money on building the basics but are willing to put in the resources to maximize customization and user experience.
For customers who are looking for a cost-effective way to get their applications out quickly, the multitenant option is the most suitable choice. Multitenant applications share a server and database across all versions. Customers can focus solely on the UI of their application to suit their brand while enjoying the benefits of a well-designed base architecture.
Multitenant applications provide a one-size-fits-all app architecture that cannot be changed on a per-customer basis. Customers can change stylistic elements of their own version of the app, but any changes to the UX or backend will update all versions.
This solution is cost-effective because it requires very little set-up or developer resources for the customer to get going. One downside to this model is that a shared database and server ultimately implies shared impact when it comes to issues or breaches.
Whether you choose to build a single-tenant or multitenant white-label app depends on what your clients need. If your client wants a highly customizable experience and has the budget, a single-tenant app still provides shorter development time and lower costs than a completely custom-built app. However, a multitenant app is a quick, affordable solution to serve many small- to medium-sized companies that want to get an MVP up and running and requires less technical set up, so you can take on more clients.
Once you have decided which type of white-label app you will build, you can begin to design your app. You will need to consider the core functionality of the app while keeping future customization in mind.
In the next section, we will walk through:
Let’s take a look at how you can create a single-tenant application and host multiple versions of it on Code Capsules. We will set up two versions of a white-label app, representing two different companies that have bought the app. We’ll customize each version of the app by editing environment variables to meet the branding requirements of the customers.
To edit, configure, and deploy both versions of our application, you will need the following:
To start, initialize a local Git repository and clone the starter code onto your local machine from your terminal with the following command:
git clone https://github.com/ritza-co/demo-htmx-express-white-label.git
This repo hosts an HTMX and Express app that works as a UI for a data store. To see the application, run the following commands from your terminal:
npm install
npm run start
Then go to
http://localhost:3005/
to see the app.

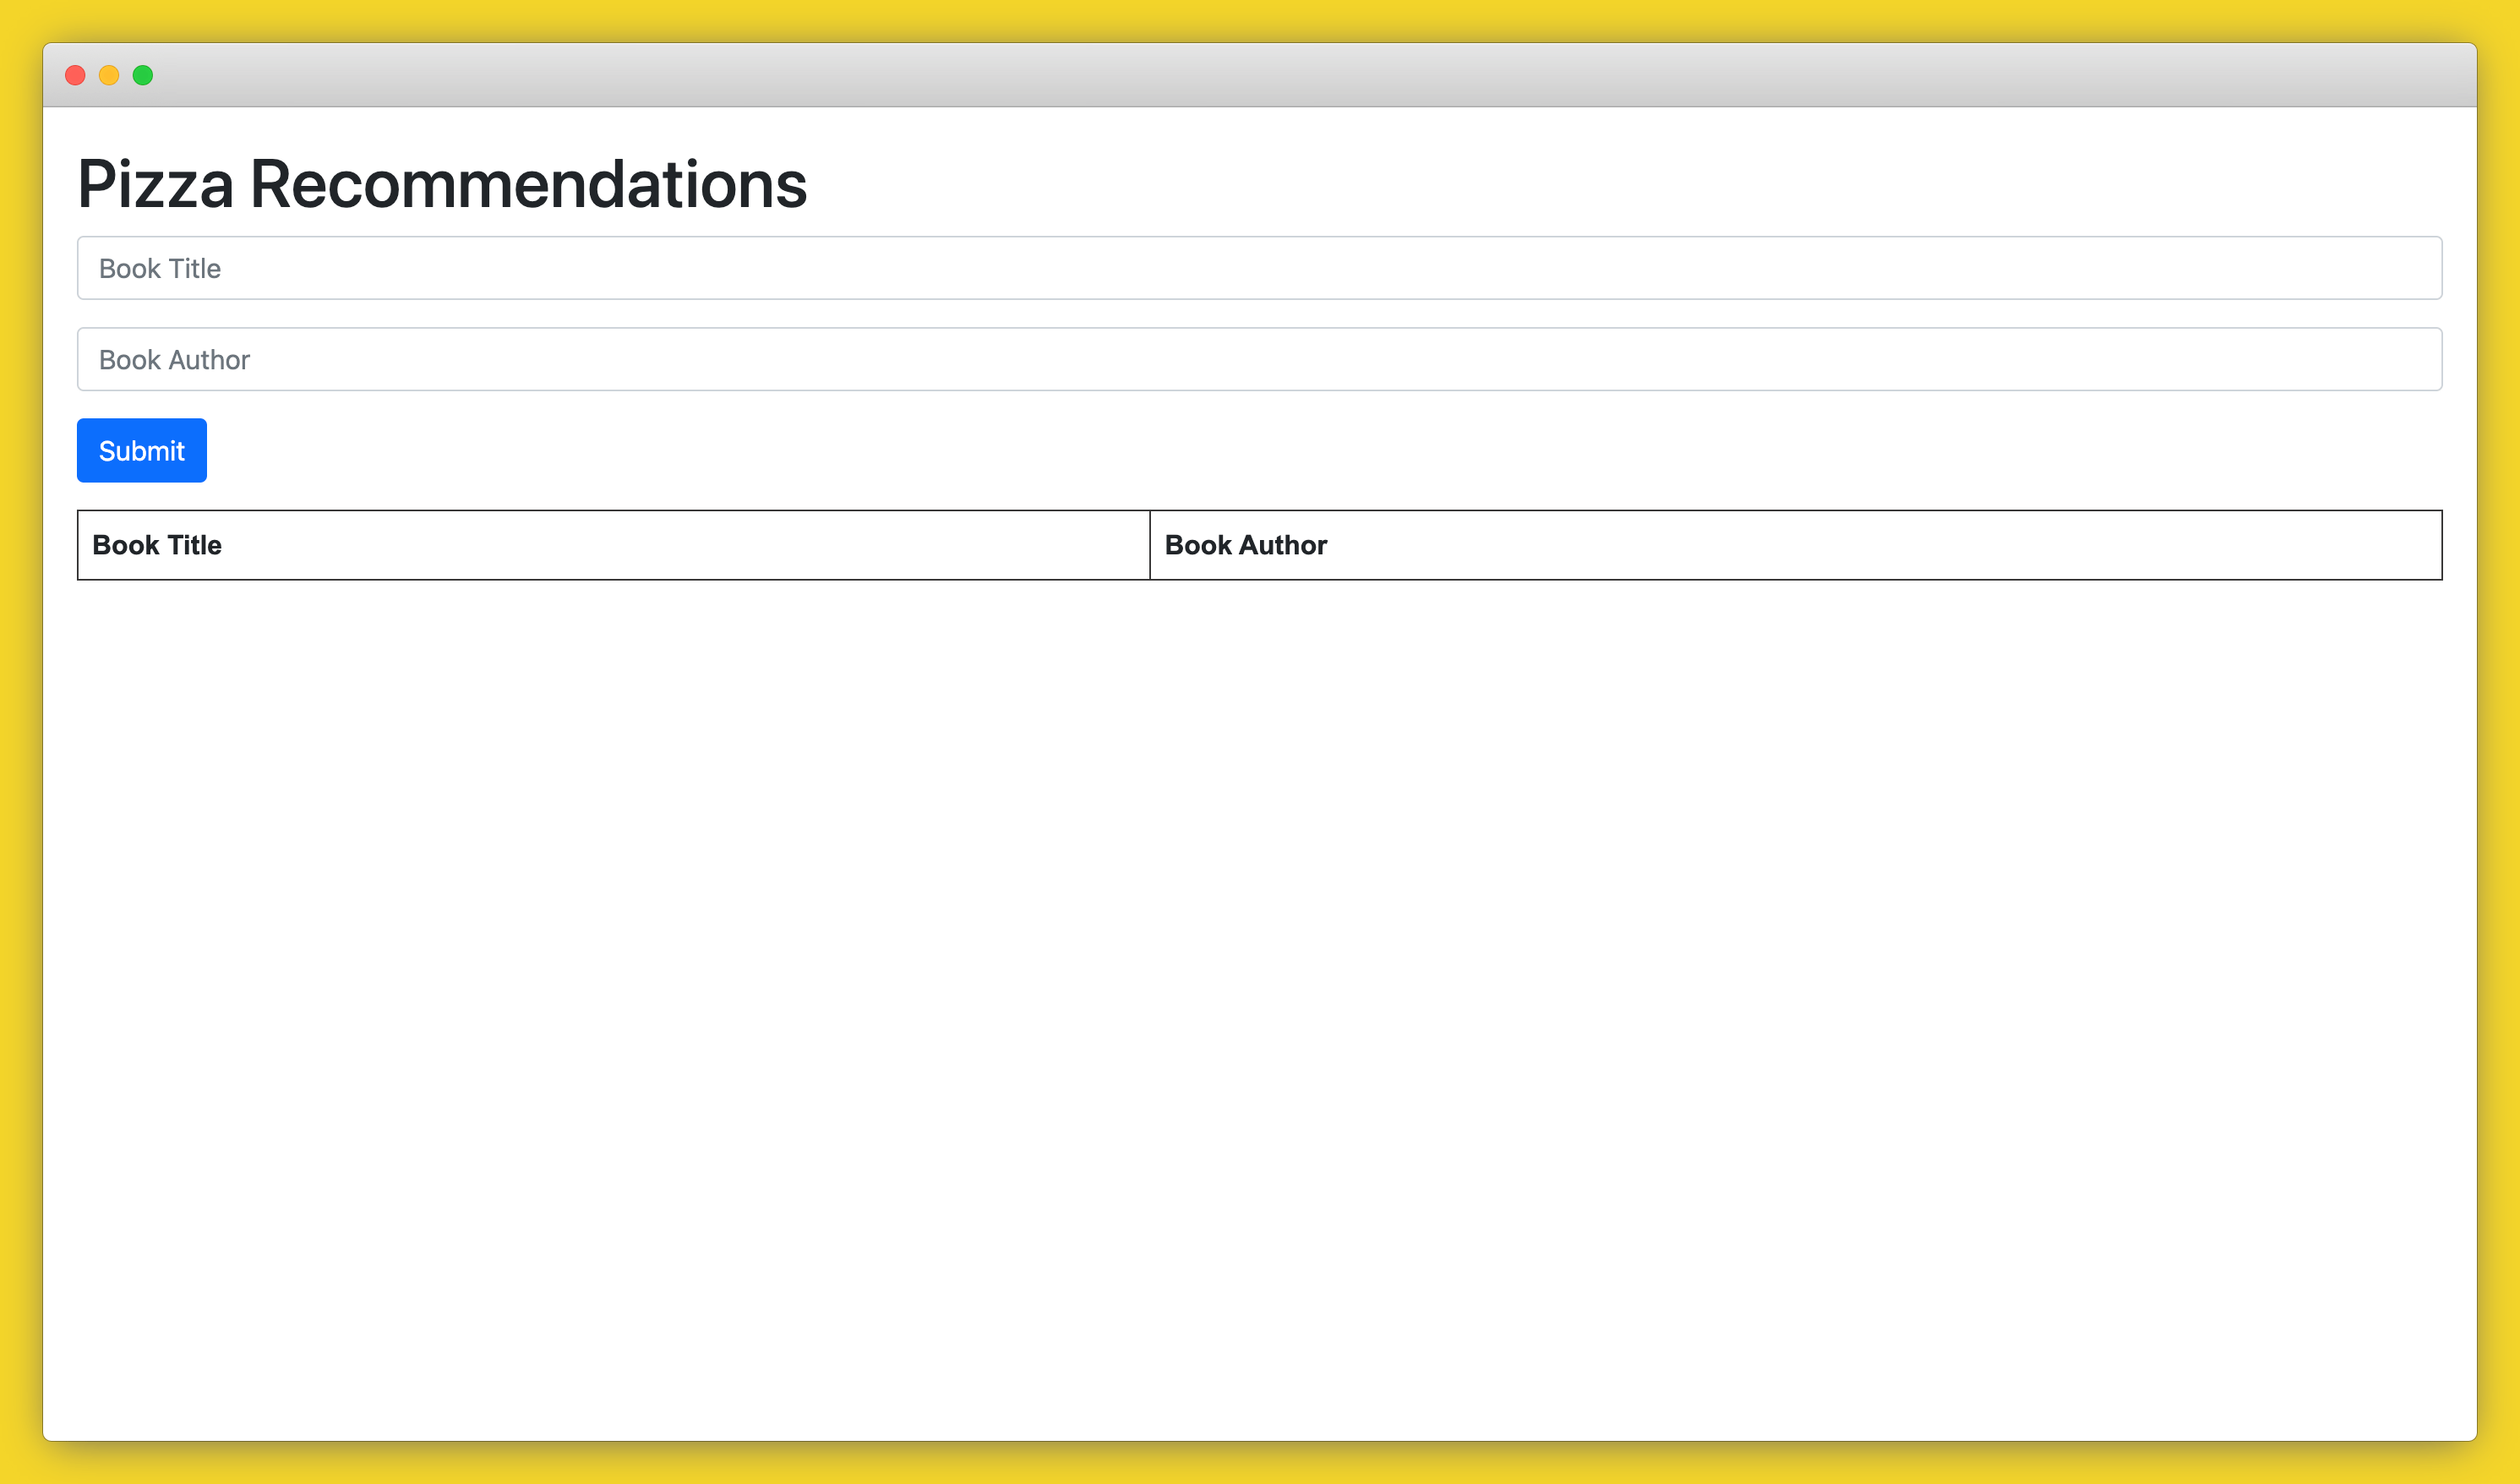
The application is currently set up for a singular purpose: to store book recommendations. The scope and branding are limited, but the core functionality—a data store with an intuitive UI—could be a great tool for a number of companies.
To be a white-label app, this app needs to be customizable to match the requirements of different companies. To make the app customizable, we can remove hard-coded values from the code and replace them with environment variables that can be changed easily.
Create a new file in the root directory of the project called
.env
and copy the following code into it:
heading= Pizza Recommendations
This defines an environment variable that we can now access from our JavaScript code and pass into our
index.pug
through a context dictionary. In the root directory of the project, open the
index.js
file and in the
app.get('/',
function, replace the
return
function with the following:
return res.render('index', {
items: items.rows,
heading: process.env.heading,
});
Here we get the environment variable we set in the
.env
file with
process.env.heading
and pass it into the context dictionary that we can now access from our app’s view.
For example, open up the
index.pug
file in the
views
folder and change the
h1
on the page from this:
h1 Book Recommendations
To this:
h1= heading
This changes the hard-coded title of the page to the environment variable accessed through the context dictionary. If you run the app now, you will see that the page has a new heading.
You can get pretty creative with setting these environment variables. To demonstrate some of the possibilities, define these variables within the
.env
file:
title= Pizza store
heading= Pizza Recommendations
logo= fa-solid fa-pizza-slice
font= sans-serif
tableHeading1= Pizza Type
tableHeading2= Restaurant
navbar= true
navTheme= dark
navColor= red
buttonColor= red
buttonTextColor= white
And replace all the code in the
index.pug
file with the following:
doctype html
html(lang='en')
head
title= title
link(rel='stylesheet', href='https://cdn.jsdelivr.net/npm/bootstrap@5.0.0-beta1/dist/css/bootstrap.min.css')
script(src='https://unpkg.com/htmx.org@1.5.0')
script(src="https://kit.fontawesome.com/1857d670c9.js" crossorigin="anonymous")
style.
#app {padding: 20px}
i {padding-left: 20px}
table {font-family: arial, sans-serif;border-collapse: collapse;width: 100%;}
tr.htmx-swapping td {opacity: 0;transition: opacity 0.5s ease-out;}
td, th {border: 1px solid #383737;text-align: left;padding: 8px;}
tr:nth-child(even) {background-color: #dddddd;}
body(style=font)
nav(class=navTheme style= navStyle)
a.navbar-brand(href='#')
i(class= logo)
button.navbar-toggler(type='button' data-toggle='collapse' data-target='#navbarNav' aria-controls='navbarNav' aria-expanded='false' aria-label='Toggle navigation')
span.navbar-toggler-icon
#navbarNav.collapse.navbar-collapse
ul.navbar-nav
li.nav-item.active
a.nav-link(href='#') Home
li.nav-item
a.nav-link(href='#') About
li.nav-item
a.nav-link(href='#') Contact
div(id="app")
h1= heading
form(hx-post="/submit" hx-swap="beforeend" hx-target="#new-item" class="mb-3")
input(type="text" placeholder= tableHeading1 name="tableHead1" class="form-control mb-3")
input(type="text" placeholder= tableHeading2 name="tableHead2" class="form-control mb-3")
button(type="submit" class="btn btn-md" style= buttonColor) Submit
table
thead
tr
th= tableHeading1
th= tableHeading2
tbody(id="new-item" hx-target="closest tr" hx-swap="outerHTML swap:0.5s")
each item in items
tr
td #{item.tableHead1}
td #{item.tableHead2}
td
button(class="btn btn-primary" hx-get=`/get-edit-form/${item.id}`) Edit
td
button(hx-delete=`/delete/${item.id}` class="btn btn-primary") Delete
Here, we’ve added multiple environment variables. This code allows us to customize the following elements of our application:
Finally, we need to access the environment variables from the
index.js
file and pass them into the context dictionary. Some of the variables set in the environment need to be altered before they can be passed into our context dictionary.
Replace the
app.get('/',
function with the following:
app.get('/', async (req, res) => {
const items = await Item.findAndCountAll();
let display = '';
if (process.env.navbar === 'true') {
display = '';
} else {
display = 'none';
}
const font = `font-family: ${process.env.font}`;
const navTheme = `navbar navbar-expand-lg navbar-${process.env.navTheme}`;
const navStyle = `background-color: ${process.env.navColor}; display: ${display}`;
const buttonColor = `background-color: ${process.env.buttonColor}; color: ${process.env.buttonTextColor}`;
return res.render('index', {
items: items.rows,
title: process.env.title,
heading: process.env.heading,
logo: process.env.logo,
font: font,
tableHeading1: process.env.tableHeading1,
tableHeading2: process.env.tableHeading2,
navTheme: navTheme,
navStyle: navStyle,
buttonColor: buttonColor,
});
});
Now we can pass the environment variable directly into the context dictionary, like so:
title: process.env.title
Or we can edit the environment variable where necessary. The code below checks if the user wants a navigation bar and if not, it will define a string to set the display property of the navbar styling to
none
.
let display = '';
if (process.env.navbar === 'true') {
display = '';
} else {
display = 'none';
}
const navStyle = `background-color: ${process.env.navColor}; display: ${display}`;
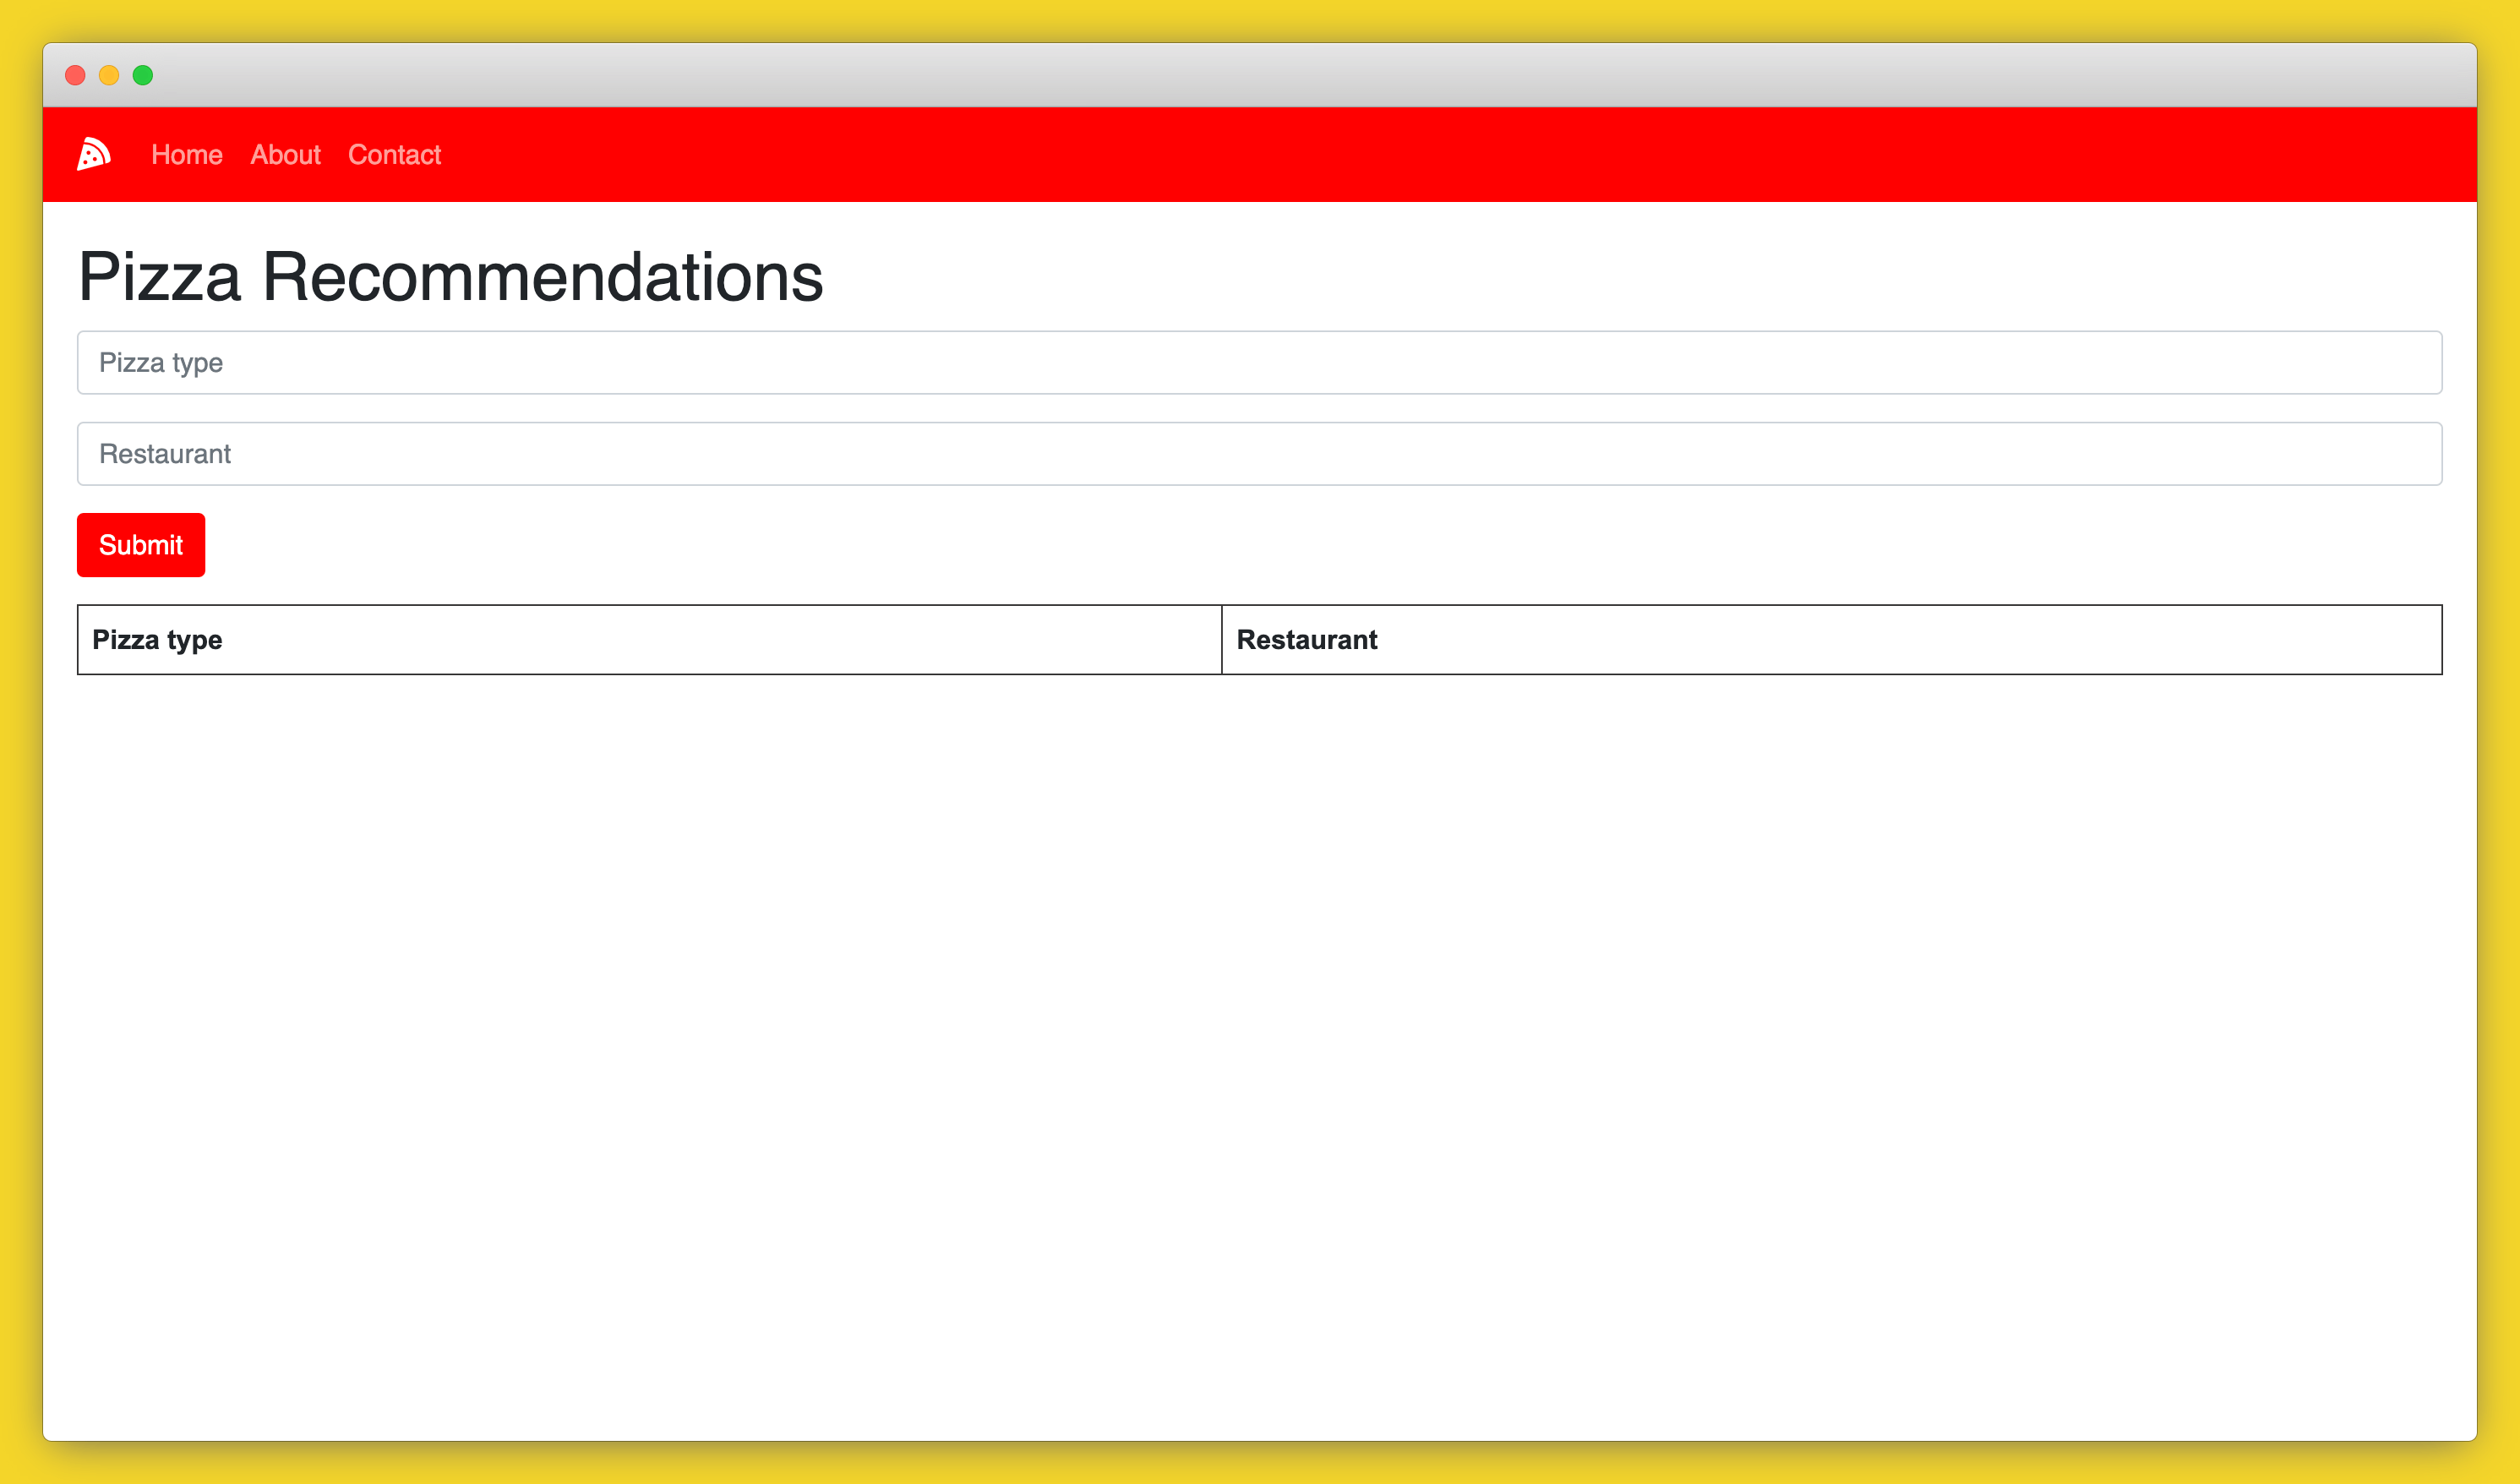
If you run the code now, you will see the app has a branded look:

We won’t need the
.env
file in our deployment, so you can go ahead and delete that file.
Now that our application is easily customizable, we can deploy different versions of the application for different companies.
Now that our application is ready to be customized and deployed, we can use Code Capsules to make this process easy and intuitive.
To get started, create a repository on GitHub and push your app’s code to this new repository.
Next, create an account for or log in to Code Capsules. During your account set up, link your GitHub repository to your Code Capsules account and provide access to the repository that stores your code.
Once your set-up is complete, you can begin deploying your apps. Let’s pretend two companies have bought your white-label app and wish to deploy their own customized version of the app. One company is a pizza company that wants to give restaurant and pizza suggestions using your data store and UI, the other company is a movie club that wishes to store movie suggestions.
You can deploy two different versions of the app with Code Capsules by following these steps for each application.
A Capsule provides the server for hosting an application on Code Capsules.
Navigate to the “Capsules” tab and click the yellow “+” icon on the top right of the screen to add a new Capsule.
To create a new Data Capsule for your Space, follow the instructions below:
Navigate to the Space containing your recently created Data Capsule and click the yellow “+” icon on the top right of the screen. Follow the instructions below to create a Backend Capsule:
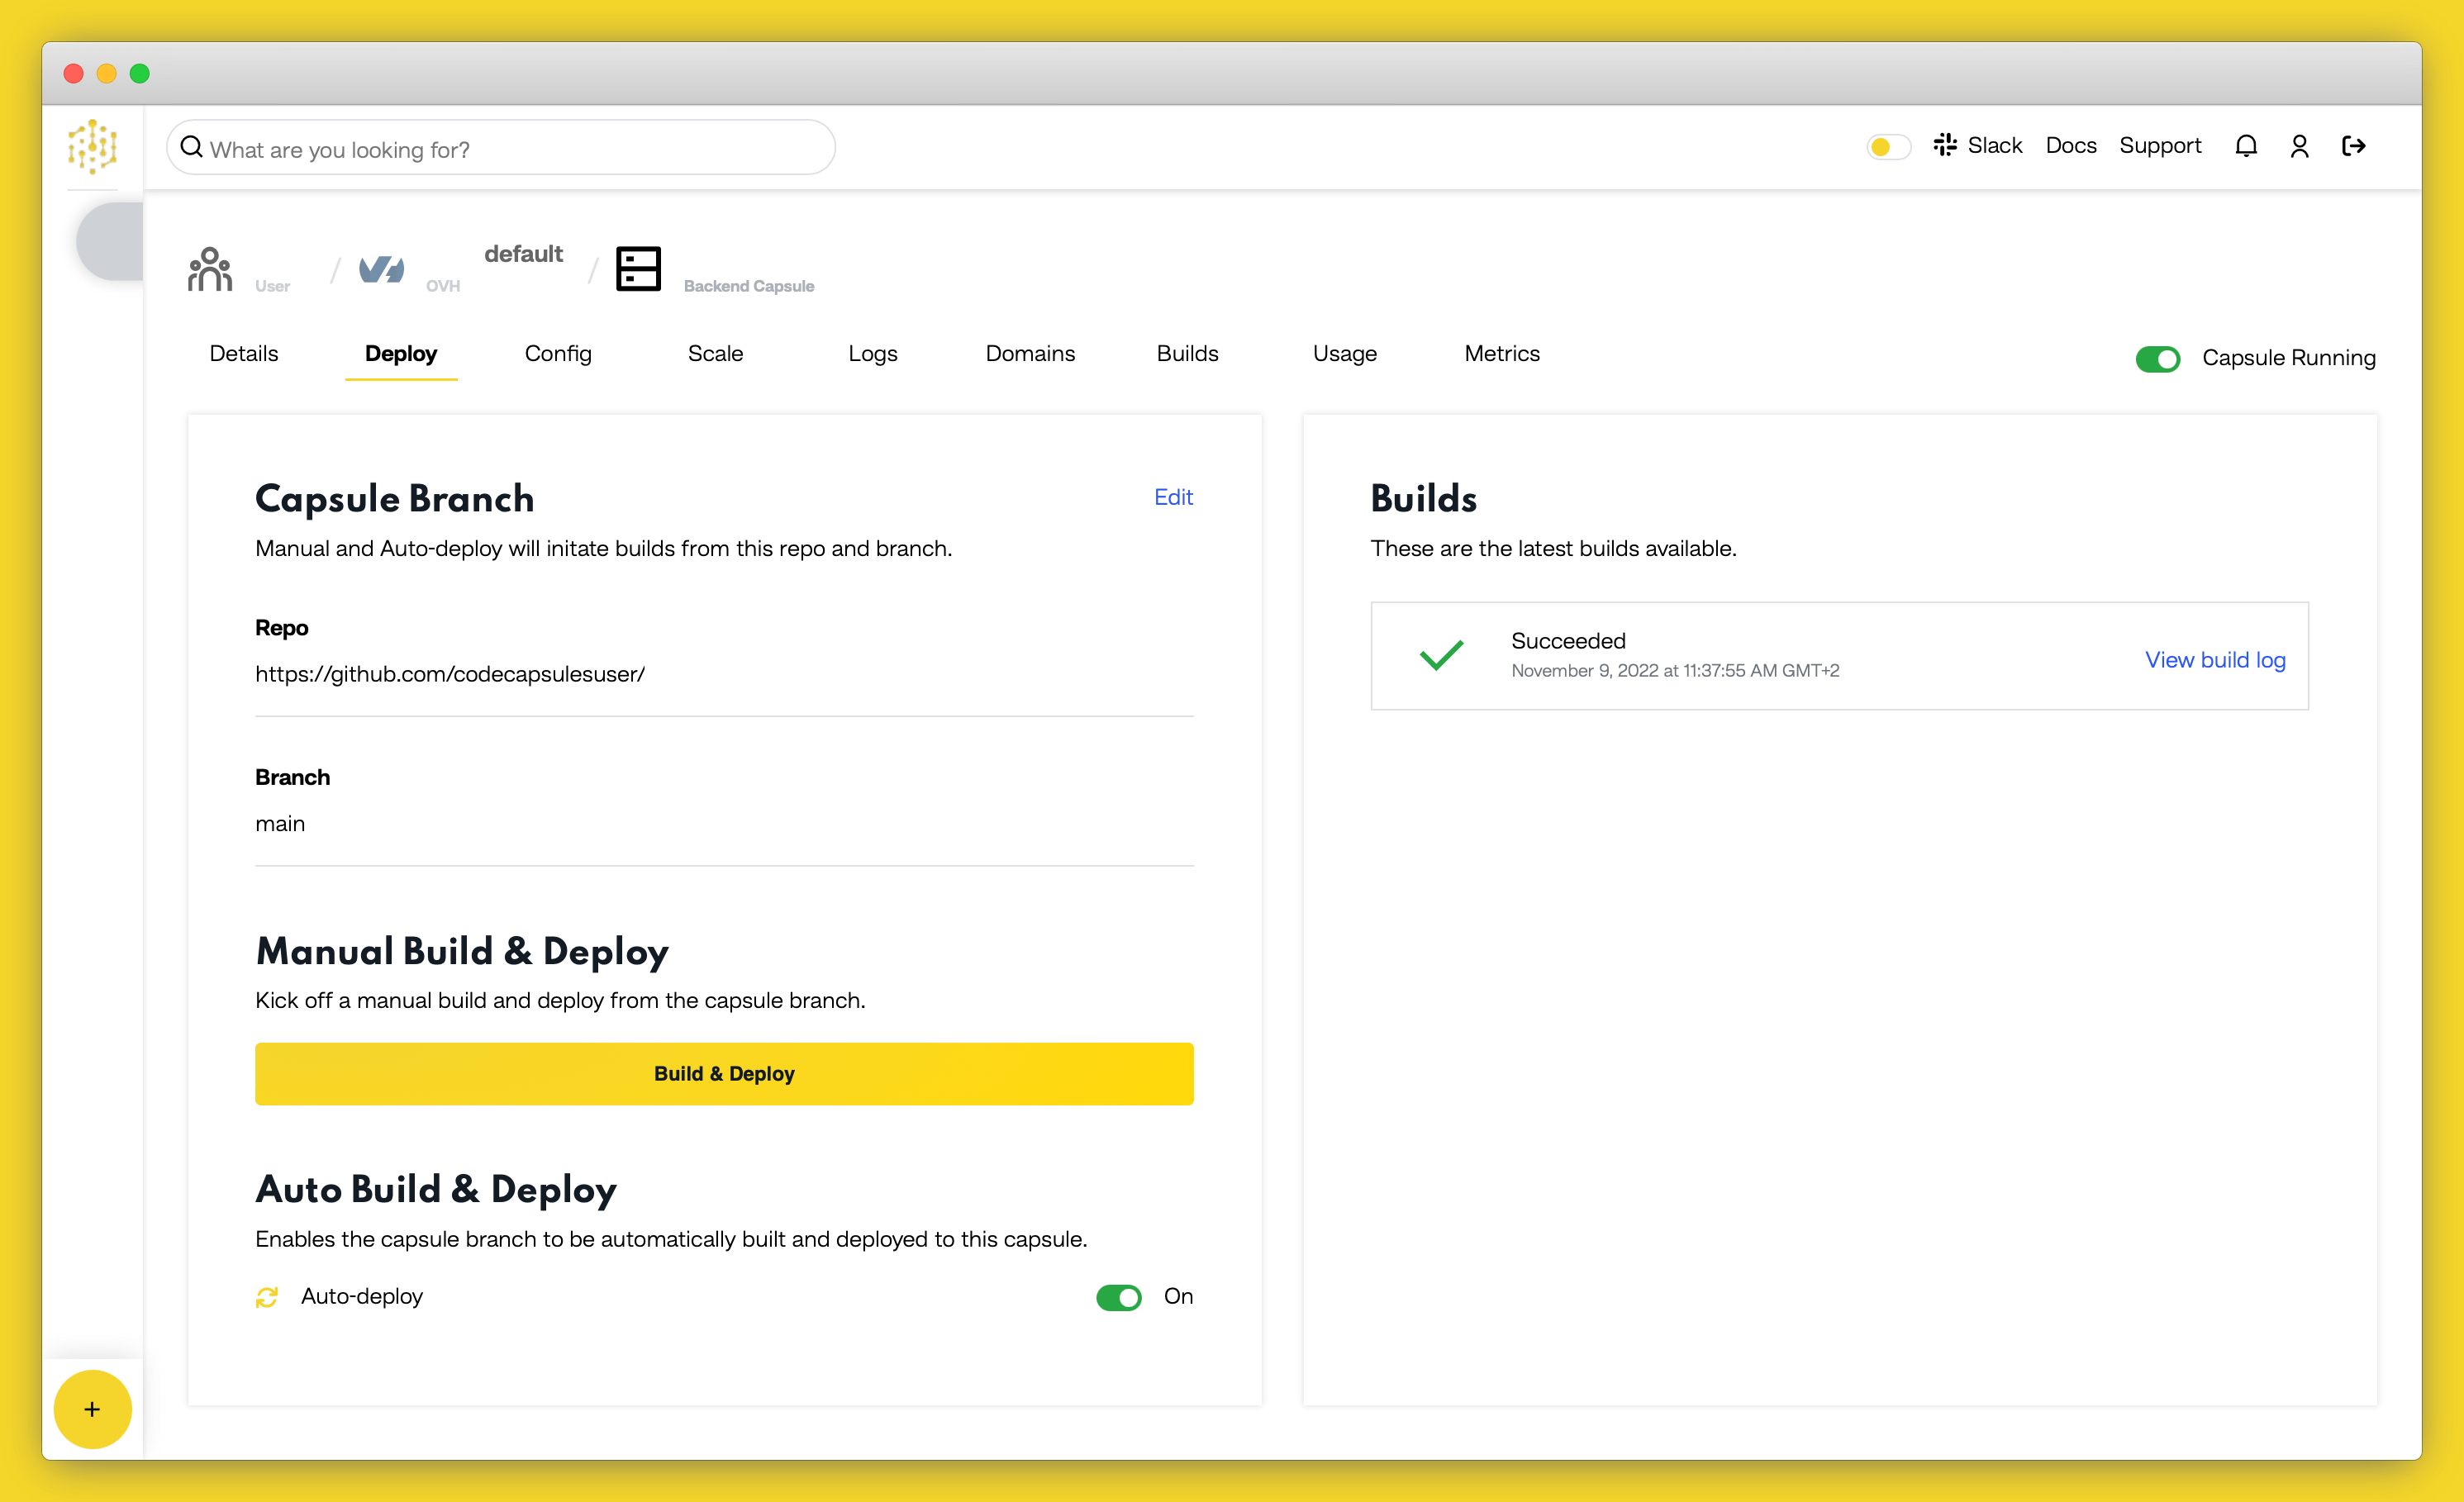
Code Capsules will automatically build your application when you’ve finished creating the Capsule. While the build is in progress, you can view the log by clicking “View Build Progress” next to the “Building Capsule” message.
Once your application is live, you can view the build log by selecting the “Deploy” tab and clicking the “View build log” link in the “Builds” section.
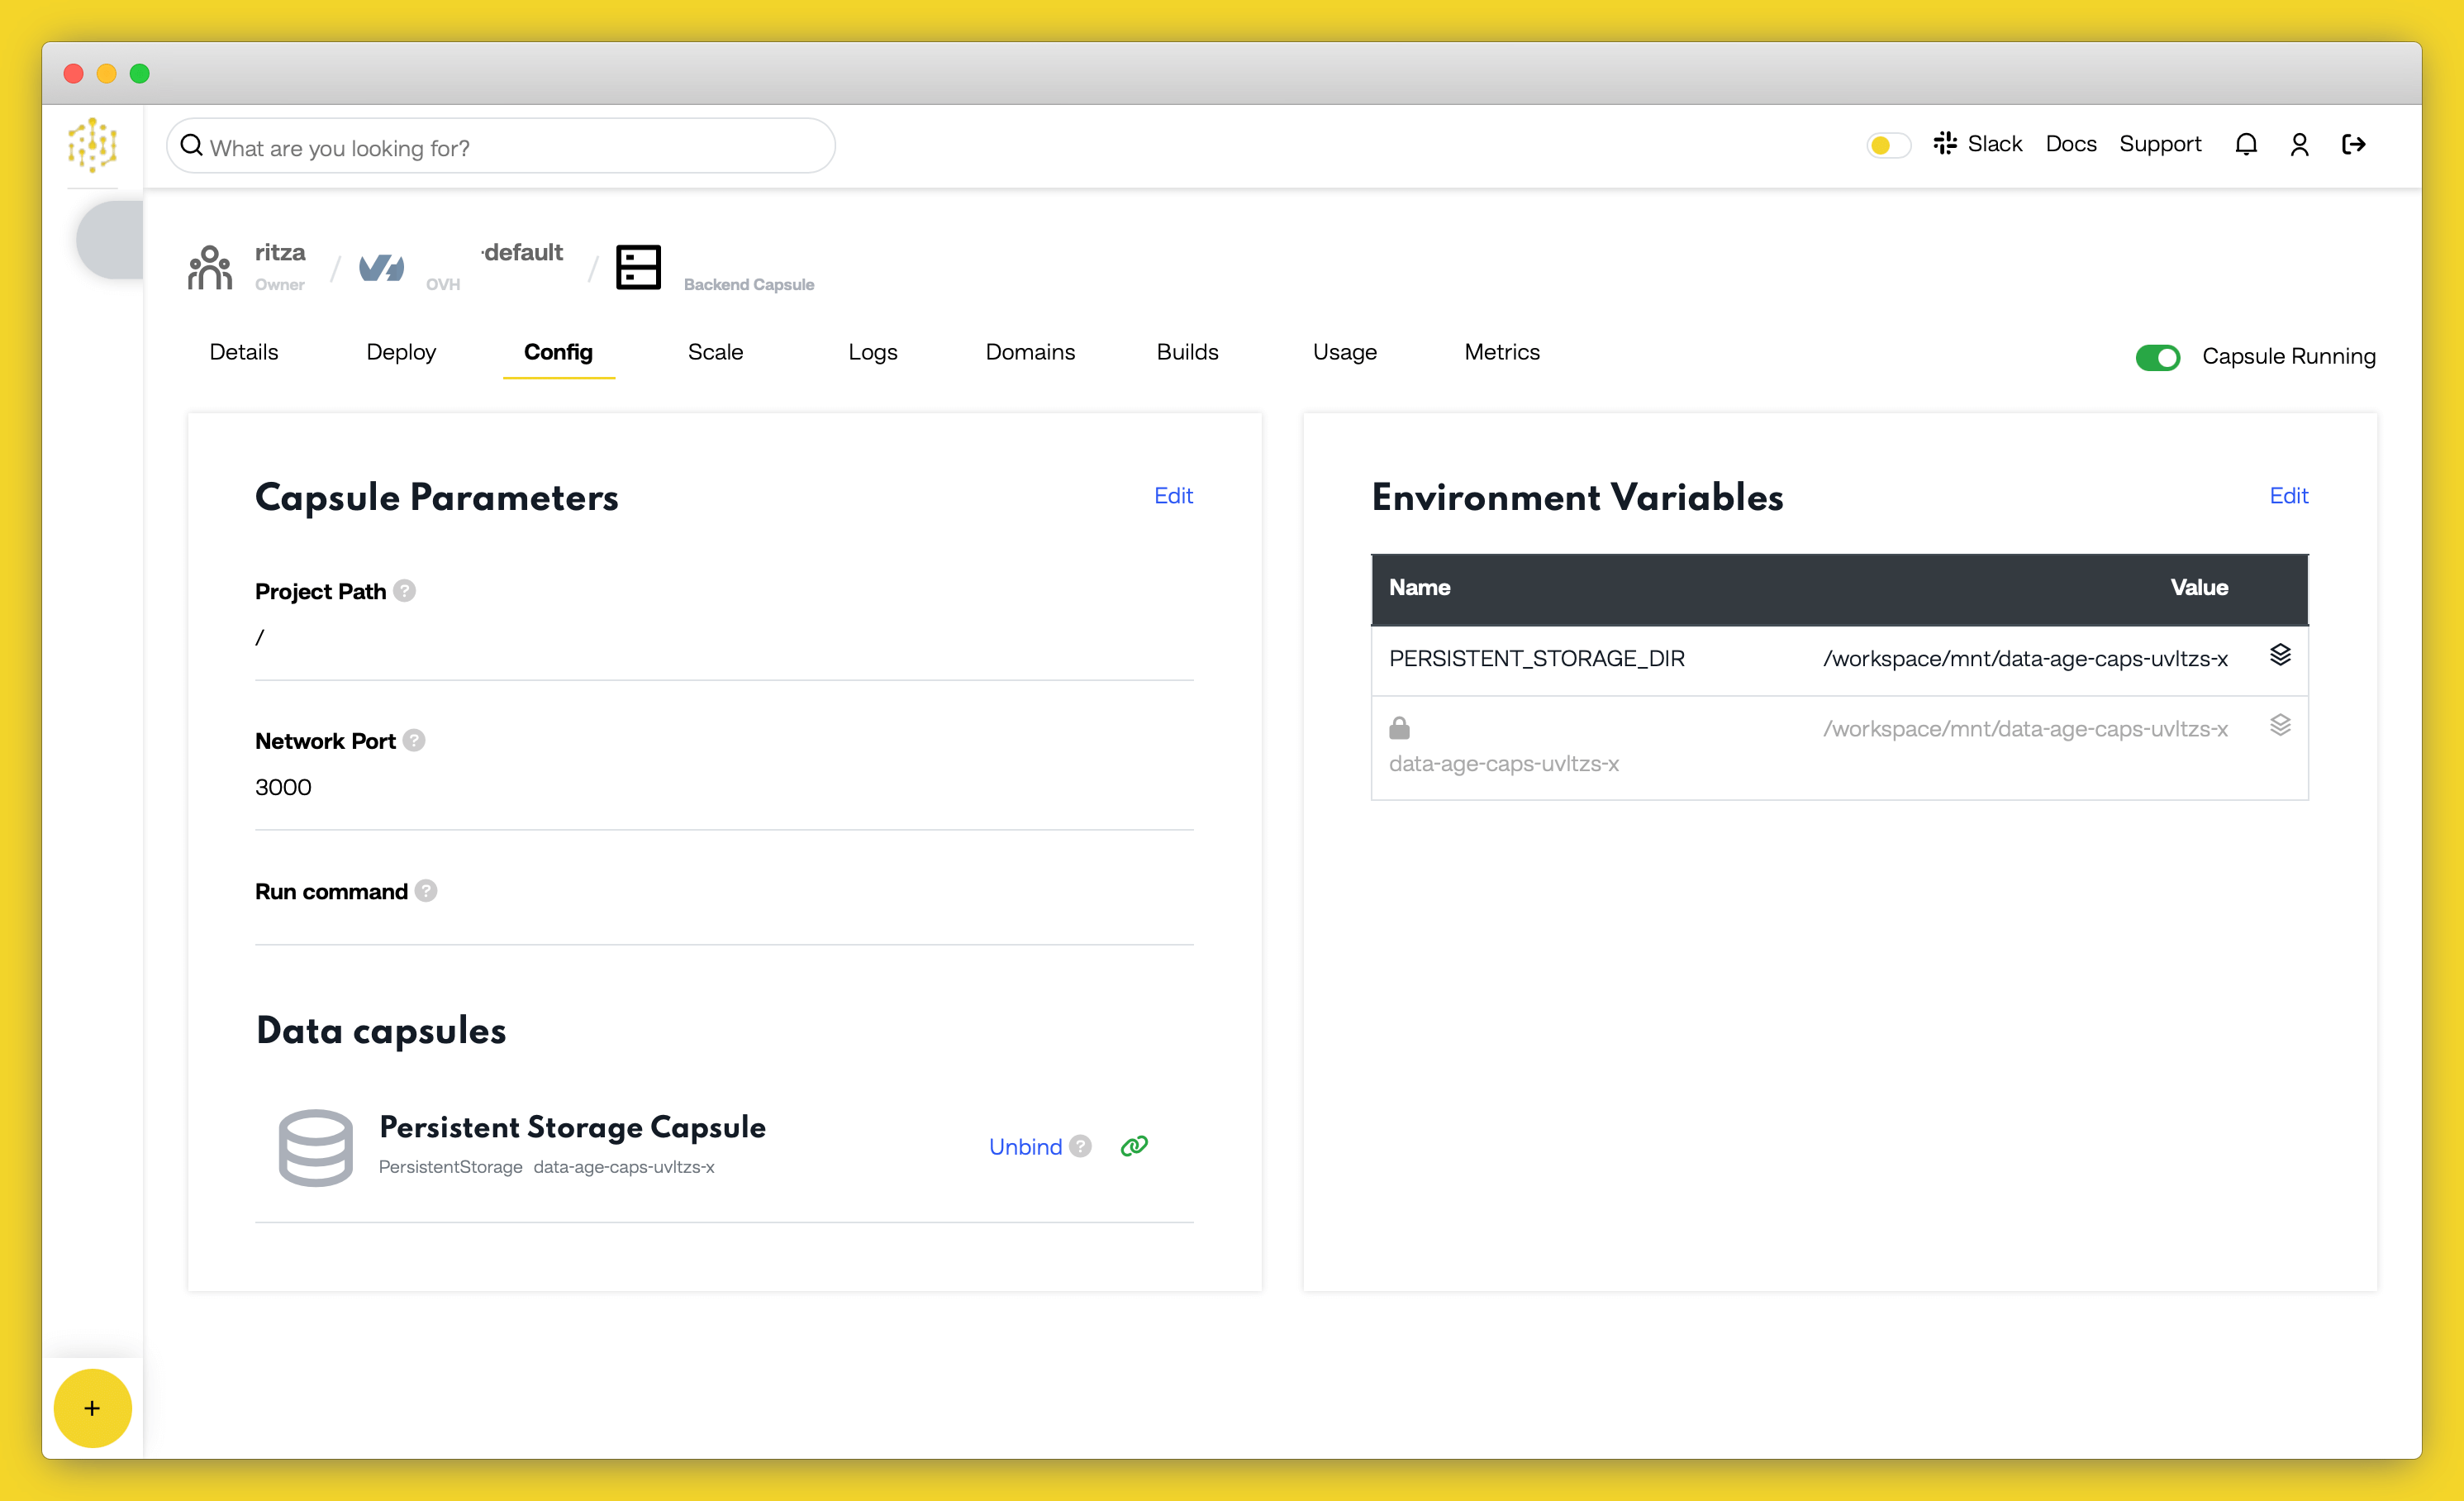
Next, you need to bind the Backend Capsule to its database. Navigate to the “Config” tab of the Backend Capsule you’ve just created. Scroll to the “Bind Data Capsule” section and click on the “Bind” option on the appropriate Data Capsule. This enables the Capsule to use persistent storage in the Data Capsule.

In the Backend Capsule, navigate to the “Config” tab. Under the “Environment Variables” section, click the “Edit” button. Next, define the name of your environment variable and its value in the UI and click “Save”. Repeat these steps for all your environment variables.
For the first app, the pizza company, set the environment variables to the following:
title= Pizza store
heading= Pizza Recommendations
logo= fa-solid fa-pizza-slice
font= sans-serif
tableHeading1= Pizza Type
tableHeading2= Restaurant
navbar= true
navTheme= dark
navColor= red
buttonColor= red
buttonTextColor= white
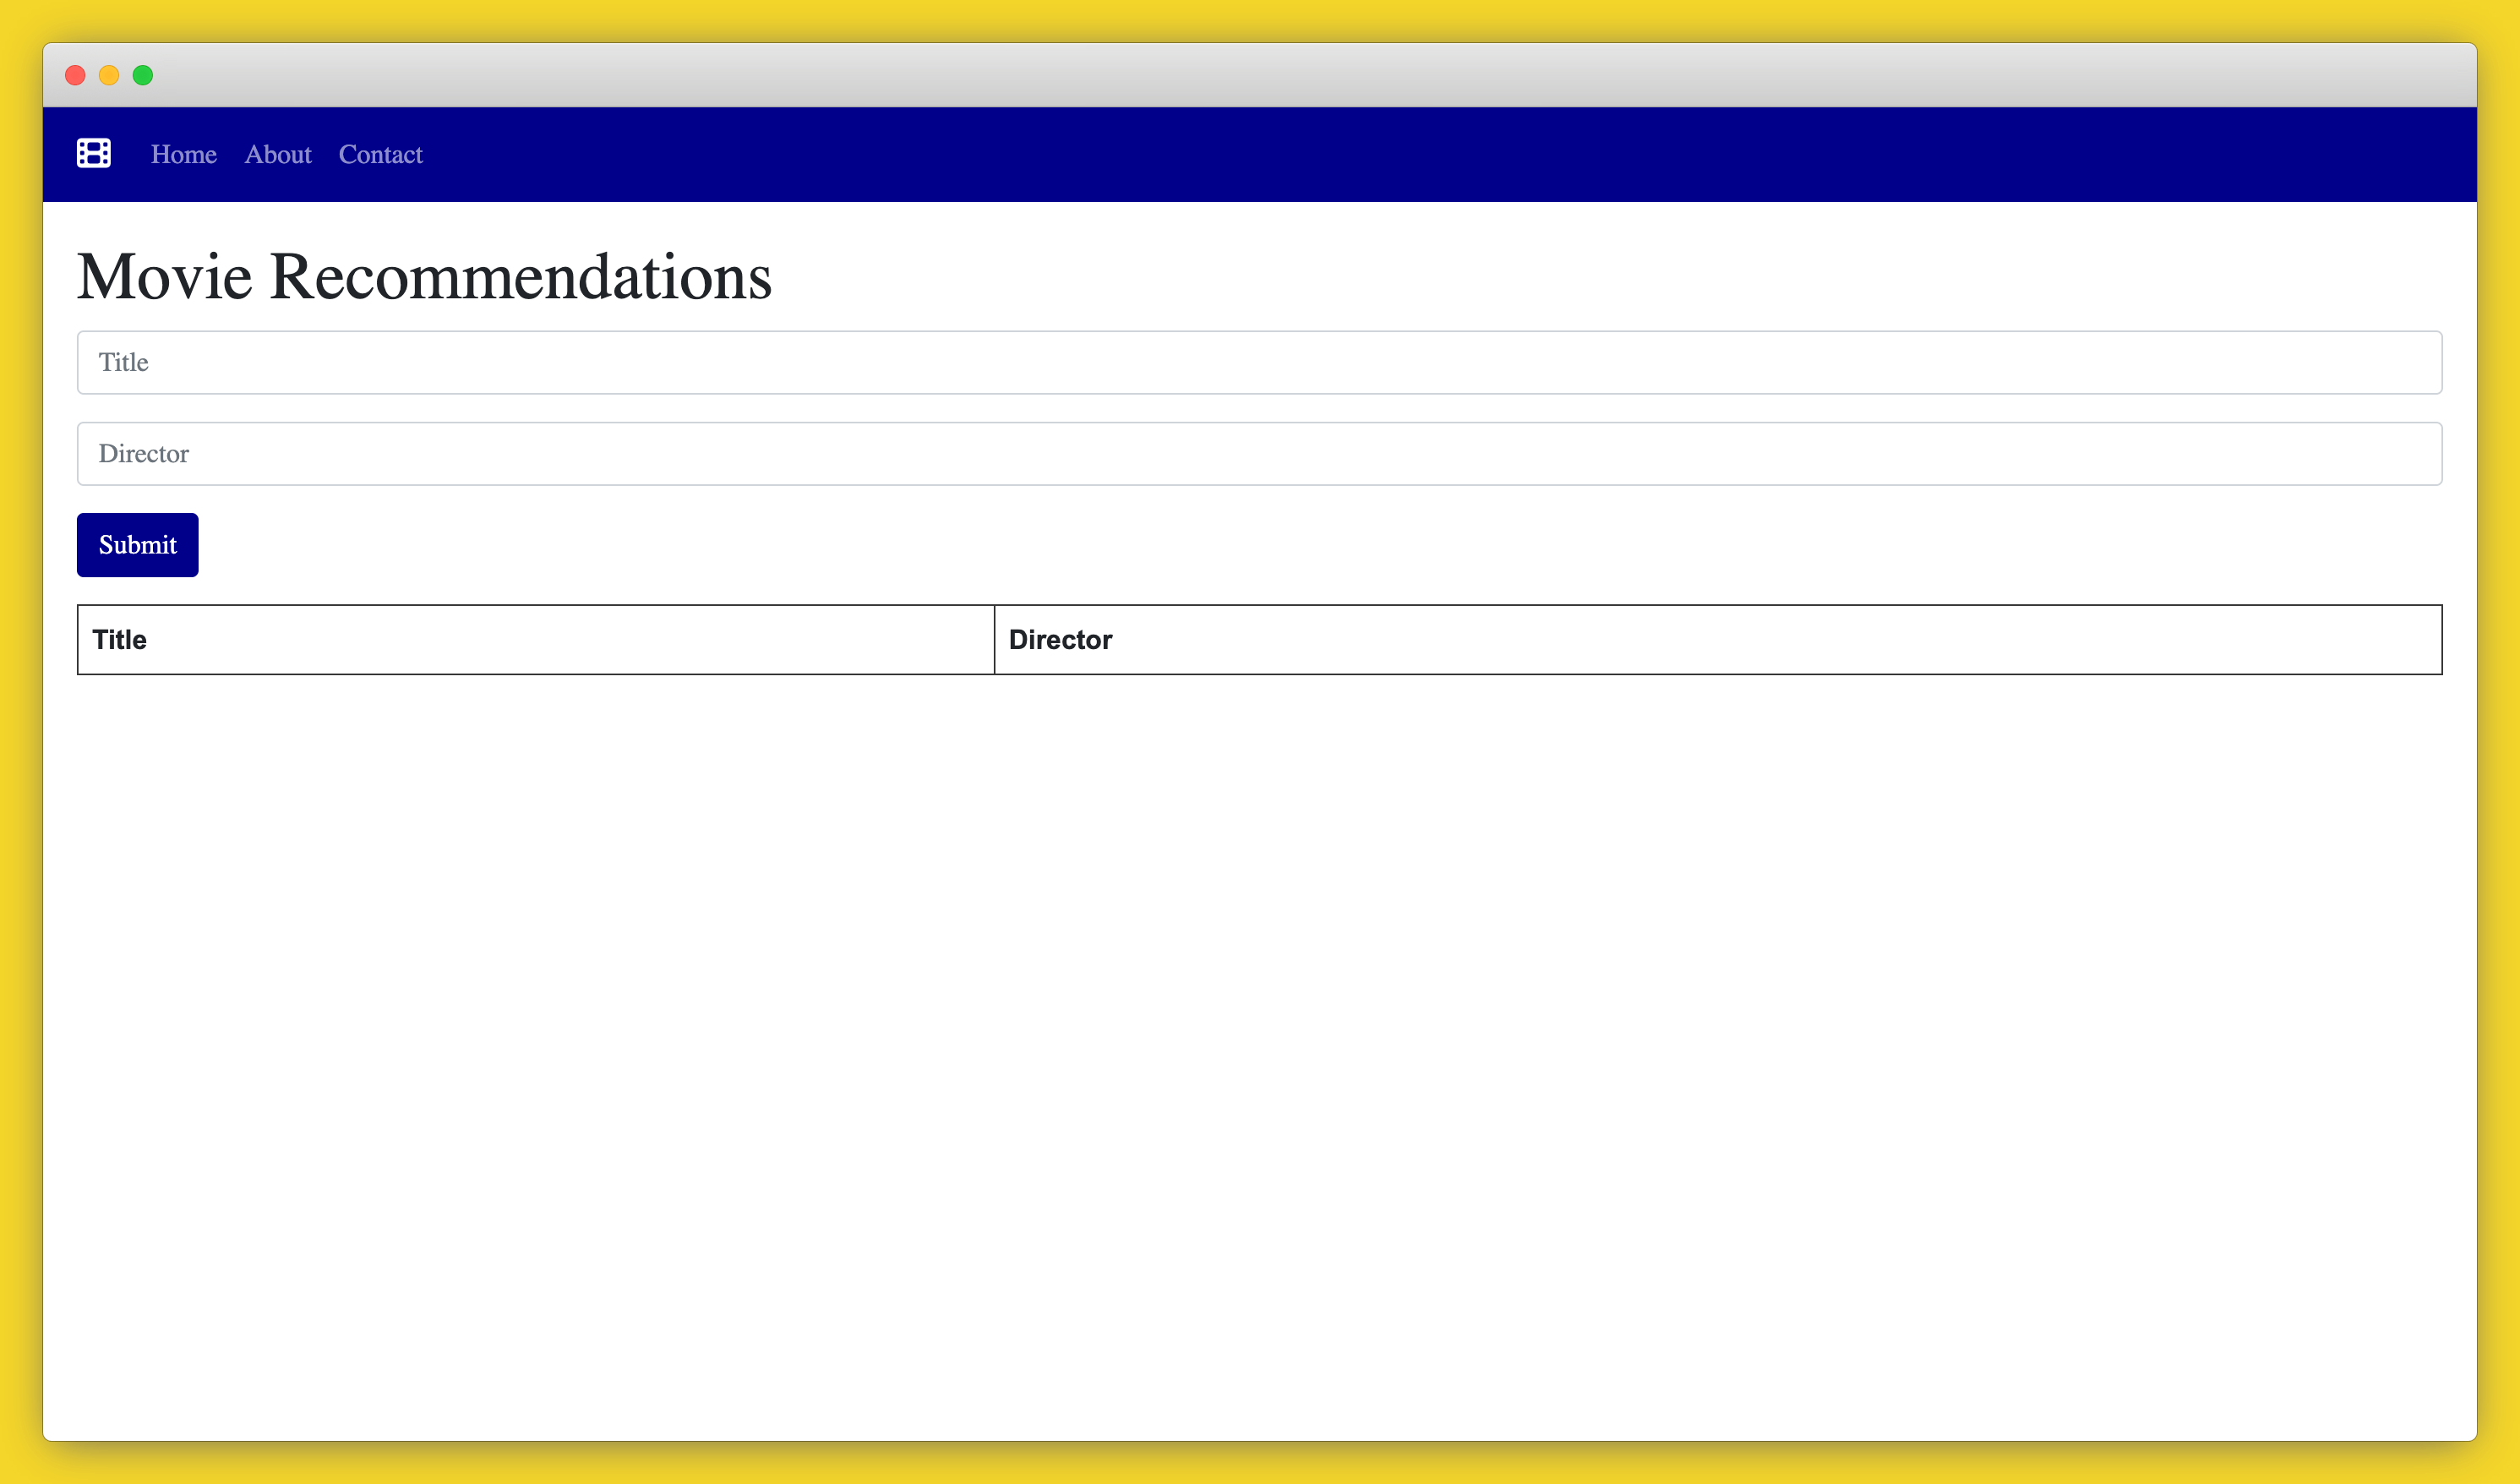
For the second app, the movie company, set the environment variables to the following:
title= Movie store
heading= Movie Recommendations
logo= fa-solid fa-film
font= serif
tableHeading1= Title
tableHeading2= Directors
navbar= true
navTheme= dark
navColor= darkblue
buttonColor= darkblue
buttonTextColor= white
After saving these new variables, the Capsule will restart, and the application will now be ready to be viewed. Click the “URL” link in the “Details” tab, and you should see your deployed application.
The pizza company’s application has a red theme, a modern sans-serif font, custom headings, and its logo.
The movie company has a dark blue theme, a traditional serif font, custom headings, and its logo.
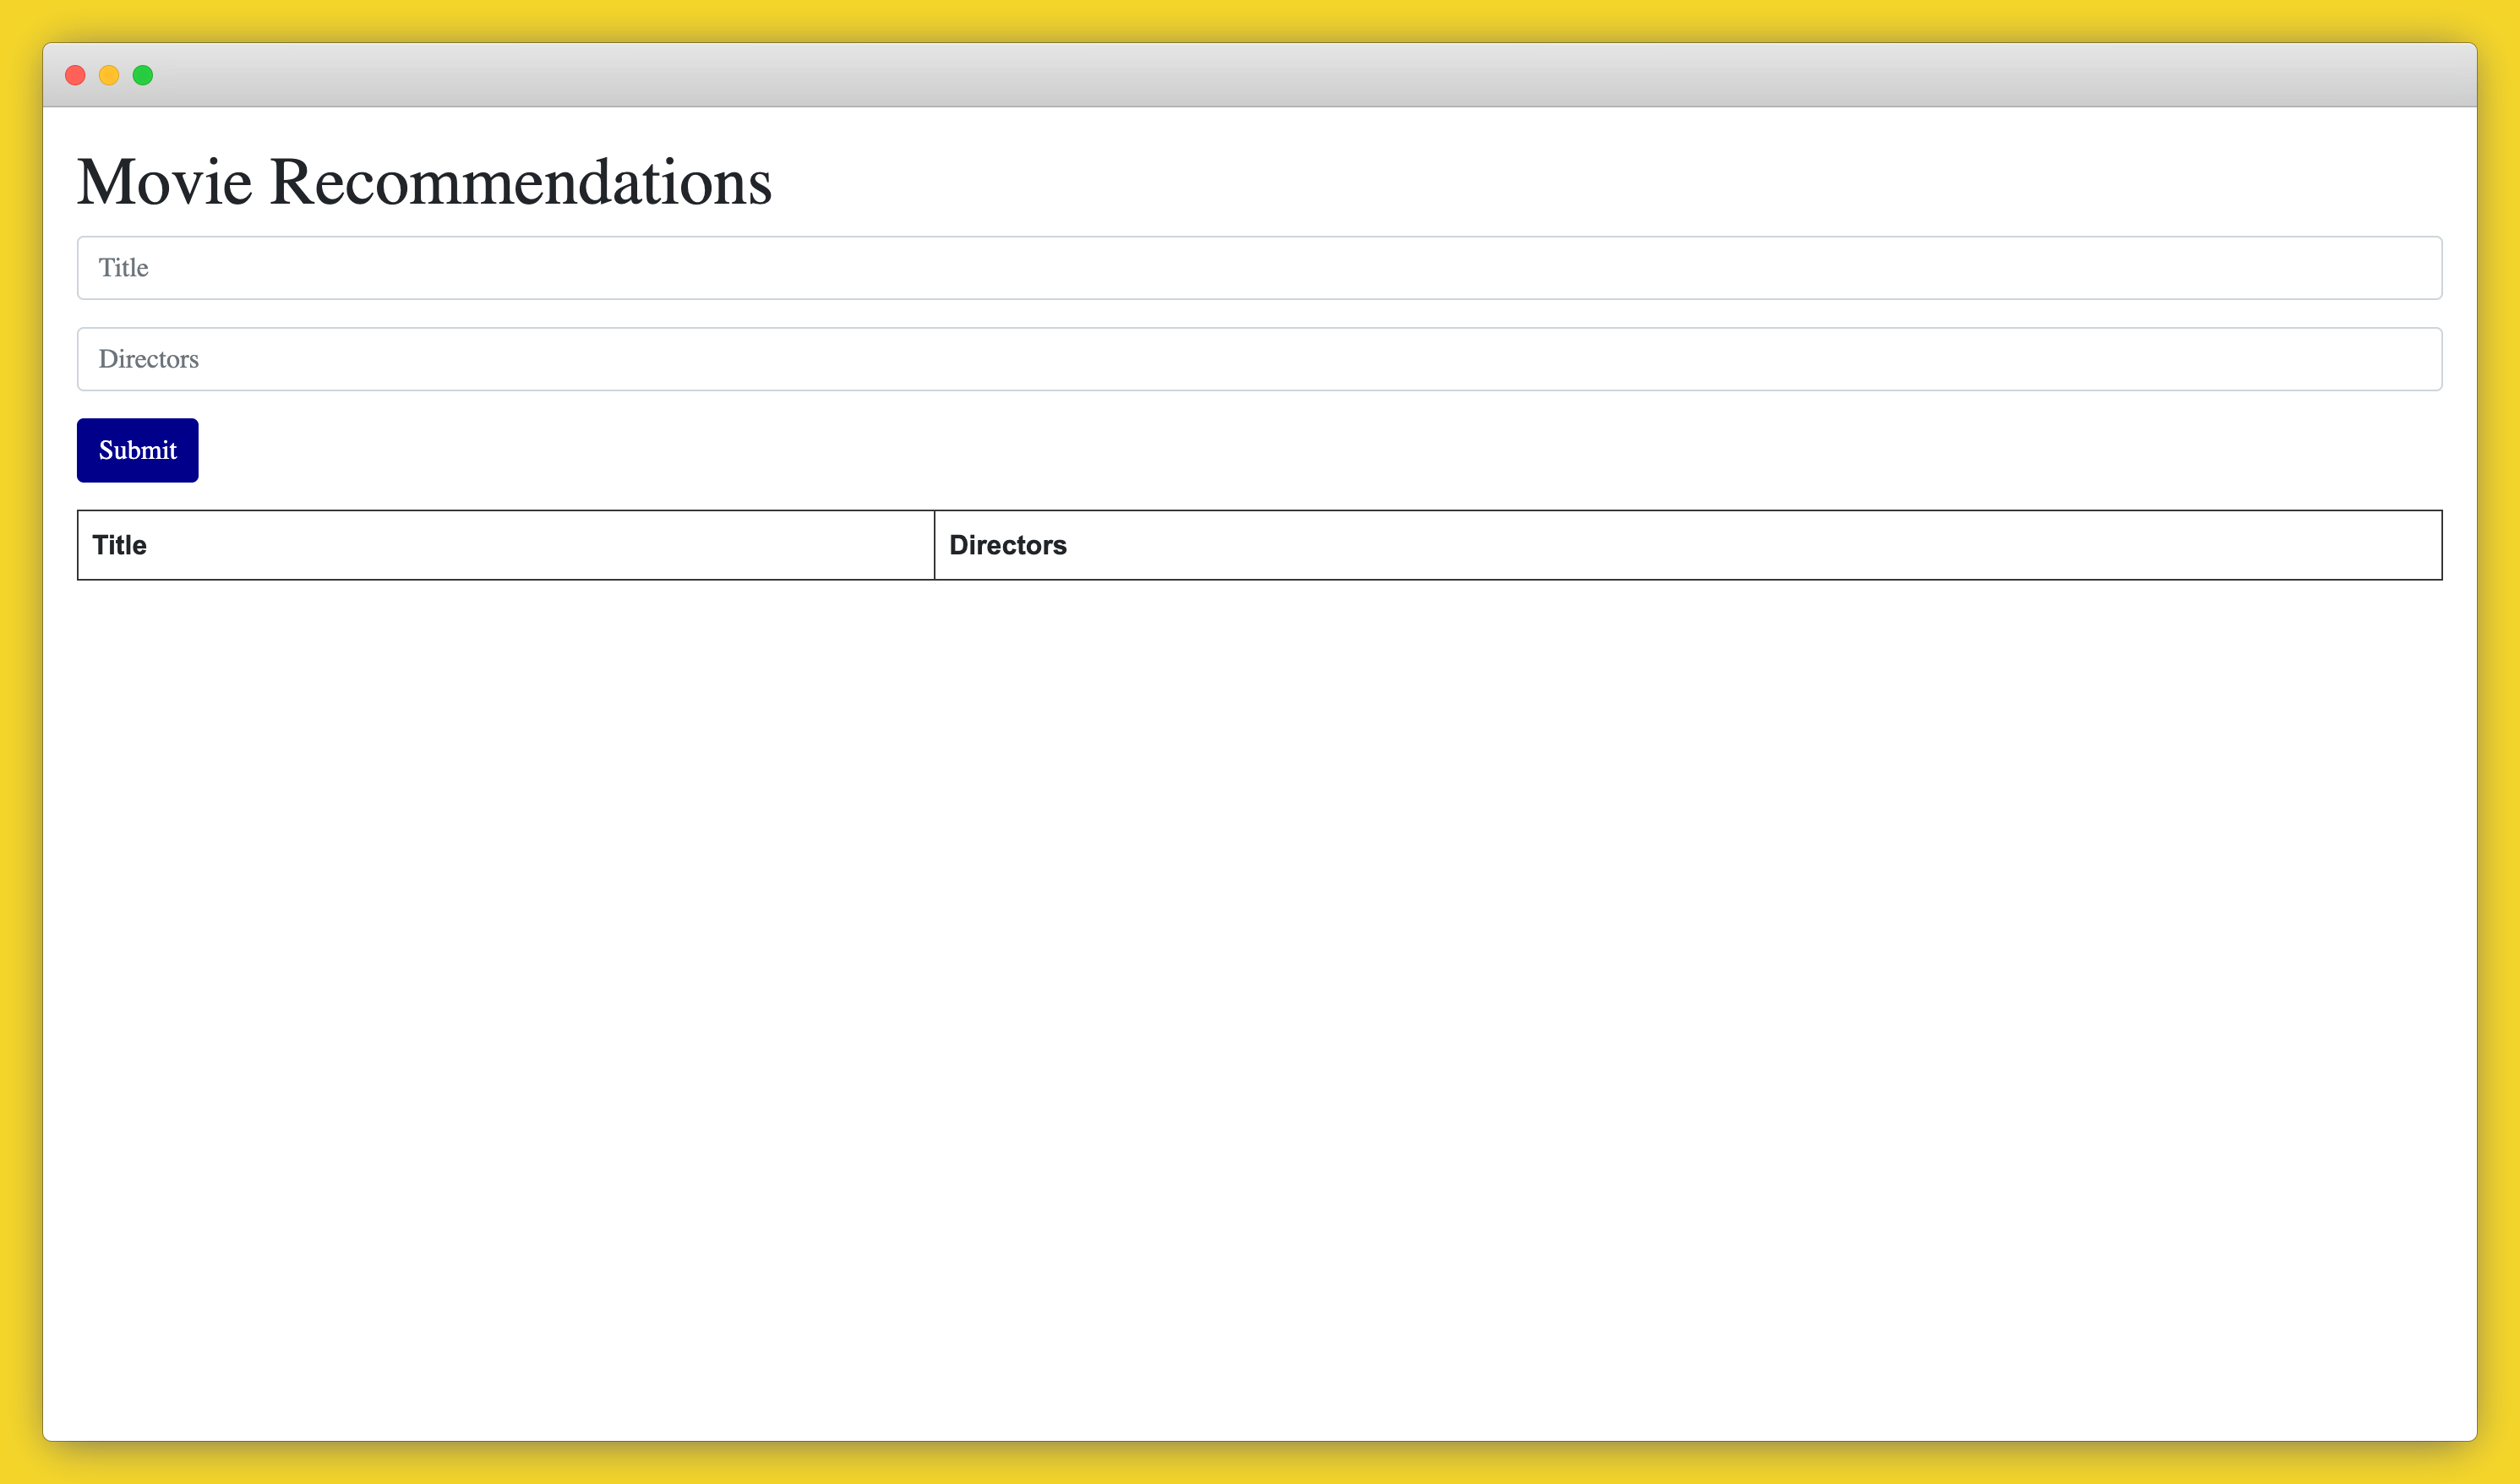
The app also has the option to turn off the navbar, which can be done by setting the
navbar
environment variable to
false
. This would be the result:
Stylistic changes can be made by changing colors, font types, text, and logos, but pretty large changes can also be made to the UI by hiding and revealing its parts through variable choices. It’s all up to the designer of the application to decide how far they want to go in providing this kind of customization to their client.
In this tutorial, two very different-looking applications were deployed from the same codebase simply by changing a couple of variables in the Code Capsules UI. This is a powerful way to get your app solution to more people, more quickly, and at a lower price.
Getting some new app ideas after reading this? Test your application out or deploy it to production by signing up with Code Capsules.
Table of content