A decentralized application (dApp) is a software application that runs on a decentralized network, often a blockchain. Unlike traditional apps, dApps are transparent and resistant to censorship. In this article, we focus on a React Token dApp built using React.js for the frontend and handling tokens through a Solidity smart contract.
Cloning the Project Repository
Before you begin building your React Token dApp, it’s essential to start with the base code. This tutorial assumes you have a Git repository set up with the initial code required for the project. Follow these steps to clone the repository and set up your local environment:
- Install Git: If you haven’t already, install Git on your system. You can download it from git-scm.com.
- Clone the Repository: Open your terminal or command prompt and navigate to the directory where you want to clone the repository. Use the following command to clone the repo:
- Navigate to the Project Directory: Once the cloning process is complete, navigate to the project directory:
git clone https://github.com/codecapsules-io/dapp-react-token
cd [name of your project directory]
With the repository successfully cloned and dependencies installed, you’re now ready to start building and deploying your React Token dApp as described in the following sections of this tutorial.
React Frontend App
Your dApp will leverage React.js to create a dynamic, user-friendly interface. React is popular for dApps due to its flexibility and component-based architecture.
Solidity Smart Contract Token
The tokens in your React dApp are governed by a smart contract written in Solidity. Solidity is a high-level programming language for writing smart contracts on the Ethereum blockchain.
Creating the React Frontend
Assuming dapp-react-token is your root directory:
- Open Terminal/Command Prompt: Navigate to your
dapp-react-tokendirectory. - Create React App Inside the Directory: Run
npx create-react-app frontendto create a new React app in a subdirectory calledfrontendinsidedapp-react-token. - Navigate to the Frontend Directory: Change your current directory to the newly created frontend folder with
cd frontend. - Start the React Development Server: (Optional at this stage) Begin the development server with
npm start.
Installing Web3.js
In the frontend directory of your dapp-react-token project:
- Install Web3.js: Within the frontend directory, execute
npm install web3to add the Web3.js library to your project.
Modifying Frontend Code to Interact with Blockchain
In the frontend/src directory:
import React, { useEffect } from 'react';
import Web3 from 'web3';

function App() {
  useEffect(() => {
    // Initialize web3
    const web3 = new Web3(Web3.givenProvider || 'http://localhost:8545');

    // Your contract ABI and address
    const ABI = [...]; // Replace with your ABI array
    const contractAddress = '...'; // Replace with your contract address

    // Connect to the contract
    const contract = new web3.eth.Contract(ABI, contractAddress);

    // Additional logic goes here
  }, []);

  return (
    <div>
      <h1>Hello, React Token dApp!</h1>
      {/* Additional UI components */}
    </div>
  );
}

export default App;
Setting Up the Solidity Smart Contract
In the dapp-react-token directory:
- Create a Directory for Smart Contracts: Use
mkdir contractsand thencd contractsto create and navigate into a directory for your Solidity contracts. - Write Your Smart Contract: In the contracts directory, create a Solidity file (e.g.,
TokenContract.sol) and write your smart contract logic. - Compile and Deploy Your Contract: Utilize a tool like Truffle or Hardhat within the contracts directory to compile and deploy your smart contract.
Integrating Frontend and Smart Contract
Use the deployed contract’s ABI and Address in your React app:
- Getting the ABI Array: Compile your Solidity contract to generate the ABI, which is found in the
build/contractsorartifactsdirectory after compilation. - Obtaining the Contract Address: Deploy your contract to a blockchain and note the deployed address.
Writing the TokenContract.sol
A basic ERC-20 token contract in Solidity can serve as a starting point. Here’s a simple example:
// SPDX-License-Identifier: MIT
pragma solidity ^0.8.0;

interface IERC20 {
    function totalSupply() external view returns (uint256);
    function balanceOf(address account) external view returns (uint256);
    function transfer(address recipient, uint256 amount) external returns (bool);
    // Add other ERC-20 functions here
}

contract TokenContract is IERC20 {
    string public name = "MyToken";
    string public symbol = "MTK";
    uint8 public decimals = 18;
    uint256 public override totalSupply;

    mapping(address => uint256) private _balances;

    constructor(uint256 initialSupply) {
        totalSupply = initialSupply;
        _balances[msg.sender] = totalSupply;
    }

    function balanceOf(address account) public view override returns (uint256) {
        return _balances[account];
    }

    function transfer(address recipient, uint256 amount) public override returns (bool) {
        require(_balances[msg.sender] >= amount, "Not enough tokens");
        _balances[msg.sender] -= amount;
        _balances[recipient] += amount;
        emit Transfer(msg.sender, recipient, amount);
        return true;
    }

    // Implement other ERC-20 functions here

    event Transfer(address indexed from, address indexed to, uint256 value);
    // Add other events here
}
Key Components
When building a React Token dApp, the following components are essential:
- Smart Contracts: These self-executing contracts with the terms directly written into code are typically written in Solidity.
- React.js: Used for the frontend, this JavaScript library enables creating a dynamic and interactive user interface.
- Web3.js: This JavaScript library lets you interact with a blockchain, essential for connecting your React frontend to your Solidity smart contract.
- Tokens: These are the digital assets your dApp will handle, managed by a Solidity smart contract.
Required Resources and Dependencies
To develop and deploy a React Token dApp, you will need the following developer tools and dependencies:
Developer Tools
- Node.js and npm: Node.js is a JavaScript runtime that allows you to execute JavaScript code server-side. npm (Node Package Manager) accompanies Node.js and serves as the package manager for JavaScript, helping you to manage project dependencies. Both are foundational tools for any JavaScript-based project.
- React.js: A JavaScript library for building user interfaces, particularly SPAs (Single Page Applications). React enables you to create reusable UI components and manage the state across components, making it well-suited for the dynamic and interactive frontend of a dApp.
- Web3.js: This is a collection of libraries that allow you to interact with the Ethereum blockchain using JavaScript. It provides the necessary functionalities to connect your React.js frontend with your Solidity smart contract, enabling features like sending transactions, reading contract state, and more.
- Metamask: An in-browser Ethereum wallet that allows users to safely store Ether and other ERC-20 tokens. It’s also a gateway to blockchain apps (like your dApp) and is often used to provide the web3 functionality to the browser.
- Solidity Compiler (solc): A tool for compiling Solidity source code into bytecode that can run on the Ethereum Virtual Machine (EVM). It’s essential for turning your Solidity smart contracts into something that can actually be deployed onto the Ethereum blockchain.
Code for Installing Dependencies
Below are code snippets for installing these essential dependencies. Each dependency has a specific role in the development and deployment of your dApp:
// Installing Node.js and npm
// To install Node.js and npm, download the installer from the official website and follow the installation instructions.

// Installing React.js
npm install -g create-react-app
// This command installs Create React App, a tool that sets up a new React project with sensible defaults.

// Installing Web3.js
npm install web3
// This command adds the web3.js library to your project, allowing you to interact with the Ethereum blockchain.

// Installing Solidity Compiler (solc)
npm install -g solc
// This command globally installs the Solidity compiler, enabling you to compile Solidity smart contracts into bytecode.
Sample React.js Frontend Code
Below is a basic example to initialize web3 and connect to a smart contract using React.js. This code assumes you’ve already written a Solidity smart contract and deployed it to get an ABI and contract address.
import React, { useEffect } from 'react';
import Web3 from 'web3';

function App() {
  useEffect(() => {
    // Initialize web3
    const web3 = new Web3(Web3.givenProvider || 'http://localhost:8545');

    // Your contract ABI and address
    const ABI = [...]; // Your ABI array here
    const contractAddress = '...'; // Your contract address here

    // Connect to the contract
    const contract = new web3.eth.Contract(ABI, contractAddress);

    // Your code logic here
  }, []);

  return (
    <div>
      <h1>Hello, React Token dApp!</h1>
    </div>
  );
}

export default App;
Key Concepts
Understanding some key concepts can help you grasp the nuances of deploying a React Token dApp:
- Decentralization: Unlike traditional apps, dApps don’t have a central authority, offering more security and freedom.
- Smart Contracts: These are self-executing contracts where the terms are directly written into the code.
- Token Standards: ERC-20 and ERC-721 are popular Ethereum token standards often used in dApps.
- Gas: Transactions on the Ethereum network require a fee, known as gas, which varies depending on network congestion.
Explaining the Code
Below we delve deeper into each code snippet to gain a more comprehensive understanding of how our dApp functions.
{/* Use useEffect to run code after the component mounts. */}
useEffect(() => {
  // Initialization logic here
  // The empty dependency array means this useEffect runs once after the initial render.
}, []);

{/* Initialize web3 instance */}
const web3 = new Web3(Web3.givenProvider || 'http://localhost:8545');
// Web3.givenProvider will use the provider from MetaMask if available.
// Otherwise, it will default to localhost at port 8545 for development purposes.

{/* Initialize contract instance */}
const ABI = [...];  // Paste your contract's ABI array here
const contractAddress = '...';  // Paste your contract address here

// Creating new contract instance using web3
const contract = new web3.eth.Contract(ABI, contractAddress);
// ABI and contractAddress are necessary to interact with the contract.
Troubleshooting Common Issues
Here are some common issues and how to solve them:
- Metamask Not Found: If the dApp can’t find a web3 provider, make sure Metamask or another web3 provider is installed.
- Gas Errors: These usually occur when you don’t have enough Ethereum in your wallet to perform transactions.
- Smart Contract Errors: Ensure your smart contract is properly deployed and you’re interacting with the correct functions and sending the required arguments.
Why Deploy to Code Capsules
Code Capsules offers a streamlined environment for deploying and managing web applications, making it an ideal choice for React Token dApps. Here are some compelling reasons to use Code Capsules:
- Scalability: Code Capsules allows for easy scaling, so as your dApp gains more users, accommodating them becomes seamless.
- Security: With built-in HTTPS and other security features, Code Capsules ensures that your dApp is secure.
- Frontend Capsules: Specialized environments, called Frontend Capsules, are optimized for frontend technologies like React.js, making deployment a breeze.
- Global CDN: Code Capsules provides a Global Content Delivery Network (CDN), ensuring low latency and a fast loading dApp.
- Continuous Deployment: With features like GitHub integration, continuous deployment is straightforward, allowing for quick updates to your dApp.
How to Deploy to Code Capsules
Here is a step-by-step guide to deploy your React Token dApp to Code Capsules:
- Sign Up/Login: Start by creating an account or logging into your existing Code Capsules account.
- Create a New Capsule: Go to the dashboard and create a new Frontend Capsule.
- Configuration: Configure your capsule settings such as the domain, build environment, and routes.
- Repository Connection: Link your GitHub repository where your React dApp code resides.
- Deployment: Once the repository is linked, trigger the deployment process.
- Verification: After the deployment is complete, verify that the dApp is running as expected by visiting the provided URL.
Note: Always ensure that your dApp is responsive and adheres to best practices, especially when deploying to a live environment like Code Capsules.
Deployment on Code Capsules: A Guide for Your React Token dApp
Deploying your React Token dApp on Code Capsules brings together ease of use, best practices, and optimal performance. Let’s walk through the steps of deployment and understand why Code Capsules is the right choice for your project.
Registration and Account Management on Code Capsules
Begin by creating an account on Code Capsules to manage and deploy your projects. After registration, log in to manage your CMS deployment and other project settings.

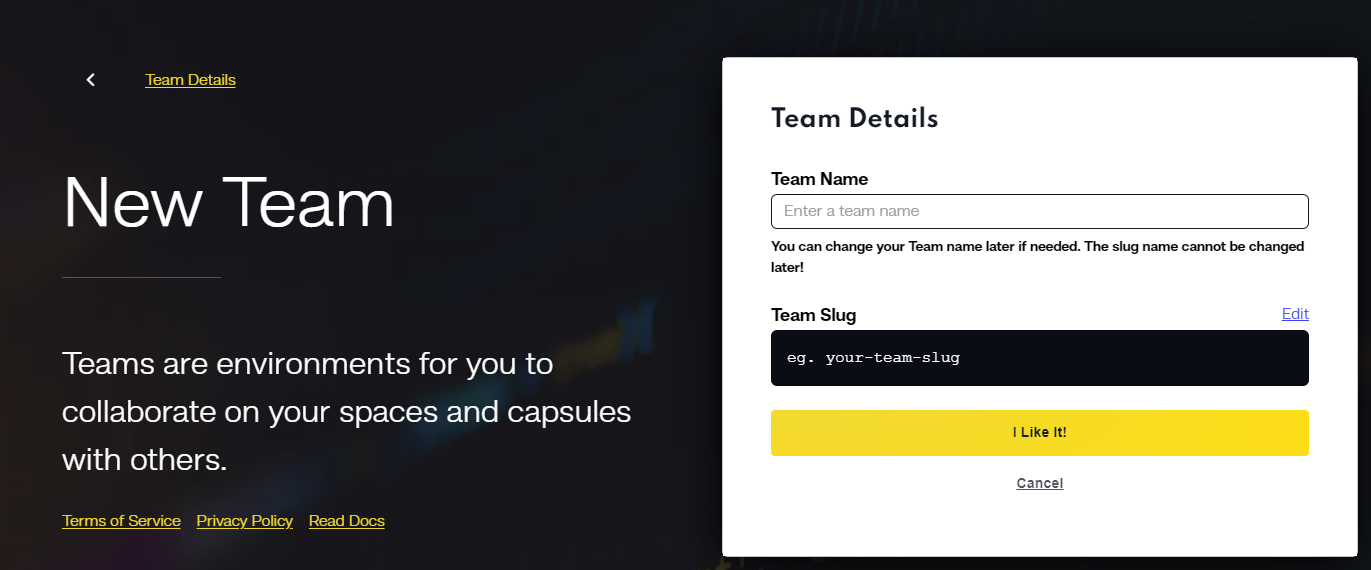
Team and Space Creation for Collaboration and Organization
Create a team for collaborative projects and set up a new space, offering flexibility in organizing and managing different applications.
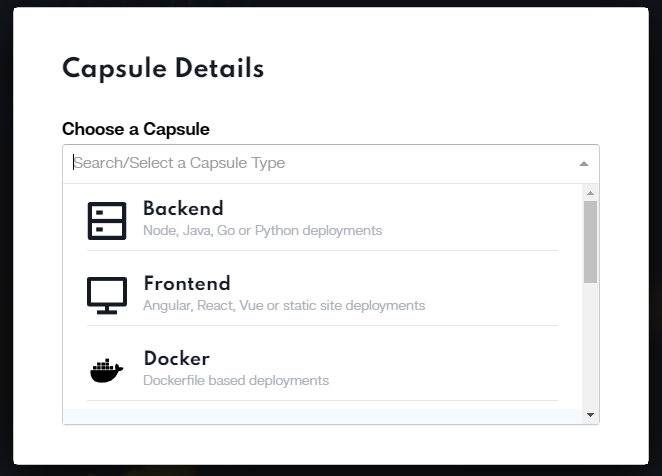
Starting a New Capsule for Your Project
Within your space, start a new capsule for your CMS. Choose its purpose according to your project’s architecture – front-end, back-end, or a Docker container.
Why Code Capsules is Ideal for Your React Token dApp
Code Capsules aligns with best practices, offering streamlined development and deployment, responsiveness, and core vitals optimization. Its global CDN ensures fast load times, critical for user experience. The platform supports scalability and security, making it an ideal choice for your dApp.
Streamlined Development and Deployment
Enjoy GitHub integration for continuous deployment, focusing more on coding and less on deployment mechanics.
Responsiveness and Core Vitals
A fast-loading dApp is key to maintaining strong Core Web Vitals, a critical aspect of user experience.
Best Practices and Security
HTTPS is built-in, and the platform scales easily, allowing your dApp to grow without constant re-engineering.
Conclusion
Choosing Code Capsules for your React Token dApp is more than a decision; it’s an investment in the quality and future success of your application.